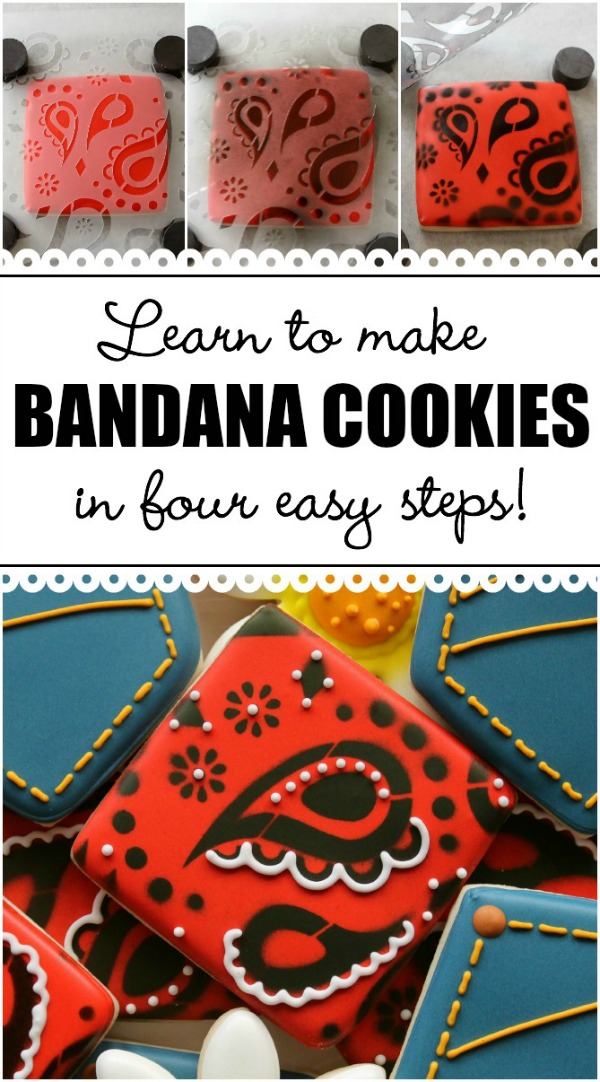
Easy Bandana Print Cookies
Until recently, bandana print cookies were quite a project. But now, thanks to the stencil revolution, you can make gorgeous bandana cookies in a fraction of the time.
 To make these cookies you will need:
- Paisley cookie stencil
- Red piping and flood icing
- Black airbrush color
- White piping icing
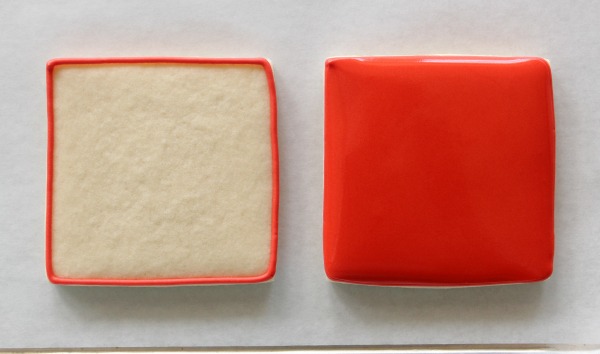
Begin by outlining and flooding the cookie as pictured below. Let dry.
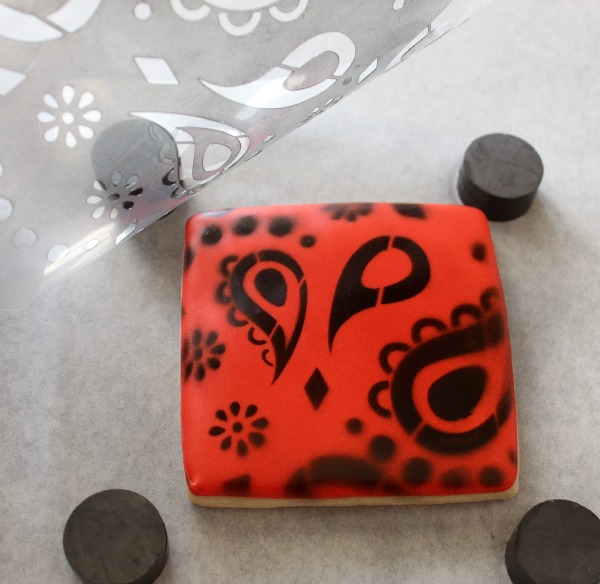
 When the base is completely dry, place the stencil securely over the cookie. You can use an iced cookie to hold things in place {like I did here} but these days I prefer magnets. To learn more about stenciling with magnets, click here.
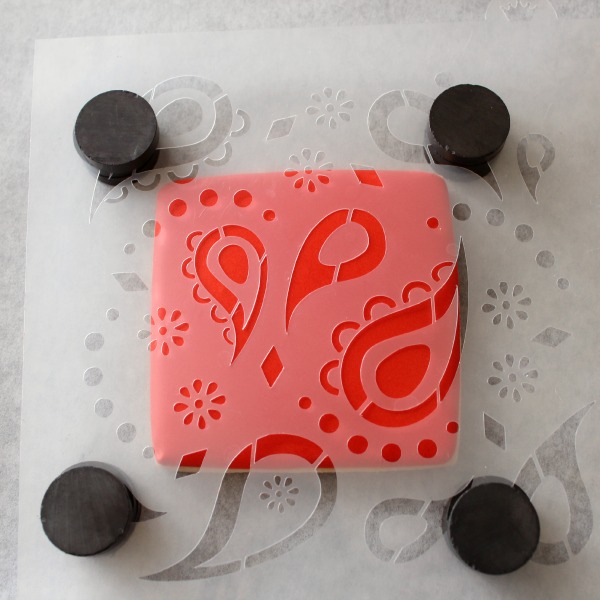 Once the stencil is secure, lightly mist the cookie with black airbrush color. If you don’t have an airbrush, Wilton Color Mist works too. Just be sure to spray the cookie in light even layers.
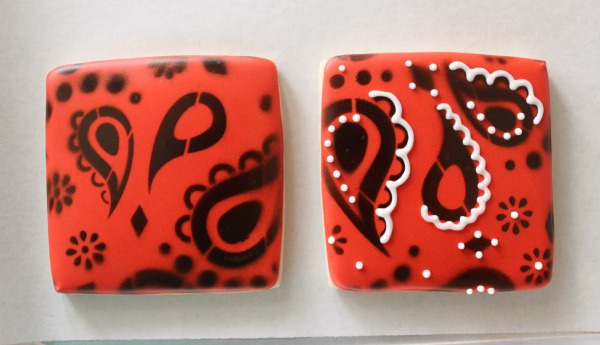
 Give the mist a few seconds to dry and gently lift the stencil up and away from the cookie. Try not to stress imperfections, the next step will clean everything up.
 Use white piping icing and a small round tip such as a PME #1.5 to add a few details.
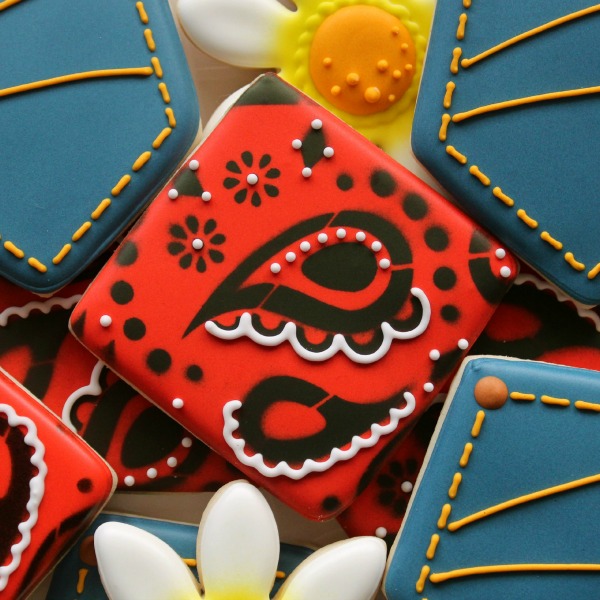
 That’s all there is to easy, breezy bandana print. Something about these cookies remind me of long summer days.
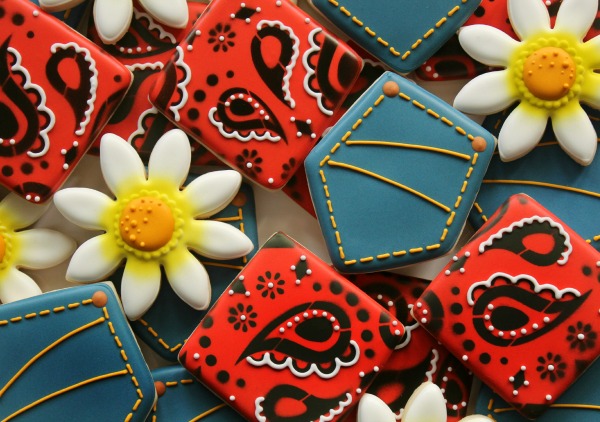 If you’re hesitant about trying cookie stencils, don’t be. With a little practice they’re easy to master and totally worth the investment. I’ll never pipe bandana the old way again!
For more helpful posts, be sure to check out the following links:


Stencil make the life a lot easier, don’t they?! These are beautiful, crisp and clean as always Callye. Have a great weekend.
Your cookies are awesome,I check the stencils they are so many and beautiful . I saw in tool section something I know what is the name is Notte Cookie what is that and the use.love your news letter. Thank you.
Your very first bandana cookies have always been a favorite and once tried to recreate – they did take hours. What a wonderful stencil to speed up time and with the added white, they look incredible too. And the stitching on the pockets? I don’t think I could sew a straighter line! 🙂
Pingback: Colorful Stenciled Autumn Leaf Cookies
Woww, they were very beautiful, very good that the stencil helps make faster.
Thank you for sharing it.I will come to see if you have new post.
nice picture, i will be like it
i don’t eat it
very delicious and beautiful desain
Excellently written article, if only all bloggers offered the same level of content as you, the internet would be a much better place. Please keep it up!
Nice informative post..Thanks for sharing ..I have added it to my favorites blog site list and will be checking back soon.
I am very happy to see this website, the article is very satisfying for readers, thank you for the enlightenment that you have outlined in this article you can share..
Nice post. I learn something more challenging on different blogs everyday. It will always be stimulating to read content from other writers and practice a little something from their store. I’d prefer to use some with the content on my blog whether you don’t mind. Naturally I’ll give you a link on your web blog. Thanks for sharing.
I never seen a very unique and interesting writing like this post, very well and good job.
Thumbs up for you
Nice post. I learn something more challenging on different blogs everyday. I never seen a very unique and interesting writing like this post. Thank you for sharing it.I will come to see if you have new post.
writers and practice a little something from their store. I am very happy to see different blogs everyday
Bravo! It’s really amazing. I can even imagine your website will be on the top of google.
I like to see how you describe every sentence and the way you think about it.
You’re rock!!
I admire creative ideas, made with love and care.
congratulations for your blog with many ideas, let us happier …
Thank you…
the very good tip, thanks.
fantastic article, congratulations curso afiliado arbitro and thank you
they were very beautiful, very good that the stencil helps make faster.
Our your site is simply too great, content, reconstrução capilar images tips are fantastic, real congratulations, very good !!
thanks for the opportunity, thanks and good luck to all !!
I wanted to leave here and express my gratitude for the space beneficios do pilates and always been helping me and teaching to live better, thank you.
Thank you for sharing,
Very good, thank you for the chance luiz mazine thanks and good luck to all!
My name is Jerry and I am very grateful for the article, poarabéns.
Congratulations, very good
wow, I admire creative ideas, made with love and care.
congratulations for your blog with many ideas, let us happier …
Thank you…
That’s so great.
Can i share in my blog?