Skin or Flesh Tone Icing
I have been thinking about these cookies for a while. They were inspired by those little necklaces that were so popular during my grade school years.
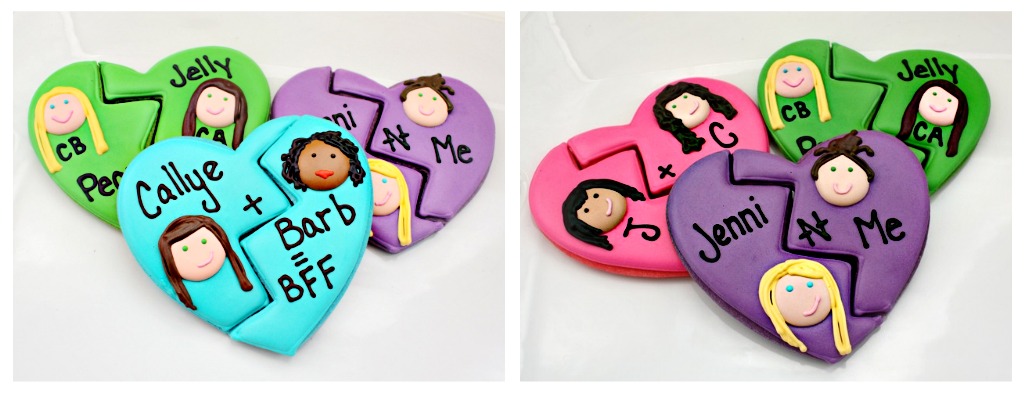
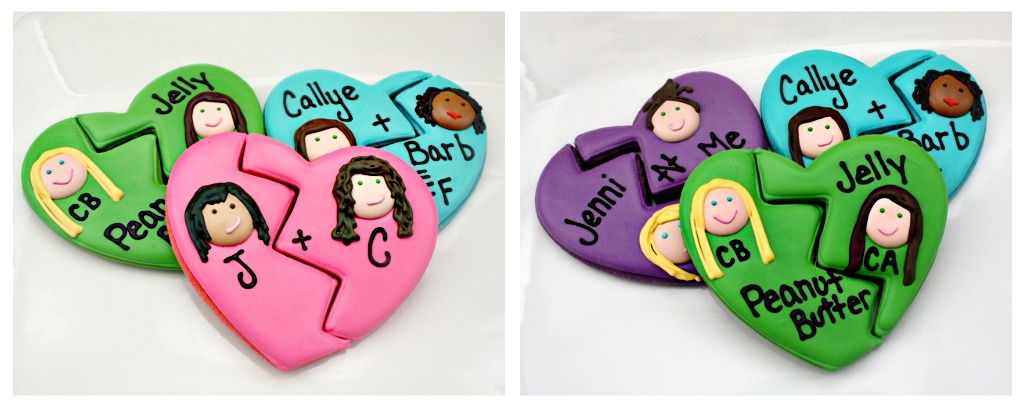
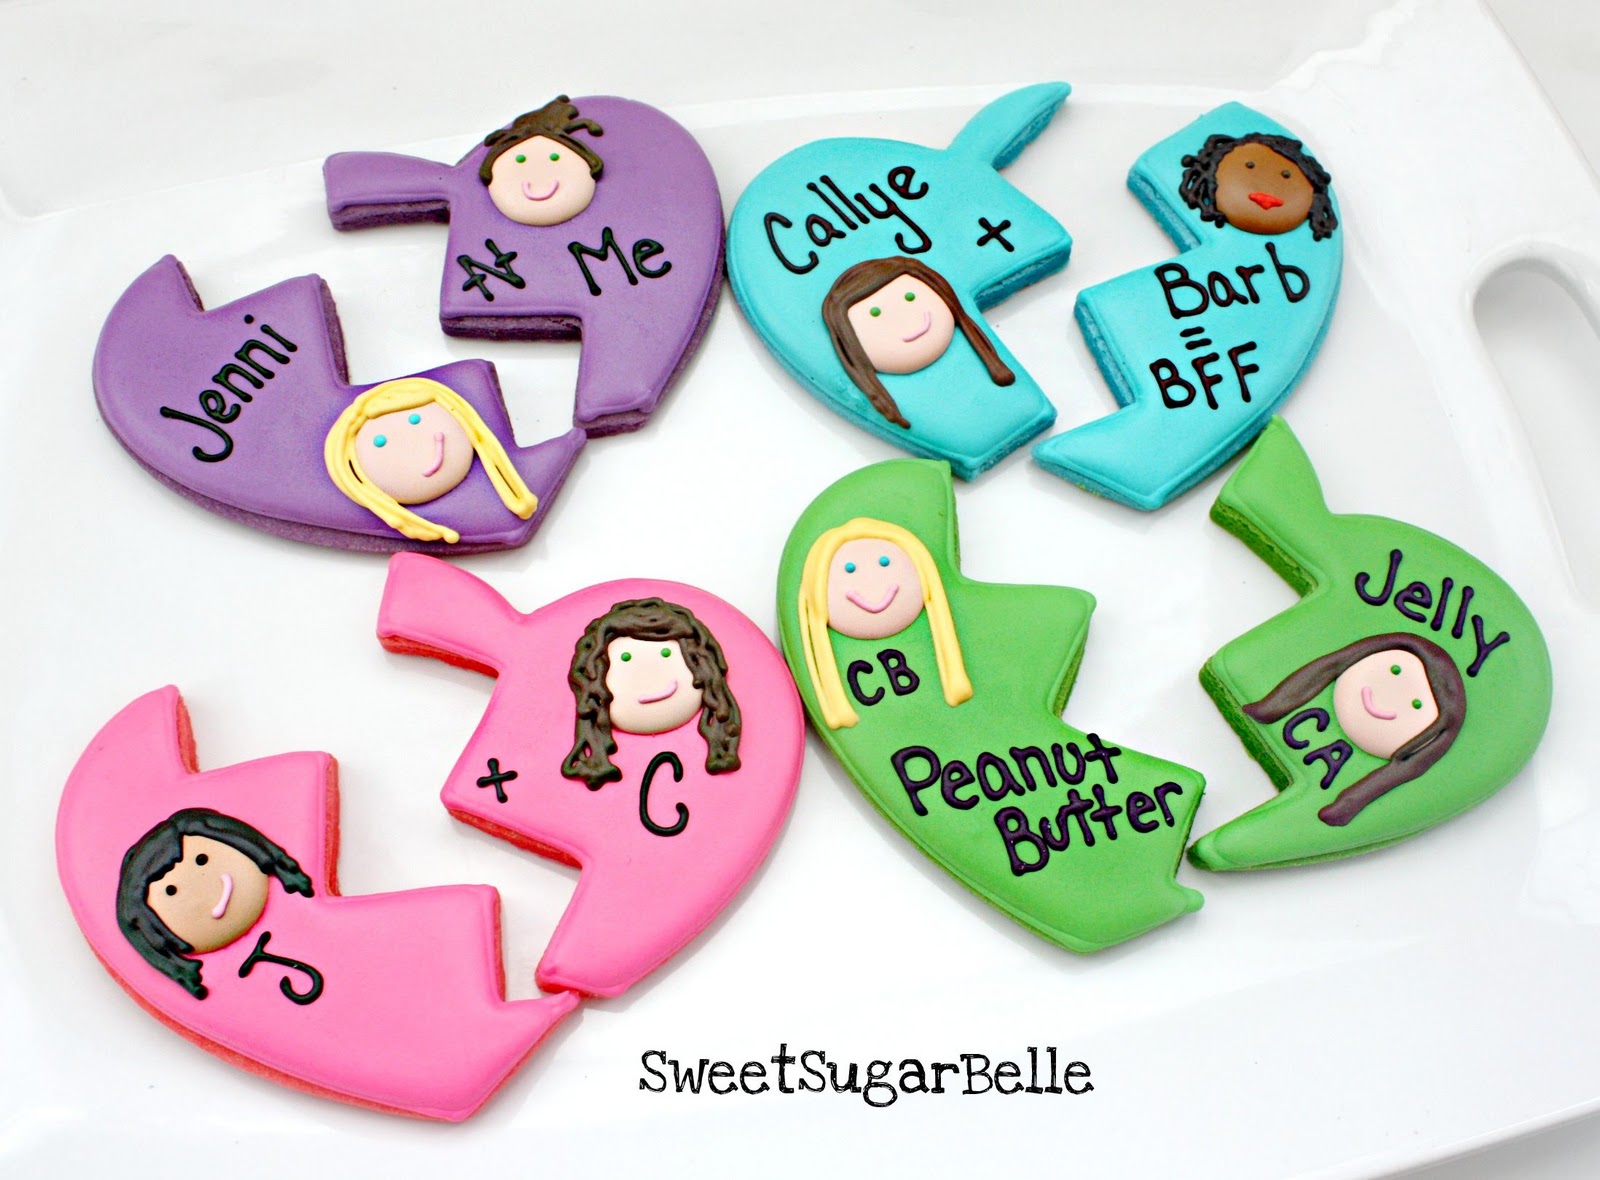
I made the cookie version for my best friends {who deserve way more than a cookie for putting u with me}, but I think they would be perfect for slumber parties, or even bride and groom wedding favors.

If you would like to see the full tutorial, I am guest posting today on I ? naptime. You should definitely check it out!
In the meantime, I am going to talk about creating skintone colors with RI.

I made these disks ahead of time for my BFF cookies. Since my friends are as different in appearance as they are in personality, I needed three different shades of icing…light, medium and dark.
???
???
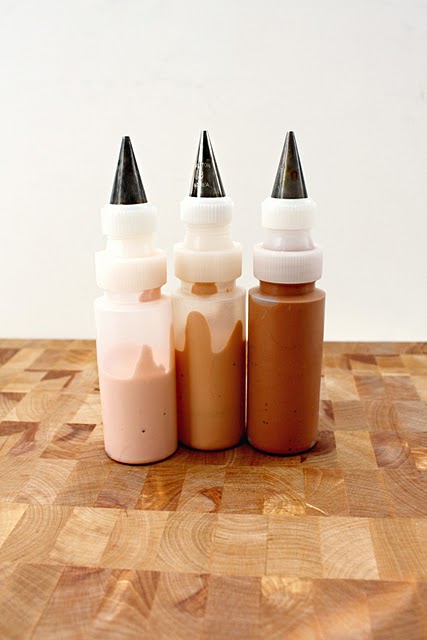
{The ratios below apply to approximately half a cup of white RI using Americolor soft gel pastes}
To make light skintone icing mix: two parts warm brown + one part ivory
To make medium skintone icing mix: 2-3 parts warm brown + 1 part chocolate brown +1 part ivory
To make dark skintone icing mix: 3 parts chocolate brown +2 parts warm brown +a touch of black {if this is going to sit for awhile, use more than half a cup of icing, or less color, because it will develop, or DARKEN and time goes by}
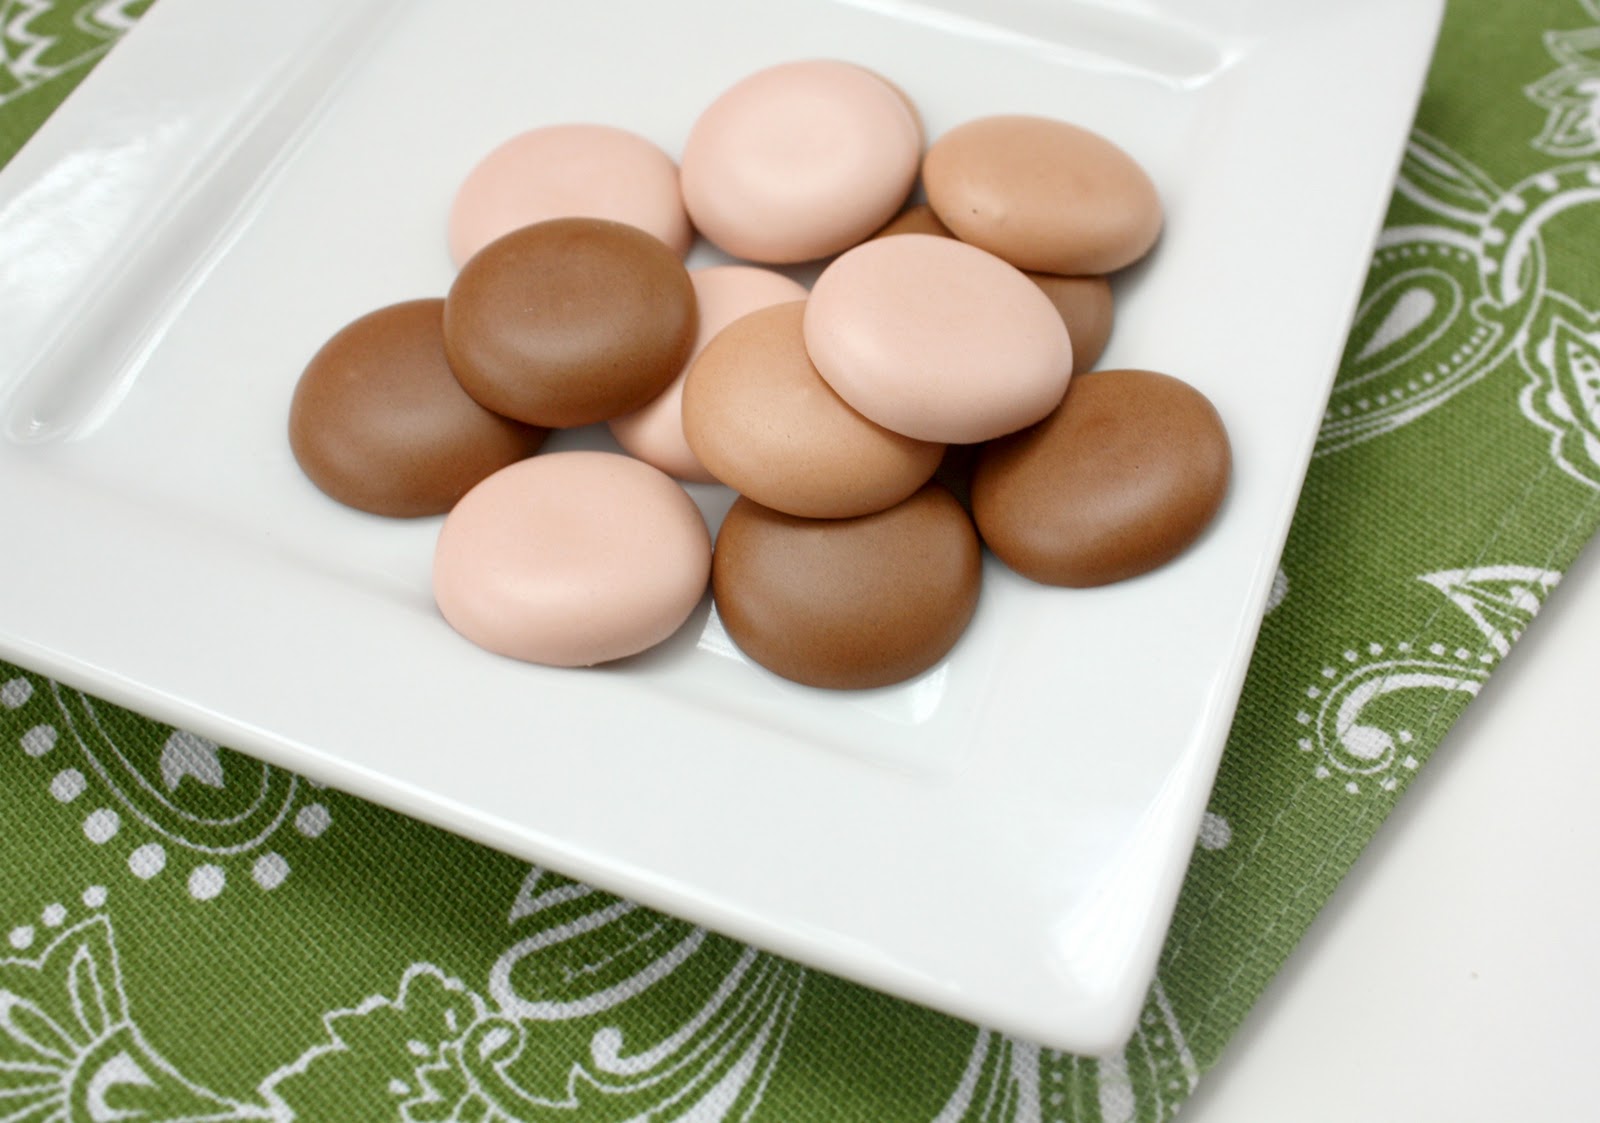
Here is an example of the colors:

Once I mixed the colors, I used them to make royal icing disks to use on my cookies. If you would like to learn more about this, click on the photo below:

Here’s my girls. Bob {Barb}, Jenni, Crys, and Jack-o. I have known all of them for over ten years, and they really mean the world to me. I am thankful every day that they are in my life.
For some reason, we all ended up miles apart…Jackie, the closest, is six hours away, but still it feels like they are all right next door.
There is a saying that goes something to the effect that a friend is someone who knows EVERYTHING about you and still loves you anyway…
So very true!
So, here’s to good friends and good cookies. I love you guys!


Pingback: Easy Pirate Face Cookies
Pingback: Amazing Ivory
Pingback: Guest Post--Sweet Sugarbelle!!
Pingback: Make Cute Indian Cookies from a Bunny Cutter
Pingback: "Stuck" Santa Cookies!
Pingback: The Easiest Queen/Princess Cookies Ever
Pingback: Make Cupid Cookies for Valentines Day
hello I love your Icing but I have a problem when I made faces after dry they make wholes in the center can you please help to find the wrong? please.
Pingback: Spock LLAP Cookies - Bakingdom
Thank you so much for doing this post! I was asked to make bandaid cookies and I’ve alway had such a hard time getting good brown shades. I used your instructions on making light and medium skin tones and they made perfect bandaid colors! You’re awesome!
Pingback: 101 Essential Cookie Decorating Resources
Well, I pined your pirates cookies because my boys decide to have a pirate birthday party.
I never baked or decorated cookies before, so I’m trying a month earlier. I’m simply enchanted with your talent and your sweetnes! Alll the beautiful thongs you do and explaining step by step on an adorable way, WOW! thank you and aloha!
Pingback: Easy Batman Cookies
Pingback: Get Well Soon Cookies
Pingback: Interpreting Icing Color
Pingback: Manly Chippendale Cookies
Pingback: Chubby Pencil Cookies
Pingback: China Doll Cookies
Pingback: 3D Boob Cookies: Because Boobs are Magic! | Make Me Cake Me
Pingback: Princess Face Cookies
Pingback: Princess Cookies
Pingback: Decorated Santa Claus Cookie
Pingback: Christmas Elf Girl Cookies from a Snowman Cutter | Make Me Cake Me
Pingback: Mrs. Claus Cookies
Pingback: Nosey Santa Cookies from a Candy Corn Cutter | Make Me Cake Me
Pingback: The More Elf Girl Cookies the Merrier! | Make Me Cake Me
Pingback: Santa Sugar Cookies: Decorating Start to Finish! | recipes2luv
Pingback: Polar Pals Cookies
Pingback: Baby Face Cookies for a Gender Reveal Party | Make Me Cake Me
Pingback: St. Patrick's Day Leprechaun Girl Cookies | Make Me Cake Me
Pingback: Little Princess Cookies | Make Me Cake Me
Pingback: Nerdy Graduate Cookies
Pingback: Decorated Ballerina Cookies
Pingback: Decorated Hula Girl Cookies
Pingback: Decorated Football Player Cookies