Press and Seal Icing Pods
This tip isn’t novel or new, but in case ya missed it I thought I’d talk about the plastic wrap trick one more time.
What is the plastic wrap trick, you ask? Basically it’s putting royal icing into neat little plastic wrap pods before bagging. This allows you to quickly and easily refill bags while working, cuts down on cleanup time, and extends the life of disposable pastry bags. You can watch a video demonstration here or click here for a step-by-step post on coloring and preparing royal icing.
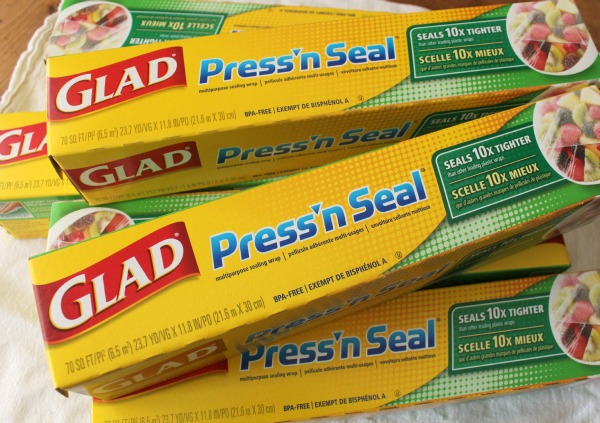
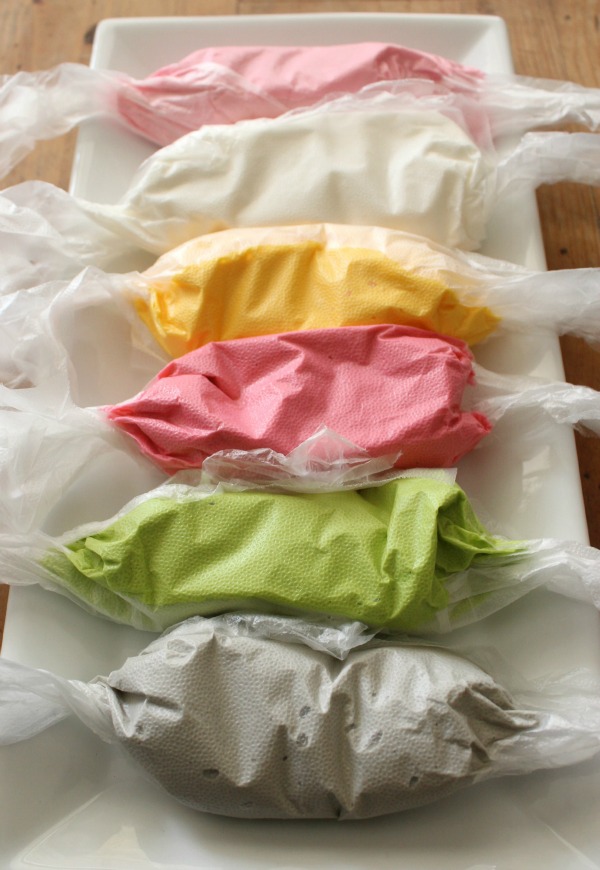 This idea is pretty much genius on it’s own, but add Press and Seal Wrap, and it can’t be beat.
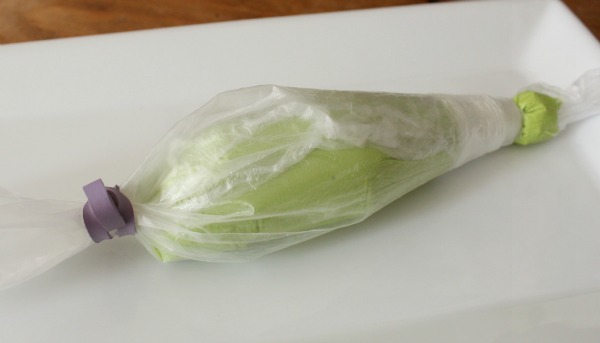
 Begin by measuring out a small piece of plastic wrap {size depends on how much icing you plan to bag}, place a dollop of icing in the center, fold the two opposite corners together diagonally, seal the edges, then use both hands to spin pod away from your body, twisting the ends into a tight seal. Again, you can see a video version here and the photo version here.
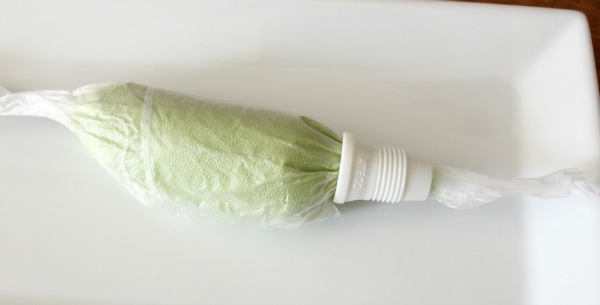
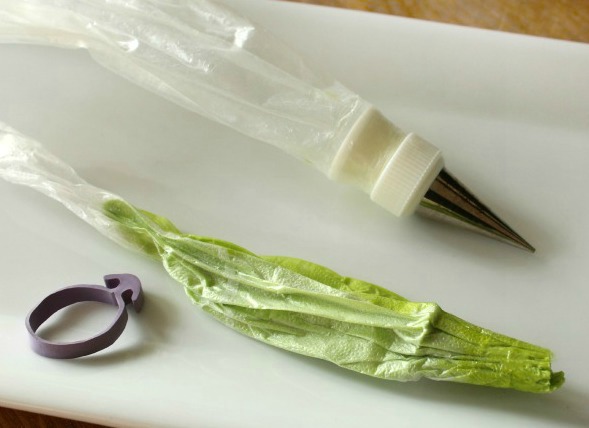
Once the pods are complete, pull the prepared pod through a coupler.
 Drop them into a prepared disposable icing bag {instructions can usually be found on the box} and pull through the snipped end.
 Secure the top of the bag with ties like these from Wilton.
 Snip any excess plastic below the coupler.
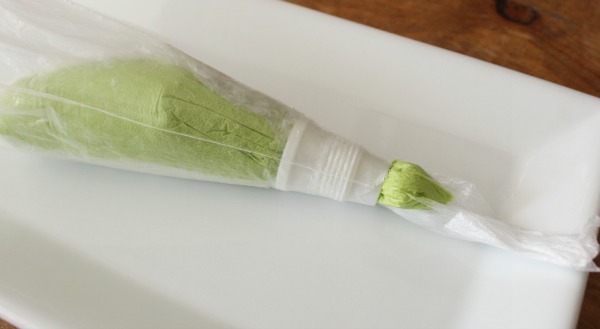
 Then, finish up by adding a tip.
 Easy breezy, right? To clean or change pods simply remove the tip and tie, pull out the empty pod, and reload. Otherwise rinse and reuse the bag.
 This is a great way to save money and a mess. For more excellent icing tips check out these posts:
I hope this little tip simplifies the process a little. Have a great week!


This is an awesome tip! It would save me so much time! I feel like I’ve wasted so much time trying to get my couplers out and clean! Thank you!
Genius! Thank you, although I could have really used this helpful tip yesterday ;0) I am excited to try next week when we make more cookies for the holidays.
I hope to learn to decorate cookies
Hi! Thanks for all of your tutorials, you are a really talented cookie decorator. I have a question, does the icing pods work with 20 second icing? Or it has to be stiff royal icing? Thank you so much, an please apologize if my english is not good, I’m from Chille. Have a Merry Christmas!!!
This may be a silly question, but is there a right and wrong side to put the icing on? Though I don’t have any press n seal in the house, I feel like there is a sticky and non-sticky side for press n seal? (I could be way off here!) Thanks!!
Wish I had asked before I put the icing on the NOT STICKY side! I thought something was wrong when no icing would come out. I hadn’t pulled the pod through enough and it sealed itself shut. I had to pull out more of the pod with tweezers & recut the piping end. Then, w hen I tried to change out the empty pod, it was stuck like glue to the insides of the bag! If there is a hard way to learn, I’ll find it every time!
“It is impossible to make anything foolproof because fools are so ingenious”
YEP, it’s a curse to be so ingenious!
I came across Karen’s web site last Friday and used this method to bag the icing over the weekend. Worked like a charm.
So you think press n seal works better than saran wrap? I have both, what makes this better than saran wrap? I guess it keeps it from running out easier than saran, with thinner icing. Interesting. Will have to have a press n seal/saran wrap battle. lol
Brilliant! This is one of those tips that make me feel dumb, for never figuring out. Oh well…at least I won’t have to clean piping bags…worst job ever!
you just rocked my world. NO I never heard of this. Yay. I can’t wait to make your reindeer now.
Hi! Im affraid this one is no egsisting in Ireland:( Can I use the cling foil for wraping sandwiches??? Up to this time I used decorating gingerbrad only with white, will try now go for colours and sugar cookis:) they fascinating me whole time:)
As I read your method of spinning the pod to create twisted ends, I winced in memory of all of those dish towel snaps I received from my brother growing up! Thanks for the tip! Now if only I had a little cleaning elf to wash my tips, cookie cutters, and cookie sheets.
I just wanted to let you know that I tried this for the first time yesterday and all I can say is OMG!!! I love it!!! I ended up using super large old fashion baggies with both end blown out and it made working with royal icing a breeze and so cost effective!!! I’m so glad I found your site!!
Works great with Saran or cling wrap as well.
Pingback: How to Make Deep Pink, Magenta, and Fuchsia Icing
Pingback: Fifteen Icing Recipes for Cookie Decorating
This is the Best. Tip. EVER! I don’t know whether I’m so happy I could cry or just angry that I couldn’t think of that on my own. I tried it this week with my valentine cookies and Wow! what a time and aggravation saver. Super site. Thanks!
I love your blog!! I’m a long-time cake decorator, first time doing royal icing & decorating cookies…. And on top of that, I stupidly decided to try it as a group cookie decorating party with girlfriends for V-Day instead of trying it out on my own first, so this could’ve been a huge disaster. But, your tips were great and I loved the results!! And my girlfriends had a blast too. The pastry bag trick is so great — I’m going to try that with buttercream for cake decorating next time. It took a couple extra minutes but was so much less messy than just using the pastry bag, and nothing leaked out the top even though my friends didn’t have experience holding pastry bags the proper way. Clean-up was really easy too. Thank you so much for sharing your experience & ideas with us!
I tried this for the first time today and I must not have sealed it up right because frosting flew everywhere! On the faucet, in my hair, all over my shirt. It was pretty hilarious. Now I’ve learned my lesson, haha.
Pingback: Ruffled Heart Cookies Decorating Tutorial - Moms & Munchkins
Brilliant!!!!
Pingback: Sugar Cookie with Royal Icing Recipes -