Boy and Girl Elf Cookies with Color Me Cookie {Guest Post}
Are you ready for more cookies? I sure hope so, because today you’re in for even more Christmas cookie fun!
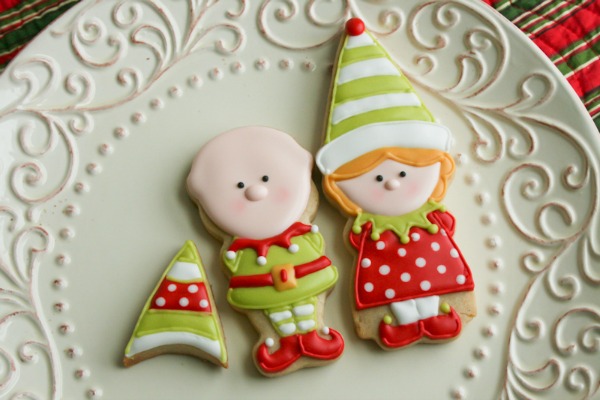
Today my sweet friend, Adrianne, of Color Me Cookie is demonstrating how she made adorable elf cookies from gnome cutters. Enjoy!
![]() Hello! My name is Adrianne, and I created Color Me Cookie about two years ago as a hobby, and it has grown into my very own licensed business.
Hello! My name is Adrianne, and I created Color Me Cookie about two years ago as a hobby, and it has grown into my very own licensed business.
Callye has always been one of my idols because of her eagerness to share what she knows about cookie decorating. She wants others to share in her joy of baking and decorating. I have learned SO much from her. I am very honored and excited to be a part of it today.
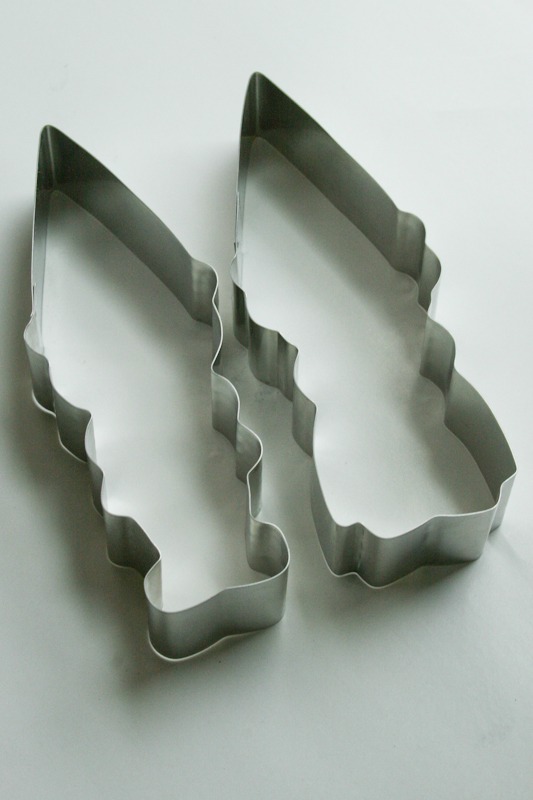
The theme of sharing sometimes goes unnoticed in the cookie world, but when you have the ability to share your creations with other cookiers and credit one another for being a part of it, your cookie world expands tremendously. This tutorial is about using gnome cutters, which I purchased from Klickitat Street’s Etsy page, and turning them into Christmas elves.
 I have always admired Sarah, from Klickitat Street, and her ability to decorate cookies. She has an amazing talent. I purchased her boy and girl gnome cutters and couldn’t wait to try them out.
After experimenting with them in their natural outfits, I decided to try others.
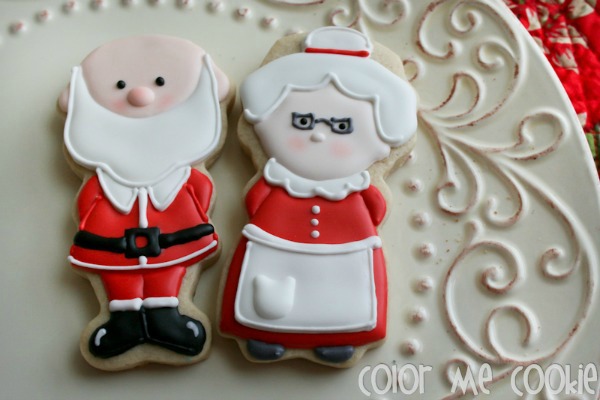
You may have seen my boy and girl pilgrims at Thanksgiving on my Facebook page. For this tutorial, I’ve created boy and girl elves to go with Santa and Mrs. Claus (you’ll see them at the end.) DON’T PEEK!
 Here’s what you’ll need:
• Outlining and flood icing (Americolor red red, electric green + bit of ivory, white, black,fleshtone, and gold)
• Klickitat Street’s gnome cutters + a small round cutter
• CK pink petal dust and a small, flat sponge brush
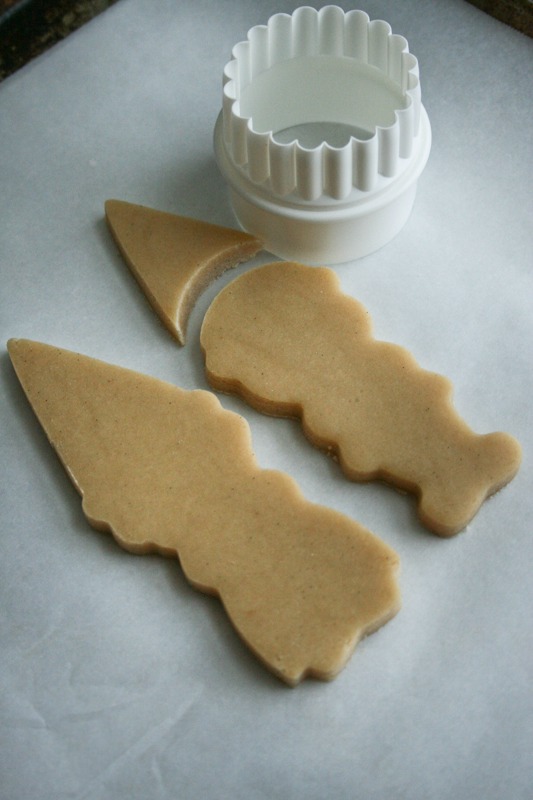 I usually outline most of my cookies, and then flood them, but with the size of each piece of the elves, I chose to outline and then immediately flood each piece. Move from their heads and hats, to their coats and dress.
 I added polka dots to the girl elf’s dress using the wet-on-wet technique. Add their arms, legs and feet.
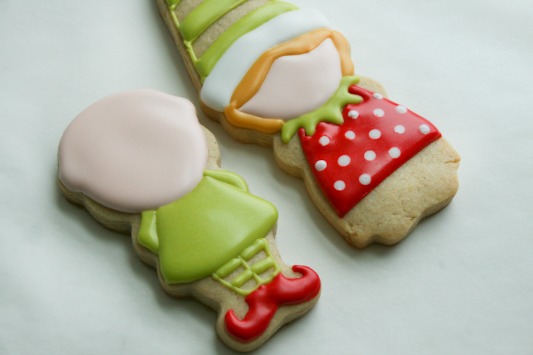 Add their cute noses, eyes, and any outlining details that you’d like. I don’t feel like my cookiesare ‘finished’ until the outlining details added.
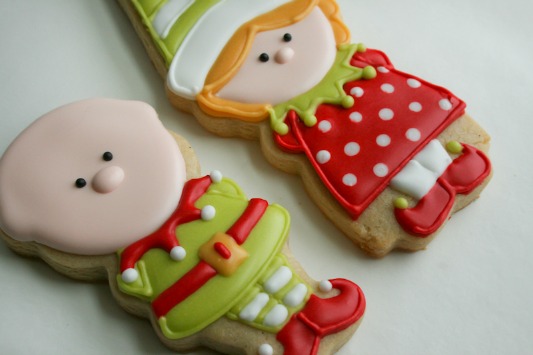 Once dried, I take a small, flat sponge brush and rub small circles of pink petal dust to their cheeks. Anything that has a face in my cookie world also has rosy pink cheeks.
 You may have noticed that my elves don’t have pointy ears. They told me they’re actually humans that were raised by elves (an Elf movie reference). Not really…I was so excited to make these, that I truly FORGOT that elves had pointy ears.
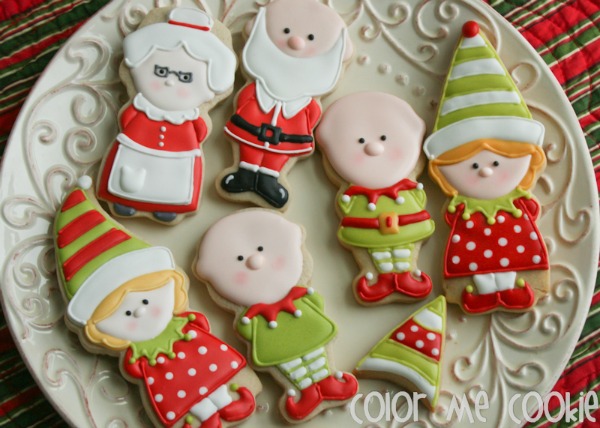 There are endless possibilities for these gnome cutters and from someone who own way too many cutters, these two cutters will hold a special place in my kitchen. Hope you all have as much fun with your gnome cutters as I do!
![]() Be sure to follow Adrianne’s Facebook page, Color Me Cookie or her blog. For more inspiring ideas, be sure to check out these links:
Be sure to follow Adrianne’s Facebook page, Color Me Cookie or her blog. For more inspiring ideas, be sure to check out these links:


Adorable! In my cookie world, as well, every face has rosy cheeks! 🙂 I’m so glad Callye featured your work. I can’t wait to see what you’ll make next!
I bought these cutters from her shop along with the mushroom from a link you or someone shared. I think it’s great you guys give each other props. It gives me hope that one day I can have the cookie know how. I’m already seeing an improvement and tried my had at the pilgrims you did using Bridget Edwards (bakeat350) vanilla sugar cookie recipe. They turned out great and these are super adorable. I love your work!
Adrienne
Love your work and the tutorial is awesome!
Thank you for sharing your beautiful work!
Love this tutorial, Adrienne! Yet another reason showing how versatile are those cutters!
Pingback: Decorated Elf Cookies
Pingback: Decorated Pilgrim Cookies with Color Me Cookie {Guest Post}