How to Make Tan Royal Icing
Most icing colors are pretty easy to figure out, while others are a little more complicated.
Tan icing might seem simple, but if you’ve ever added warm brown to uncolored icing with the expectation of a pretty yellowish-brown, you know this isn’t the case. The pinky, almost flesh-colored result isn’t even close.
Unfortunately, icing color is not an exact science. Most of the time, my colors aren’t mixed from a pre-existing formula. I start with tried and true combinations, then play with them until they’re right.
Rather than come up with the perfect tan, I thought I’d walk you through a day in life of an icing color. Hopefully, with a few practical tips you’ll have the confidence to play with color and come up with palettes that are uniquely you.
 My version of tan icing is basically a mixture of yellow and purple. Yes, I said purple. Hard to believe at first, but bear with me and I’ll show you what I mean.
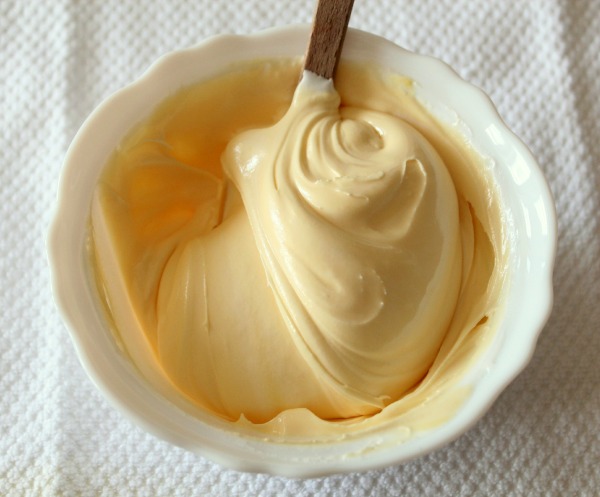
I start with yellow. Except instead of straight yellow, I mixed a few colors to create a golden yellow shade, based on the palette I had in mind.
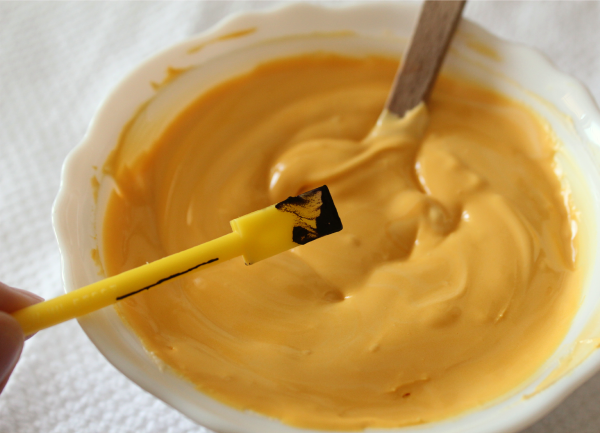
 The result was a very light shade of butter yellow, which was way too light, but good…because it’s a lot easier to add more color than take it away if you go overboard on the first squeeze.
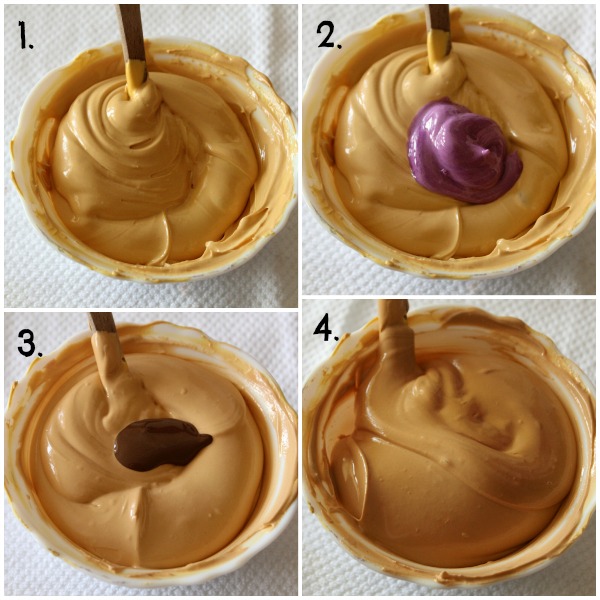
 I liked the way things were going so I added more of the same colors, in equal amounts. Then I did it again…and again.
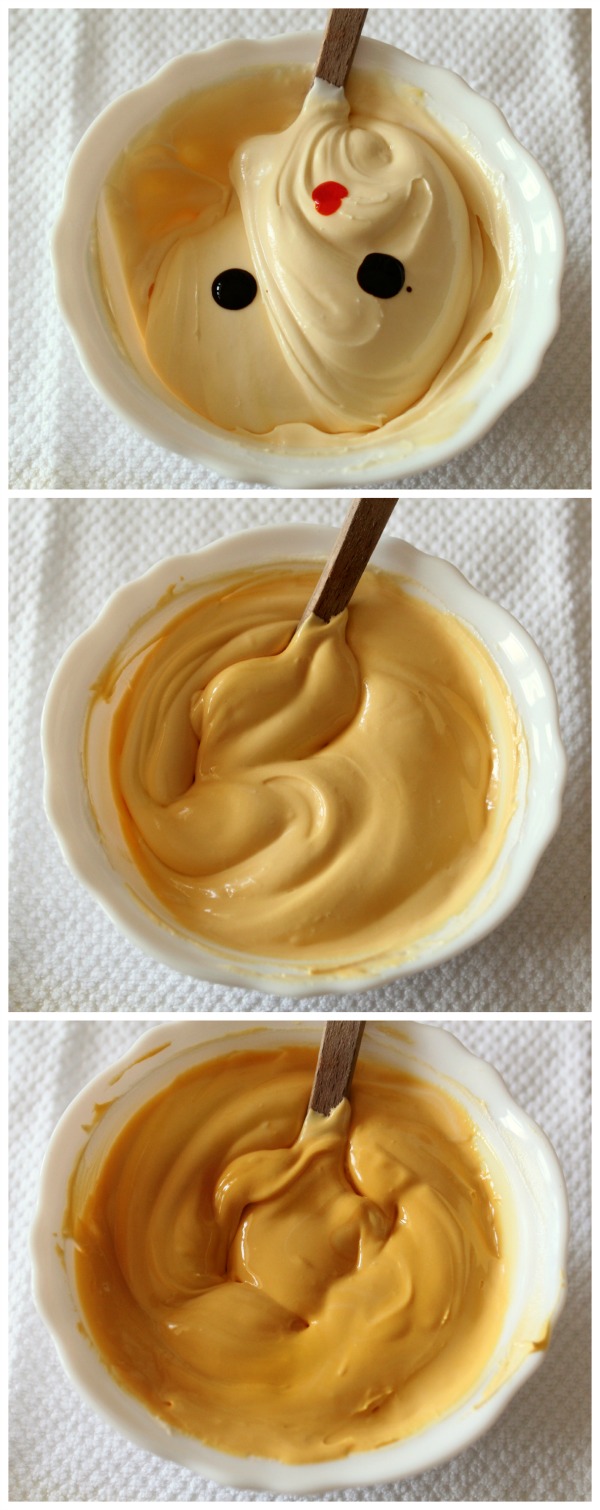 When I reached a point where I felt the base was dark enough to move on, I broke out the regal purple, which in my opinion is the key to tan.
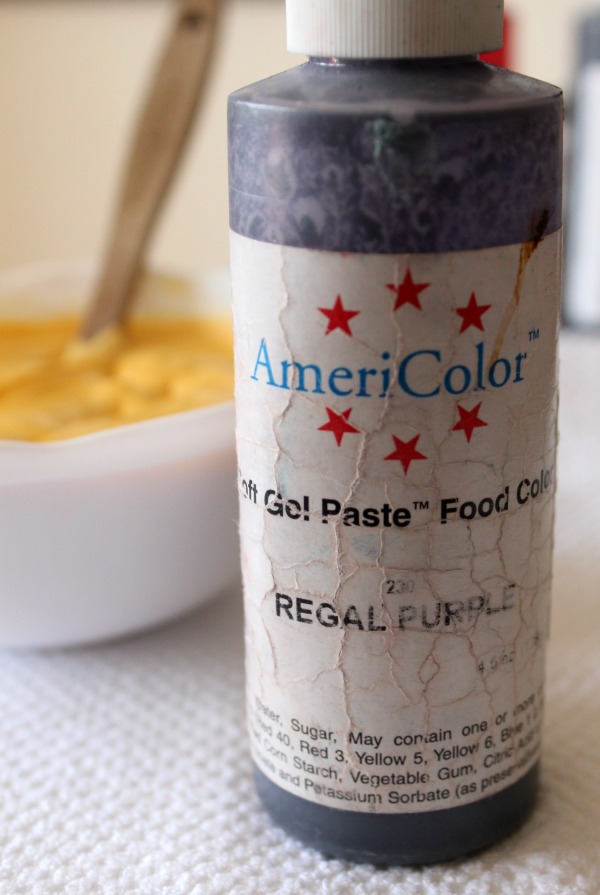 Be careful with the purple. Use a toothpick or a boo-boo stick to add it little by little, stirring in between each addition.
 With each bit of regal purple I got a little closer to the color I had in mind. Then, I got impatient. I knew a huge drop of color would likely ruin my icing, so instead I added a blob of purple icing that was leftover from Halloween.
At this point, I was close but it was still missing something. I added a bit of dark brown for depth, and finally, I had it.
 The perfect tan! For this project at least…
 To successfully color icing time after time, keep these tips in mind:
- Start with tried and true color combinations {yellow+blue=green} and tweak them for completely custom shades
- You ever heard that saying, “There’s more than one way to skin a rabbit?” Well there is. There are SEVERAL ways to make tan icing {red+yellow+green, blue+orange, ect.} but in the interest of keeping this reasonably short, I didn’t cram them all into one post. If you prefer another combination, then definitely, DO YO THANG
- Add color SLOWLY even if it takes forever. It’s very hard to lighten a shade once you’ve gone overboard
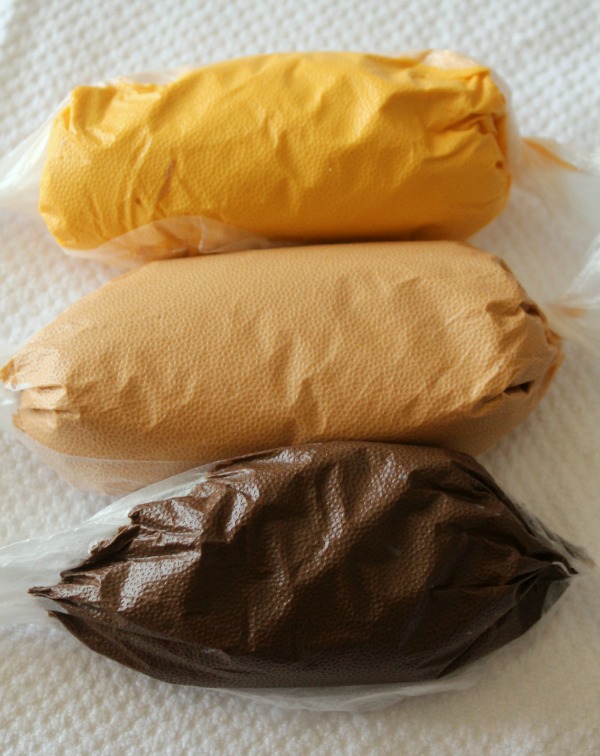
- Use leftover icing rather than gel color when mixing for a more subtle change. This also means less waste
- Tone down any color with black, ivory, or a contrasting color
- Add a touch of each shade of icing to every color for a perfectly coordinated palette
Icing color gets easier with practice. For more helpful tips, check out these links:


You could try my combination.instead of blue-green-yellow i use red instead of blue..it gives a peachy tan color..
That’s my grandma’s combination for apple jelly. You’re right, this also makes a pretty brownish-tan color.
Thank you for always being so willing to share your experience, Callye. Love you!
Tan is my nemesis. I love you now. (And I mean that in a totally not-creepy-stalker way.)
I love your color tutorials. You are so smart! I want to get you a shirt with a big ole “S” for Sugar Belle because you are my hero!!
It seems that every time I wonder about something, you post about it within a matter of days. Just yesterday I was trying to figure out tan/ivory/brown icing and *poof* today here it is! You are like my Cookie Fairy Godmother or something! 🙂
Thanks for the post!
Ahhhhhhh I could have totally used this tip last week, as my lovely “tan” color was in fact a fleshy color instead!!! I would have never in a million years thought to use purple!! Thank you!!
THANK YOU!
I NEVER would have guessed (regal) purple!
You always create such prefect shades and I come over to see how and BAM curve ball! I didn’t see that coming! I should have, I didn’t. Your colors are perfect! I have learned more from reading your blog than I could possibly ever learn by relying on my own trial and error!
Thank you so much for sharing all these helpful tips!
BOOOOOOOOOOK!!
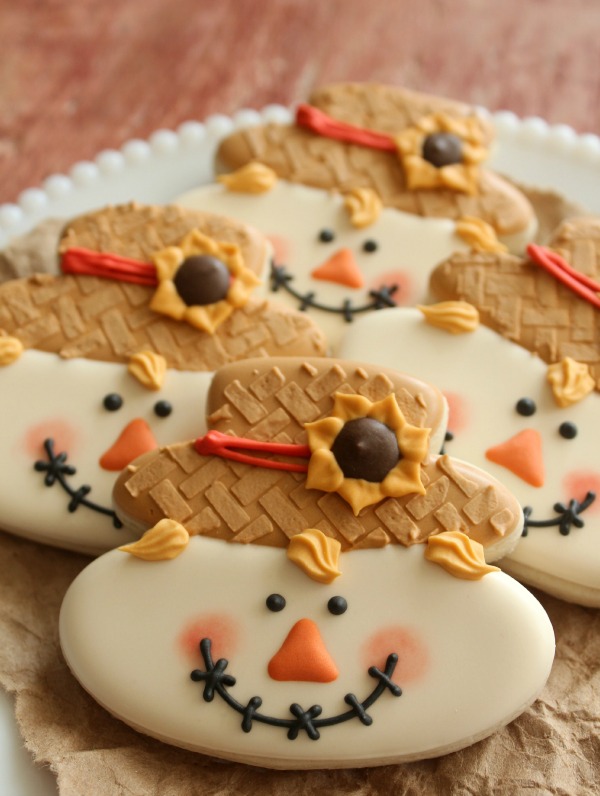
I love the shade of tan you came up with and I adore your scarecrow cookies (and hats especially). I have referred to your printable colour chart more times that I can count and am forever grateful for your advice and guidance.
You’re a color master! I also have color envy of your palettes. Slowly but surely I’m learning to just eyeball it and add different color until I achieve the shade I’m going for. Great post Callye!
Wow! Purple, who knew?!? This is such a helpful post, thank you!!
Such the cute design and seriously, you are the Color Master! Tan can be a bear, so thank you!!! Absolutely loving this scarecrow! So clever!
I would never in a zillion years thought to add purple!! That’s why YOU’RE Sugarbelle, and I’m not!!! Thanks for all of the help, Callye <3
I’ve noticed that you use the press and seal for the icing colors. Is this for storage in the fridge, or do you put it right into the piping bags? Is there a benefit to the press and seal over clear cling wrap?
I am so excited to try cookie decorating. Made some royal icing last night and could not get it into the narrow opening of the bottles. How do you do it?
Sometimes I wonder if you realize just how helpful you are to the rest of us!! You are simply amazing.
I can never, ever seem to get the tan I want and in a million years purple would not have been a color I even thought of. Your scarecrows are simply darling and I just love that color. I can’t wait to try this. All of your color posts have taught me something. You’re truly one of the best of the best!! Thank you for always sharing and teaching the rest of us.
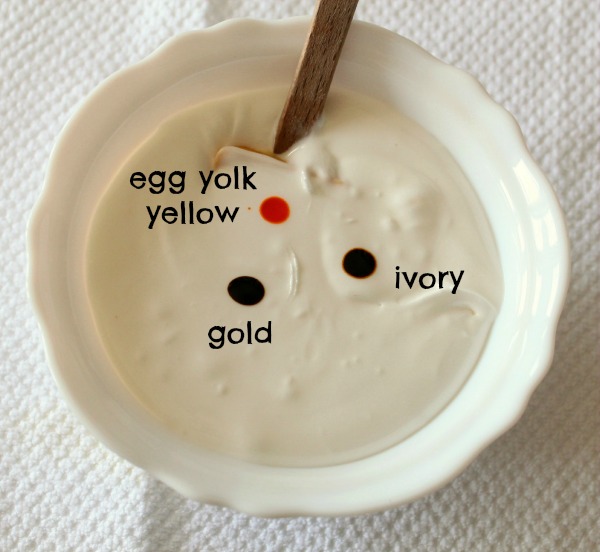
I have one question, and it’s probably a dumb one. What is egg yolk yellow? I have egg yellow. Is that it? I’ve searched for egg yolk yellow but don’t see anything.
I am so sorry! That is a name I made up in my head. Egg yellow it is, LOL! I will change that ASAP!
LOL….I am cracking up! OK, as long as I know it’s egg yellow. I kind of figured that!
Pingback: A good day for sledding | Royal Icing Diaries
Pingback: Decorated Latte Cookies
Pingback: Decorated Moose Cookies
This is the information I needed to color icing for my cupcakes Thanks! I love that the labels on your color bottles look like mine! Sometimes the color name rubs off and I have to write it with a pen so I know next time. I wonder why AmeriColor doesn’t use better printer ink for the labels.
Thanks again.
Pingback: How to Make Tiffany Blue Icing
Pingback: How to Make Navy Blue Icing
Pingback: Shopping bag cookies: It’s all about cooking & baking | Royal Icing Diaries
Pingback: How to Make Burnt Orange Royal Icing
WHERE in the world would I be without you woman?!!!??
I CAN TELL YOU!!!!
at my stinking kitchen table still making pink monkeys and pink giraffes!!
for baby BOY shower!!!! THATS where!!!!!
thank you for all the time you took to make these tute’s.
and thank you for sharing the secrets of purple.
Pingback: How to Make Adorable Peanut Butter and Jelly Cookies with a Dog Bone Cutter
Pingback: Happy Pumpkin Pie Slice Cookie Made From a Candy Corn Cookie Cutter | The Sweet Adventures of Sugar Belle
Pingback: How to Make Bitten Gingerbread Men Cookies with Wilton and Michaels Products | The Sweet Adventures of Sugar Belle
I’m a newbie and was wondering where how you store leftover icing…freezer? Counter? How long? Thanks in advance.