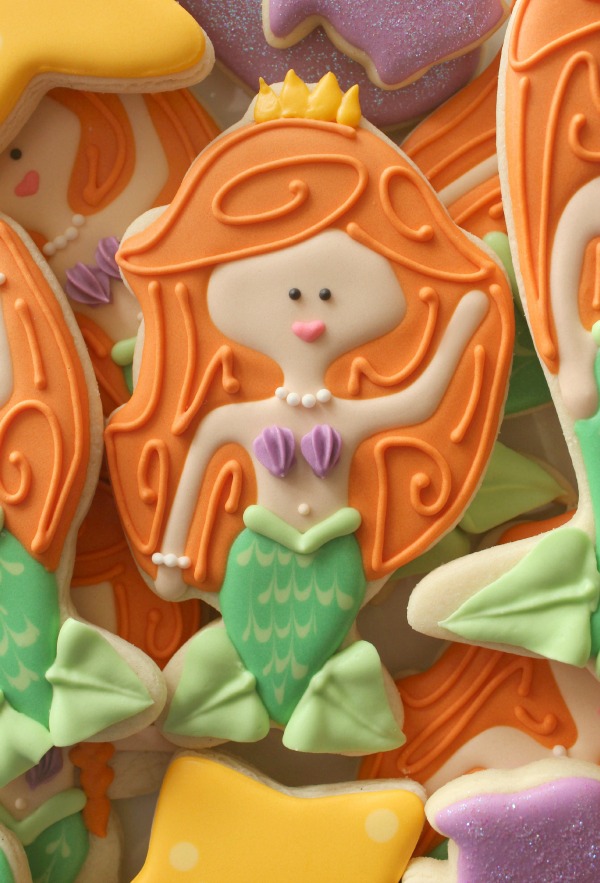
Decorated Mermaid Cookies
Instead of “Simple Mermaid Cookies”, I’m calling these “Relatively Simple Mermaid Cookies”.
Truth is, there’s nothing simple about mermaid cookies. In fact, this is probably more of an intermediate cookie, but if you’re going to decorate mermaids…this is about as simple as it gets.
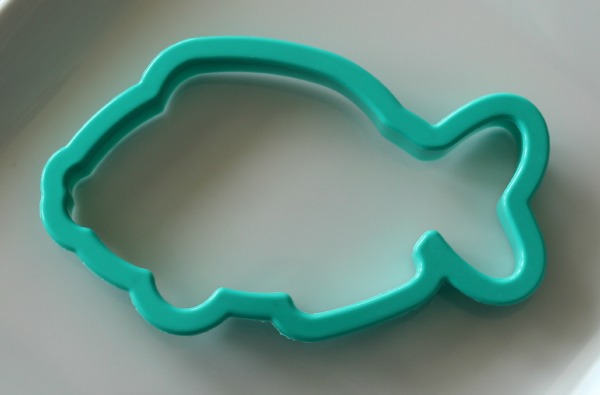
 Since I’m not really into hand-cutting, I used a cutter from my collection. This fish is from the Betty Crocker 101 Piece Set. If you don’t have this particular fish cutter, this one is very similar.
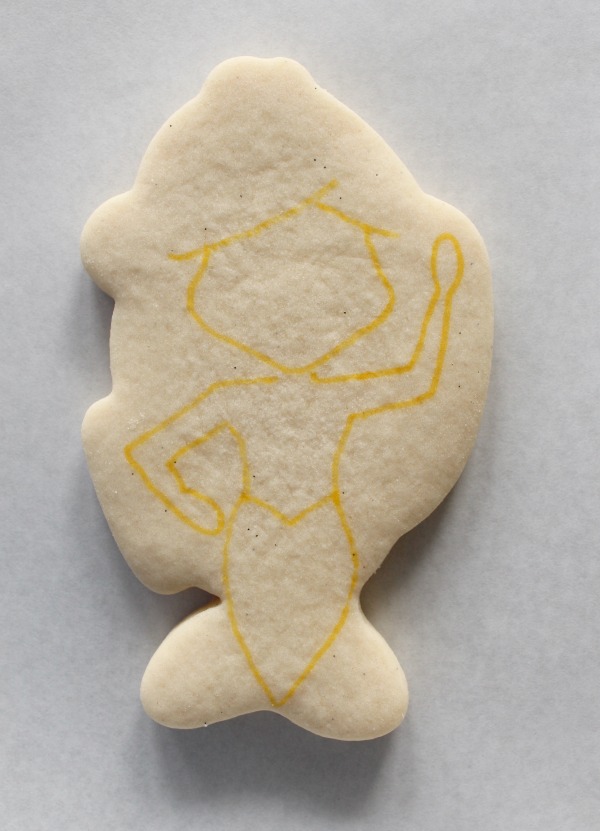
 Like most of my cookies, this one began as a sketch. Sketching cookie designs beforehand is the first, best step to great cookie designs because it helps you to avoid mistakes and miscalculations before they happen. It’s kind of like studying for a test. Most people do better when they come prepared.
 Before decorating, transfer the pencil sketch with a food safe marker. If you have a Kopykake, skip all that and pop the sketch into your projector.
 To decorate these cookies you will need:
- Fleshtone 20-second icing {make this on the very thick side}
- Dark teal 20-second icing
- Light green piping and 20-second icing
- Orange piping and 20-second icing
- Yellow piping icing
- Black piping icing
- Pink piping icing
- Stiff purple piping icing
- White piping icing
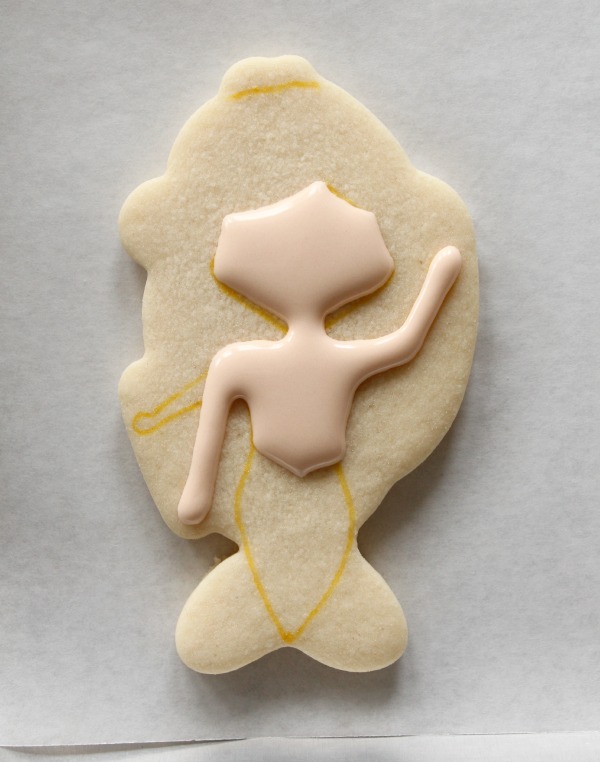
Begin by flooding the top portion of the mermaid as shown below. I used very thick 20-second icing to give the flesh-colored portion a little more bod,y while avoiding craters.
As you can see, I changed the design a bit from the original sketch. This is no big deal. Sometimes it’s hard to see the possibilities until you’re working on an actual cookie.
 Let the first step dry for about fifteen minutes before moving on. Use 20-second icing to fill the tail, then immediately add lines of lighter green icing. Quickly move on to the next step.
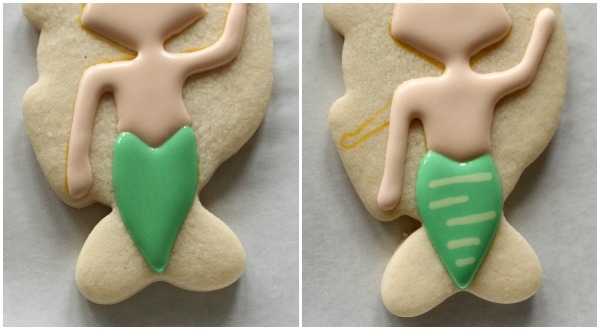 Drag a needle tool upward through the lines to create scales.
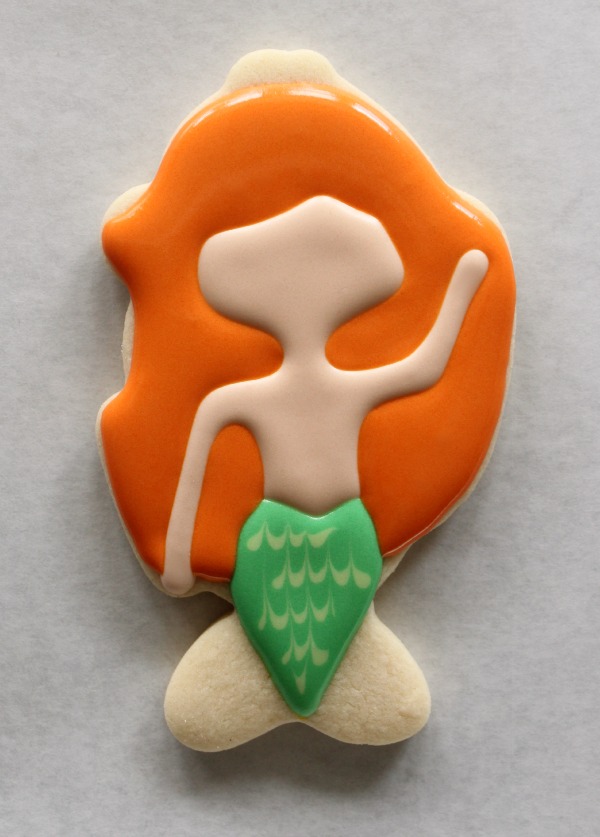
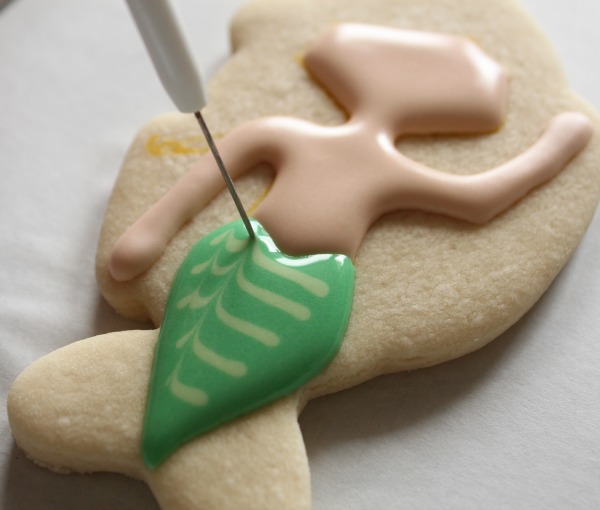 Next, add hair.
 Let the base dry for a bit {overnight if you like}, then add details:
- Crown
- Eyes
- Lips
- Hair detail
- Pearl necklace and bracelet
- Shell bikini top {I used a #18 tip}
- A small fin at the waist
- Tail Fin {I used a #70 tip}
This idea will work for almost any shape fish or whale cutter. Each of these cutters produce a very nice mermaid. It’s hard to pick a fave, but I think it is probably the one made with my trusty snowman, of course!
 {Left to right: B, D, and A+C}
If you don’t own a whale cutter you can pick one up here. I like this one best.
These look great on their own or mixed with other nautical cookie designs. For ideas, check out these links:
- Sand Dollar Cookies
- Decorated Crab Cookies
- Whale and Dolphin Cookies
- Mermaid Cookies via Flour Box Bakery
- Airbrushed Shell, Seahorse, and Dolphin Cookies
- Under the Sea Cookie Collection
- Pretty Pink Seahorses via Bake at 350
- Beachy Heart Cookies via Make Me, Cake Me
- Simple Little Jellyfish Cookies via The Bearfoot Baker


