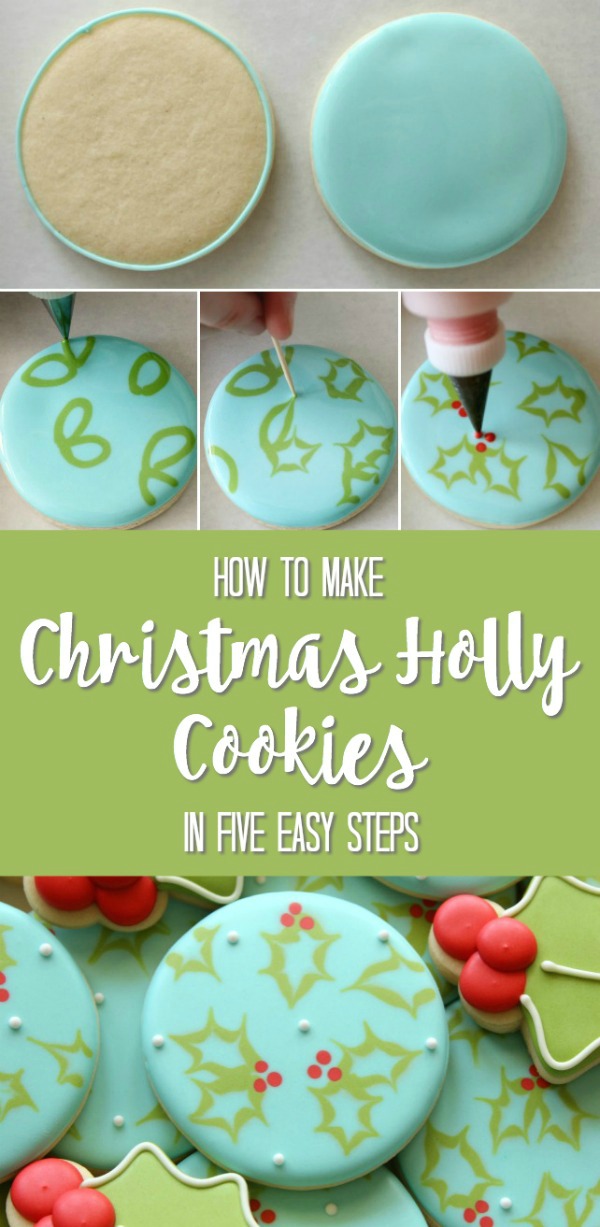
Easy Decorated Holly Cookies
It seems like the holiday season is flying by, so this year I’m trying to embrace simpler cookie designs. Rustic wet-on-wet holly cookies look great and are sure to please.
 It seems like the holiday season is flying by, so this year I’m trying to embrace simpler cookie designs. Rustic wet-on-wet holly cookies look great and are sure to please.
 To make these cookies you will need:
- Light blue outline and flood icing
- Light green flood icing
- Red flood icing
- Toothpicks, needle tool, or turkey lacer
- Clean wet cloth
- White piping icing (optional)
When decorating cookies using the wet-on-wet technique you must to work quickly. Prepare all of the icing ahead of time and have your tools and supplies nearby.
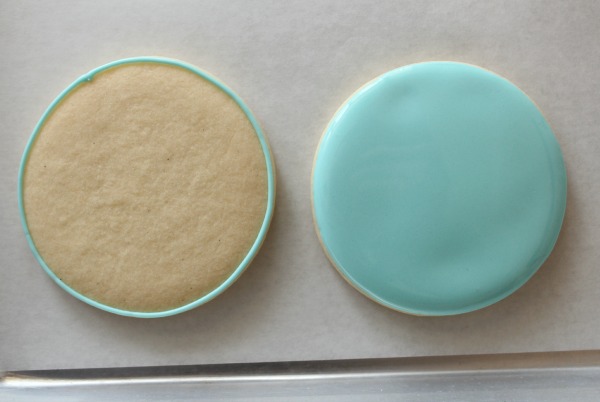
Working one at a time, begin by outlining and flooding the cookie as pictured below. Be sure not to overfill or the cookie may run over as more icing is added.
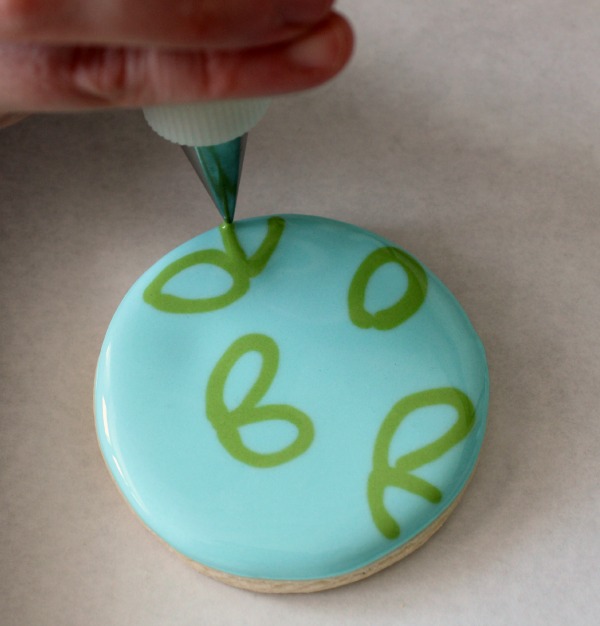
 Once the cookie is flooded, immediately use green flood icing to pipe double leaves into the base. The leaves will resemble a messy letter “B”.
 Next, quickly drag a toothpick (or other sharp tool) from the center of each leaf out through the green lines to create points. To keep things clean, use a wet cloth to wipe the toothpick in-between drags.
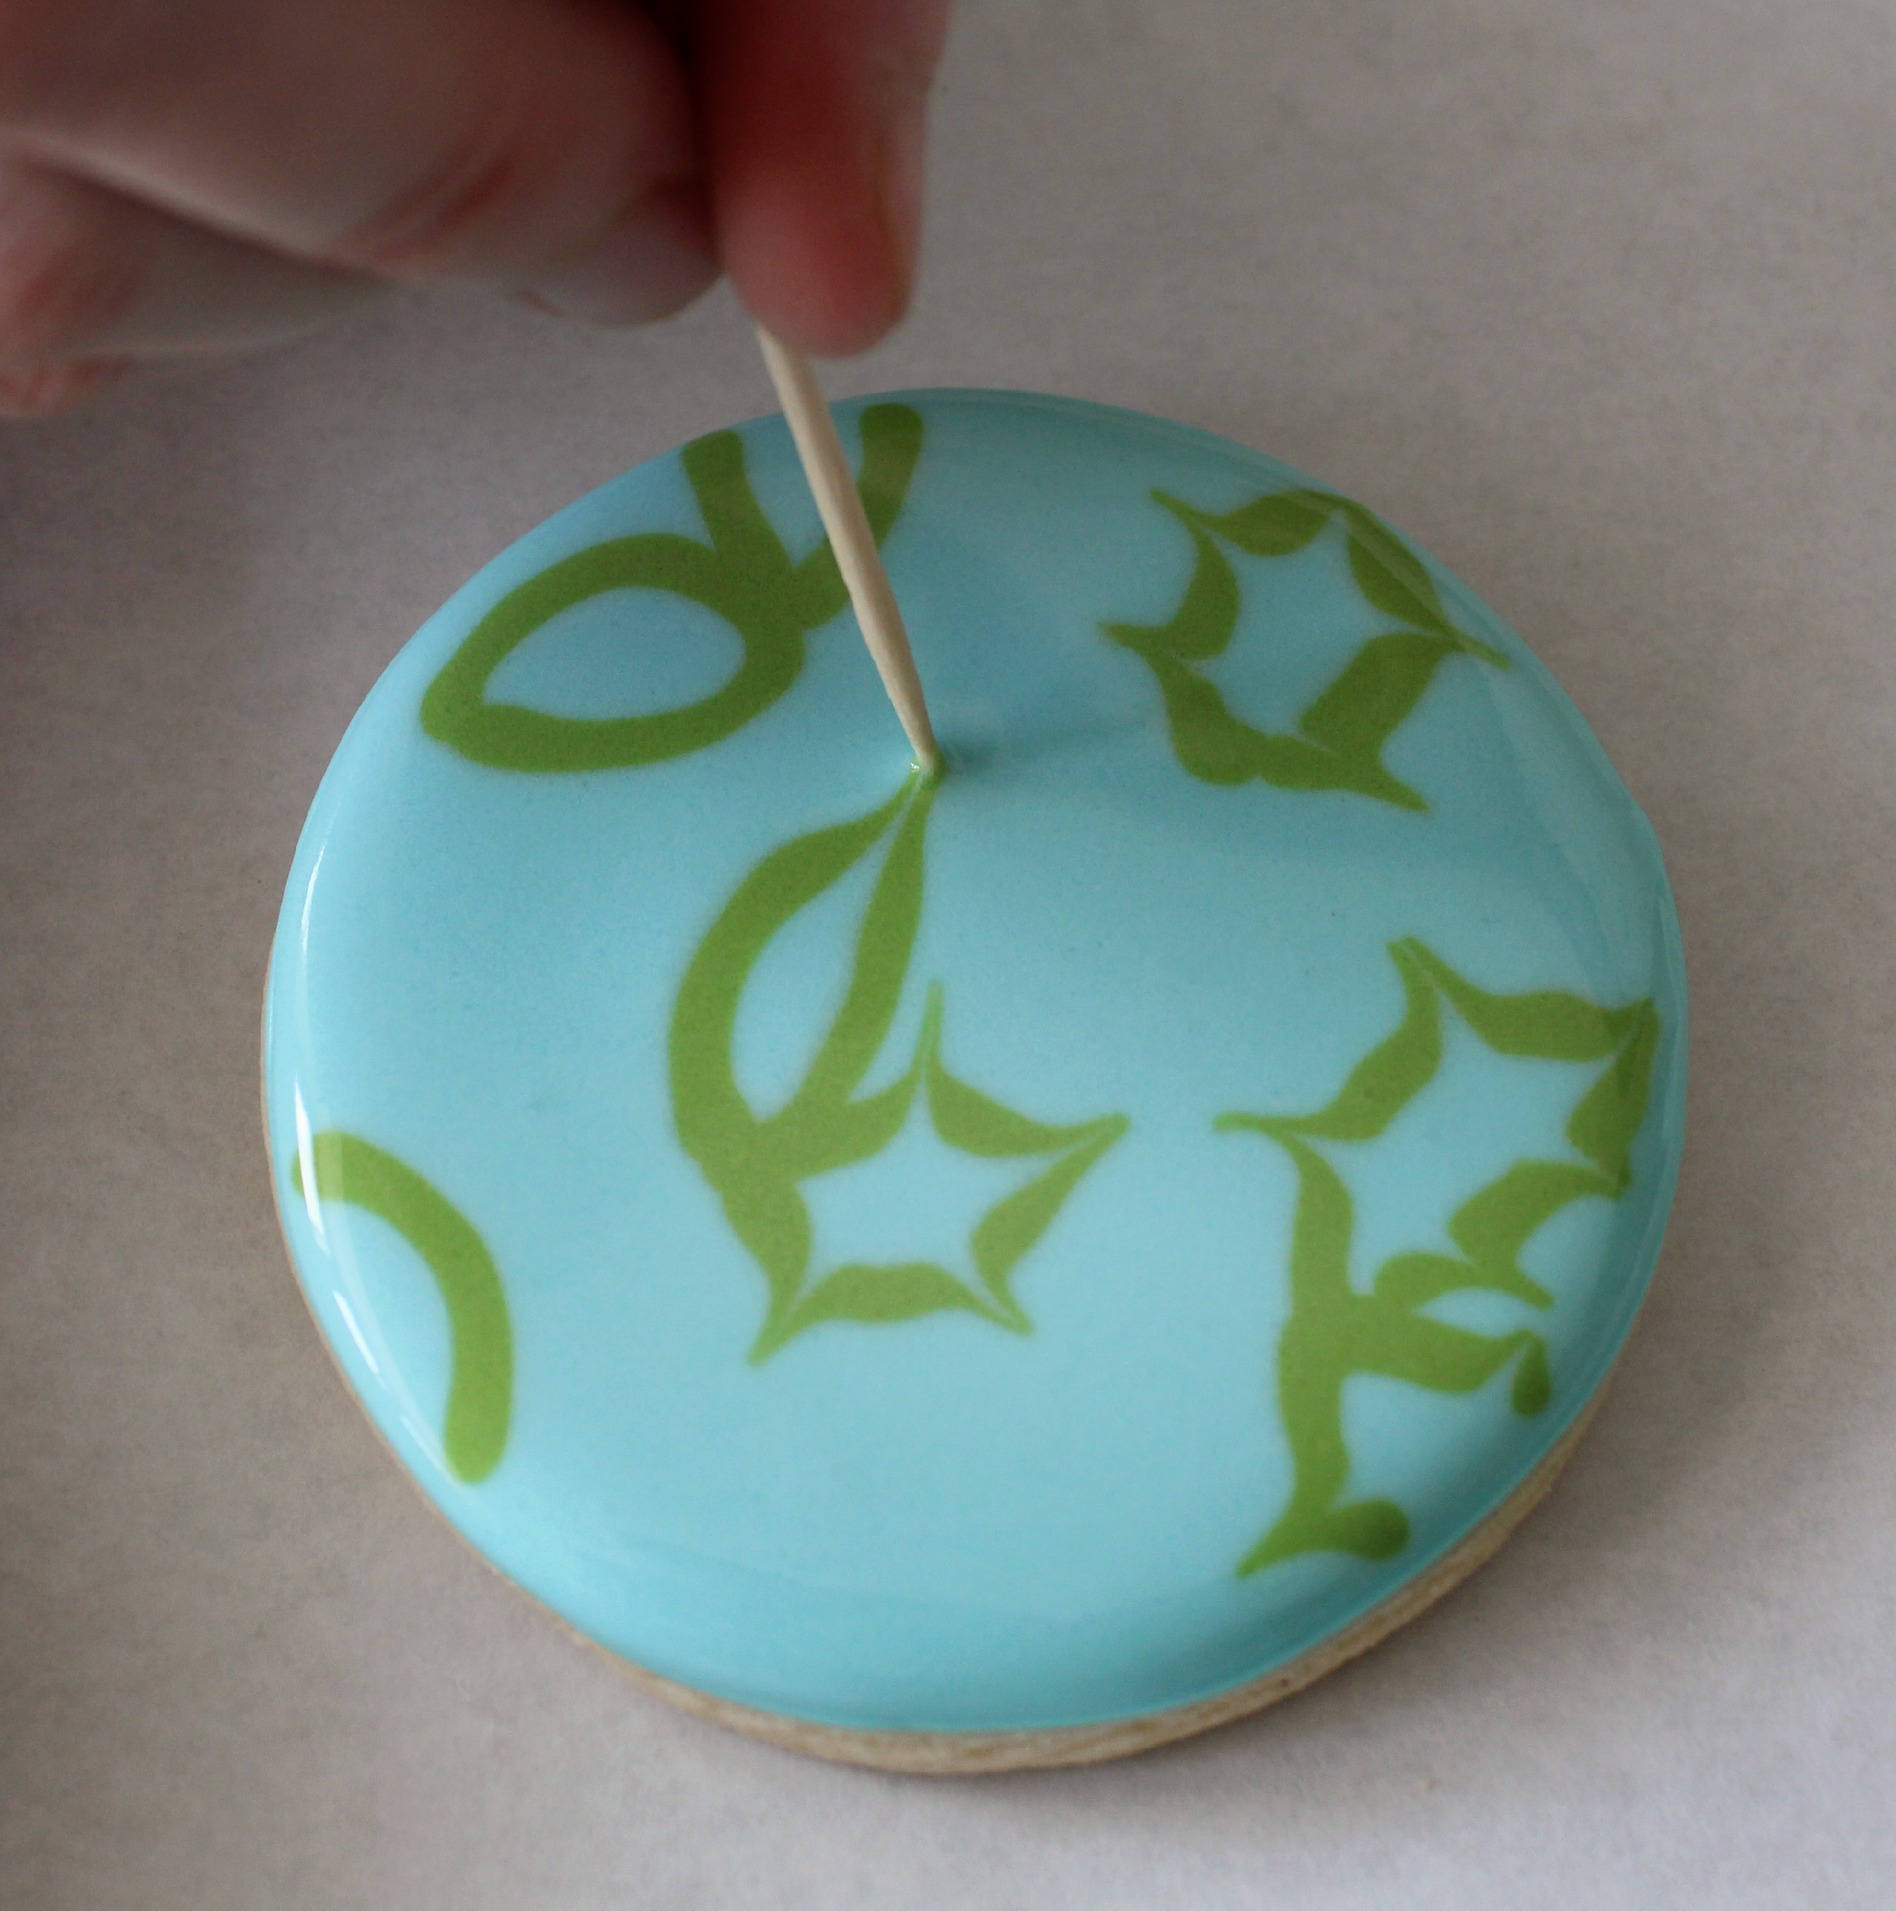 I try to do about five points per leaf, but if you run out of room, don’t stress it. When it comes to decorated cookies, there’s a bit of beauty in imperfection.
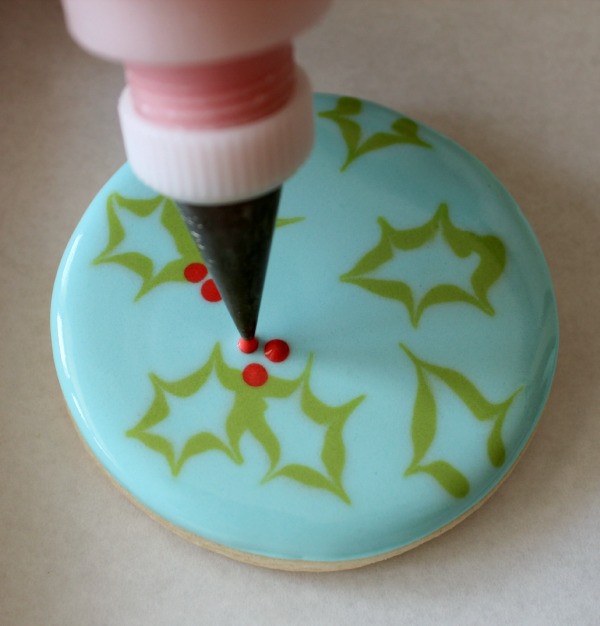
As soon as you’re finished with the leaves, quickly add berries.
Again, it’s important to work as quickly as possible so that the icing remains flat and smooth. Let the cookie dry (this can take anywhere from four to twenty-four hours) and add a few white dots if you’d like.
 For a different look, try making solid leaves or use unconventional colors. The possibilities are endless.
These cookies look great on their own or mixed with other simple designs like holly leaves.
 For more simple Christmas cookie ideas, check out the following posts:


oh my! this really is easy, and looks so beautiful. i already like using wet-on-wet toothpick technique, so i will definitely try this design for the upcoming christmas 🙂
thank you so much for the brilliant idea, love it!
LOVE THESE!
These are really pretty! And easy! Two of my favorite things!! 🙂
Very nice cookies. How did you achieve this beautiful blue ?
This is just a touch of sky blue.
Love that you did holly leaves using wet on wet…they turned out beautifully!
The BOMB.COM!!!
I love them, they are so pretty
I’ve seriously been wondering how you do this! I even showed Stan. And then I had to show him all your videos so he could he see you decorating in action. It was almost like a date night! 🙂
Hi Callye! I am always happy to see your posts. I’m on your site daily. I actually considered doing this – after bombing on many other techniques. Thanks again! Love your site, instructions, tutorials, guests, etc.
These are so lovely! The colors are soo pretty together! I love that blue and those tiny pops of red just glow! What a great idea! Perfect for a holiday platter!
So creative! I love wet on wet technique cookies and those are beautiful!!
Thank you for all of your tutorials. I appreciate you a lot. Is it possible to know the exact shade of green you used for these cookies. Thank you.
Brilliant! 🙂 LOVE your cookie platter too!
Hi!!! Makes my day to see you here!
Love these! Wet-on-wet always seem to be my ‘go-to’ for quick designs.
I’m putting these on the list for some family sets this year!
Well done!
Beautiful work, as always! Your generosity in sharing is always apreciated! What tip do you use for outlining so that your cookie is seamless after flooding? Thanks so much!
Sooooo pretty!
Hello Sugarbelle , thanks for sharing your awesome style, I already tried this design and love the simplicity, I had a hard time mixing the colors and also my brand new PME 1.5 tip clogged :(, what sizes did you use for the holly leafs?
I’m a huge fan of yours down here in México
I used a #2, but I think the #1.5 would be great for a delicate look. To mix the colors, I’d use a touch of sky blue, leaf green with a bit or ivory, and tulip red.
OMG Thanks for replying, you made my day!!! Love from Guadalajara, Mexico
Jalil, you have blossomed into the best cookie maker I know. Can’t wait to eat these cookies on Wednesday. ?
Pingback: Decorated Holly Cookies
Good golly Molly, these are just the easiest looking design to make yet is so perfect for this season! I saved this one so I could track it back later. Very cool, thanks Callie!
Pingback: Christmas in July Cookie Collage-A Fun New Tradition - The Bearfoot Baker
do you have a good icing recipe? i’ve had tons of fails and do you make 2 consistencies?