Pinterest Cookie-d {Chevron Cookies}
 Have you ever wondered what would happen if you got two cookie obsessed gals together in the same place? Well wonder no more!
I’ve been stalking following Ashleigh’s blog since I stumbled upon her fantastic ladybug party a few months ago. It’s always fun to find someone who likes cookies as much as I do. As we got to know each other, we learned that cookies weren’t our only common interest.
Like me, Ashleigh loves all things crafty and beautiful. One of our favorite places to hang out is PINTEREST, and of course, when your minds work like ours, if we love it, we have to cookie it!
So join us, for a very special week of Pinterest, cookied!!! Each day, Ashleigh and I will each share one of our favorite trends, and how we translated them into cookie form.
I have been SOOOOOOOOOOO excited to share this series with y’all, that I could hardly wait.
We decided to get the ball rolling with PATTERNS. I made chevron, and Ashleigh did her interpretation of quatrefoil.
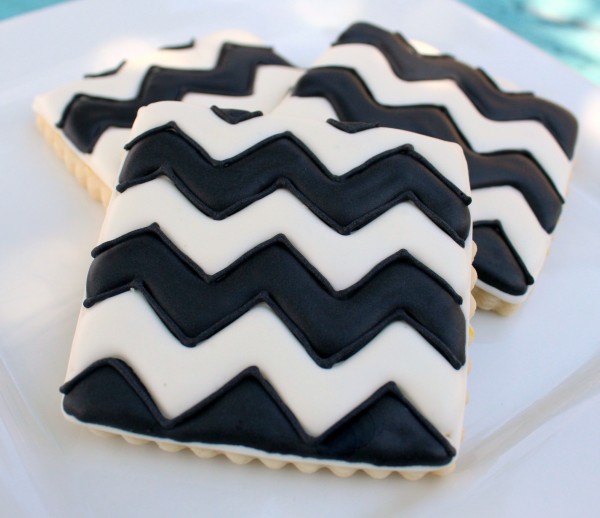
I’ve been a chevron junkie since it began appearing on ETSY. I have had these cookies in mind for a long long time. I’m only sad it took me so long to finally make them.
This is one of the instances that I am very thankful for my projector. However, I know many people don’t own one, so I came up with a way for anyone to make chevron print cookies with readily available supplies.
To make chevron cookies you will need:
- square round cookies
- clear paper, such as stencil paper, or transparency sheets
- permanent marker
- scissors
- food color markers
- white piping and flood icing
- flood and piping icing in the color of your choice
I made two versions of these cookies…the projector version, and the version I made with a template. Both are pictured in this post.
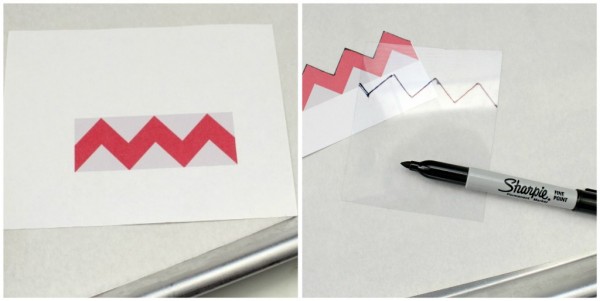
To make a chevron template, first I copied and pasted a chevron pattern that I found online into Word. I re-sized it so it would fit nicely on a three inch cookie, than printed it out. I then cut along the pattern, and used it to mark my clear plastic and cut that out.
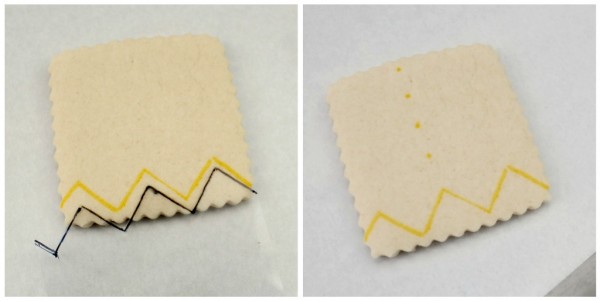
Once I had a template, I used it to mark the cookie. I started at the bottom, then used a measuring tape to mark half-inch increments on the cookie. You can skip that step and eyeball it {I used clear paper so it would be easy to guesstimate the distance}.
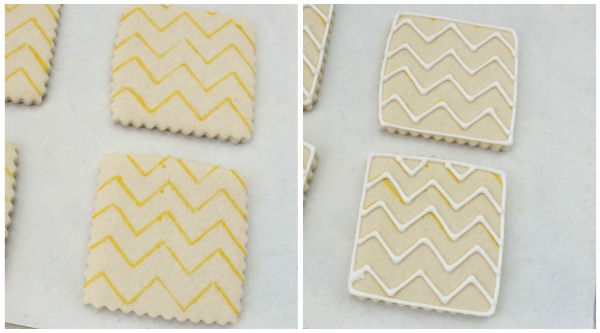
When all the cookies are marked, outline it with white piping icing.
Then fill alternating sections with white icing, and let it dry. After the white is dry, fill the rest of the sections with any color you like.
After the dried, I “cleaned up” the design, by piping over the sections with black icing using a #1.5 PME tip.
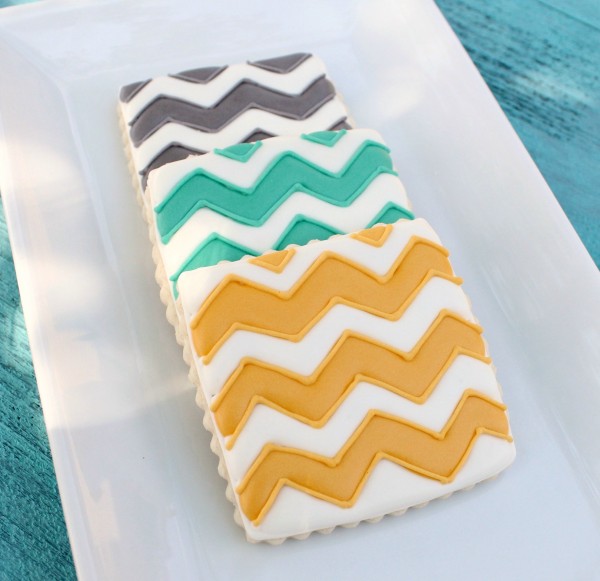
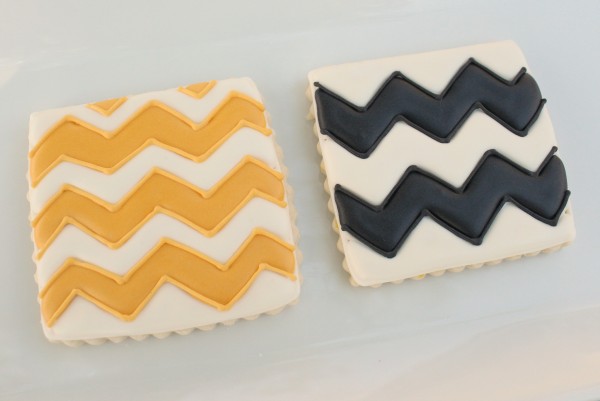
It worked WONDERFULLY, and I was able to create different looks based on how I spaced the template lines. The yellow was done using my projector, black is the template version.
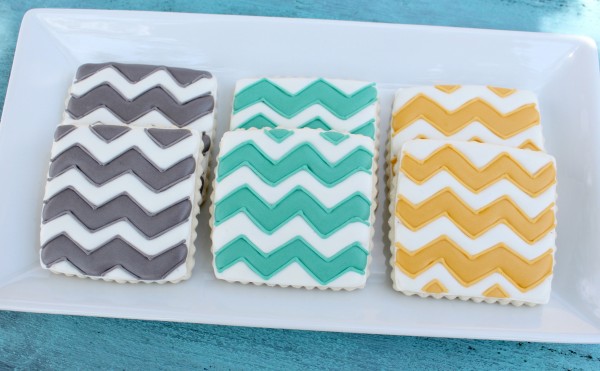
I got so into this I made more chevron cookies than I knew what to do with. I made them in color combos that I have been digging lately,
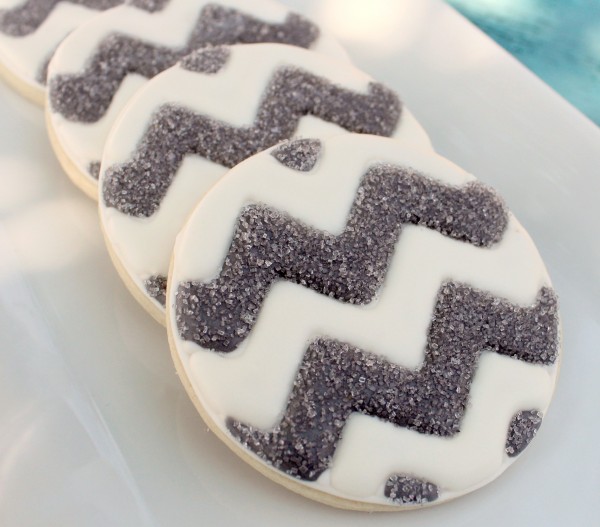
and I even started SANDING them!
You can guess what was in our cookie jar all week!
I LOVE CHEVRON, whether it’s art, pillow, or cookies, I cannot get enough of this print!
Be sure to go check out Ashleigh’s quatrefoil cookies, and start getting pumped up now! This is only the beginning…
You can see our other fun Pinterest inspired cookies by clicking these links:



OMG I am a sucker for ANYTHING chevron and these are certainly NO exception! Awesome job!! 🙂
OMG..I love these….can you direct me to the flooding icing recipe?
YOU are AMAZING!!!! = )
so so cute!
Clever, clever technique! Absolutely inspired.
Loooove the chevron cookies! And wow the quatrefoil kinda blows my mind. Thanks for introducing me to another great blog.
This is amazing ! How do you even do this ? You’re def one of the best cookie decorator ! Check out : http://nothinlasts.blogspot.com/
I love this idea, can’t wait to see the rest of Pinterst cookie week!
Gorgeous! I love the sanding sugared one!!
These are gorgeous! Thanks for the excellent instruction.
Seriously — you guys have come up with SUCH A FUN idea! I can NOT wait to see what else you do this week! These are gorgeous! I love the colors!
I love this! I too, am pinterest obsessed. I’ve noticed the chevron trend in decor and fashion, and while I’m too conservative to pick up on the pattern in my home – I would love it on a cookie! Very bold and graphical, perfect for a party.
These are so beautiful and upscale! Love the look — especially on the round ones! So much work and so perfectly done — as always!!
you are kidding me how can you imagine these cookies . theya re all like paint art ..
love your cookies …
love from turkey
http://designsbykuvvetli.blogspot.com
Chevron is such a striking pattern to begin with…but it’s your chic color choices that really make these special!
Both you and Ashley’s cookies are wonderful. You two are a match made in cookie heaven for sure!
Totally, totally cute!!!
So pretty!! I LOOOOVE the sanded ones. Sparkly and cool. Isn’t pinterest a great place for inspiration?
I keep poking around pinterest and signed up, but haven’t committed yet! I would pin these bad boys tho….so cute!
Love these ! We are having a baby shower …any suggestions ????
stunning! the cookies with the stencil came out clearer than the one with the projector…
Wow! I did the same cookie 6 mths. ago, out of fondant. It was pink and white for a baby show that Abby from Style Me Pretty was having. (she posted it on her blog) 🙂
I love your site, I’m truly inspired. I made your recipe the other day, 1 batch of vanilla and 1 batch of almond. So yummy, even without the icing!!! I was wondering how long are the cookies good for after you frost them. I froze them and plan to frost at a later date. But not sure how far in advance should I decorate. Hope you response.
Love, love, love these cookies!
These are amazing! I can use royal icing just fine, but not sure if I’d have the patience to make these haha!
Great idea, Callye! Love it!
I love this blog. I’m always hungry when I leave. Thanks for the ideas. 😉
Oh great. Another blog that is so awesome, I am going to have to follow it. More of my time spent gazing at pretty cookies instead of taking care of my children! Between you and Ashleigh and all the other blogs I love, I might get arrested for child neglect!
Pingback: My Love List Part 9 | Ciao Bella!
Those are the cutest cookies I have ever seen!
Pingback: Amazing Ivory
I have a delicious sugar cookie recipe but have never bothered to decorate them with anything but colored icing or sprinkles. Now I just have to find an appropriate audience that would appreciate the chevron design, and then I think I’ll try it!
Almost forgot to tell you that I featured the cookies in my weekly “Get Me Motivated Monday” post this week.
http://www.imbusyprocrastinating.com/2011/09/get-me-motivated-monday_12.html
Oh man… I am a chevron fan! These are the cutest cookies ever!!! LOVE THEM! I would love it if you would link this up to my Ta-Da Tuesday Link Party!!! http://mommybydaycrafterbynight.blogspot.com/2011/09/ta-da-tuesday-link-party-4.html
xoxo, Ashley J
Pingback: Pinterest Cookie-d {Subway Art Cookies}
Pingback: Chevron Obsessed «
Pingback: Life Styles News - Courtney Dial: Design Trends in the Party World | NixTimes Daily News
Pingback: Courtney Dial: Design Trends in the Party World
Pingback: Courtney Dial: Design Trends in the Party World | cosmetic platform
Pingback: Design Trends in the Party World – StyleList |
Pingback: handmade jewelry - Chevron Cookies | kids crafts ideas at - make-handmade.com
Pingback: Weird Wednesday Links: Best Airport Restaurants, Epic Food Fights and Bouncers at IHOP - DaringSearch-Free online writing and publishing
Pingback: mediarosa » Blog Archive » Chevron Cookies
Pingback: Luster Cluster: chevrons, tutorials, and Tom Hanks « Kate Schmate
Pingback: brea.vie designs | handmade paper goods
Pingback: design-inspired cookies | krista and jess
These are GORGEOUS!
Pingback: Pinterest Cookie-d {Sunburst Cookies}
Pingback: Pinterest Inspired Sunburst Cookie
Pingback: Easy Ombre Cookies
Pingback: Chevron Pattern | The Aisle Style
Pingback: Cookies… cookies… and MORE cookies! | Diva Entertains Blog
Pingback: Tuesday Trend – Chevron Prints | Diva Entertains Blog
Pingback: the chevron bandwagon « makewells
Pingback: Half Baked – The Cake Blog » DIY: Modern Christmas Cookies
Pingback: A Time to Bake « Mismatchérie
Pingback: Into 2012: Chevron Trend – Are We Done Yet? | everything in 3s
Pingback: Funky and geometric - The Chevron Pattern | Catherine Nicole
Pingback: Fräulein K. Sagt Ja - Auf Zack: Hochzeitstrend Zick-Zack Muster
Pingback: Modern Teal, Gray and Yellow Wedding Inspiration Board | Heart Love Weddings
Pingback: Elphaba & Nessarose Cookies
Pingback: Mod Construction | The Treat Garden
Pingback: Wedding Trends: Chevron « MN Wedding
Pingback: chevron : The Velvet Doe
Pingback: Get Your Chevron On! : How To Pickle A Sweater
Pingback: Charlie Brown Cookies
I love these cookies! Especially the sanded ones! How do you sand just the one color without getting the sand into the other color?
I found a trick that I love for chevron print! I bought an ‘open ended’ chevron cookie cutter from Etsy and i stamp it across my cookie dough before i bake off the cookies and they come out with a built in stencil. Then just go over it with the icing and all done! Yours are too cute, love the sanding!
This is the exact color combo of a baby shower I’m going to be working on next month! I love chevron too!! 🙂
Pingback: Sparkly Chevron Print Cookies