Masking Cookie Stencils with Press and Seal Wrap {Guest Post}
Cookie stencils have been around for a while, but in 2013 they’ve really made a splash. It seems like everywhere I look there’s a fun new pattern. My stencil collection {like my cutter stash} keeps growing and growing.
If you’ve tried stenciling, you probably know that there’s a bit of a learning curve. That’s why I am always on the lookout for tips and tricks to make things go a little more smoothly.
Today, my friend Hillary is demonstrating how she masks stencils with press and seal wrap. It’s a simple tip, but trust me…it will change your life!
![]() Hello! I’m Hillary, a.k.a. The Cookie Countess, but lately most of you have come to know me as the stencil chick. Last May I opened an Etsy shop that sells stencils with you, the cookie decorator, in mind. Since then I have spent more time than I care to admit, thinking about stencils. You know how Callye always talks about “cookie-think?” Well I now suffer from “Stencil-think.” But that’s a good thing, right? A “healthy” obsession, as they say. But you know what else I’m obsessed with? Press N Seal.
Hello! I’m Hillary, a.k.a. The Cookie Countess, but lately most of you have come to know me as the stencil chick. Last May I opened an Etsy shop that sells stencils with you, the cookie decorator, in mind. Since then I have spent more time than I care to admit, thinking about stencils. You know how Callye always talks about “cookie-think?” Well I now suffer from “Stencil-think.” But that’s a good thing, right? A “healthy” obsession, as they say. But you know what else I’m obsessed with? Press N Seal.
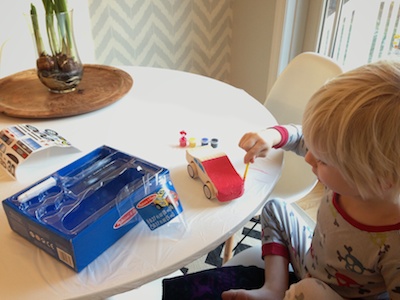
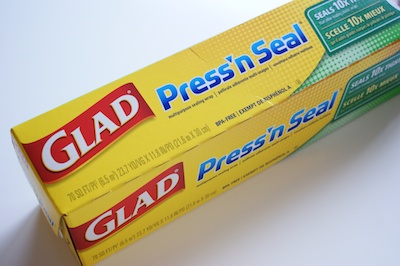 If you have spent any extended amount of time in my kitchen, you may noticed I have use Press N Seal a lot. I use it for everything. I have practically thrown away all my tupperware lids, because why waste time looking for matching tops and bottoms when you can just Press N Seal it? I even use it as an arts-n-crafts placemat for my son.
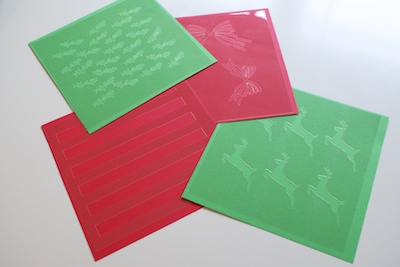
 But what does this have to do with stencils? And what does it have to do with cookies? Well my friends, I think Press N Seal may be your next favorite decorating tool when it comes to stenciling. Most of my stencil designs have a repeated pattern that make for great backgrounds on decorated cookies. But sometimes, you may want to just use one part of a stencil. In the past I have shown how you can mask off a part of a stencil with a piece of paper, or scotch tape. But then it came to me. A better idea was waiting for me right in the kitchen drawer! Press N Seal. It’s the perfect solution for masking off stencil parts. It’s food safe, it’s tacky so it won’t slide around, and it’s see-thru! Today I am going to show you a couple different cookie designs you can stencil using this technique. And since Christmas is only about 6 weeks away – EEK! – let’s bust out the red and green icing! For this set I am using 4 different stencils, all available in my Etsy shop.
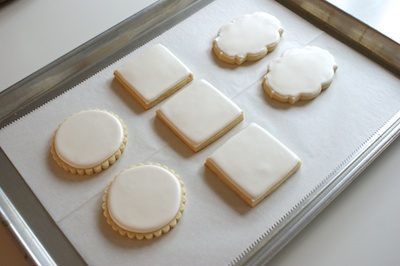
 I also have some cookies ready to go, that have been flooded and allowed to dry overnight.
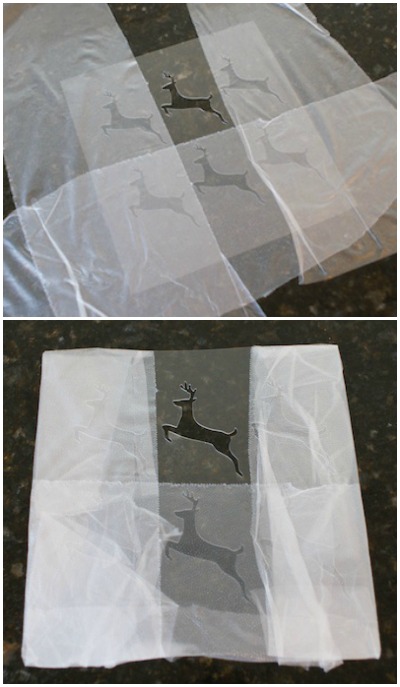
 I’m going to start with the reindeer stencil. For this design I want to isolate one of the reindeer, and not get any of the other reindeer parts of the stencil on my cookie. So I have laid out my stencil on a clean surface and then placed Press N Seal pieces over the parts I want to cover. Then I folded the overhanging pieces around the stencil, just to neaten it up and bit and make it easier to work with.
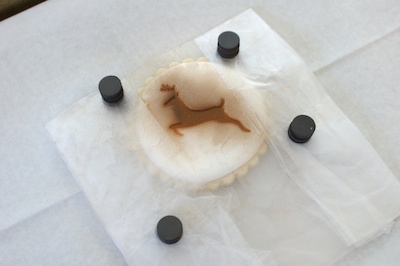
 Using this GENIUS magnet idea, I have placed my stencil where I want it on my cookie and use magnets to secure it in place. For these cookies I am airbrushing them with brown. But you could just as easily do this design by stenciling your reindeer with royal icing.
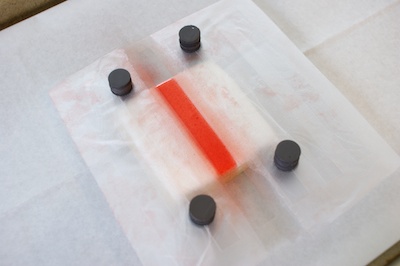
 I am also going to make some Christmas presents designs with some square cookies. For these I am using my wide stripe stencil, again using the Press N Seal technique to mask off all but one section of stripe. I will first airbrush the stripe across the middle of the cookie in one direction. Once it is dry, I can go back and airbrush another stripe going the other direction to simulate ribbons on a present. And finally once the airbrush color is dry, you can use the bow stencil with royal icing if you’d like. Or simply add your own style of bow.
 When I mentioned my Press N Seal idea to Callye, she immediately said, “You can also put Press N Seal directly over your cookie, to mask off a part of the cookie, instead of part of the stencil,” which is EXACTLY why two heads are better than one. Such a great idea!
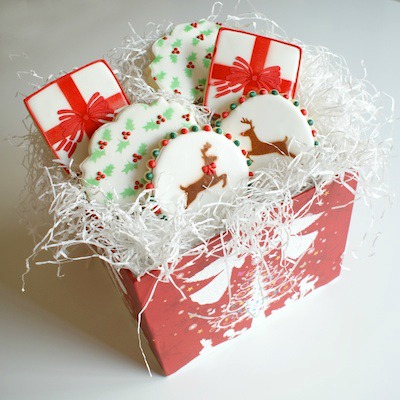
Here is the finished project! Please forgive me – I was so excited to get to writing this post for all of you, that I forgot to take more progression photographs. Ooops! Just like with cookies – live and learn. 😉 I hope you fall in love with Press N Seal just like me, and use it to take your stenciling to a new level.
![]() Be sure to check out Hillary’s ETSY shop and Facebook page. She’s also shared more great ideas for incorporating stenciling into cookie designs here.
Be sure to check out Hillary’s ETSY shop and Facebook page. She’s also shared more great ideas for incorporating stenciling into cookie designs here.
For more great tips on perfectly stenciled cookies check out these posts:


O*M*G!!! I have wrestled and wrangled, used painter’s tape and paper and anything else I could think of…never EVEN considered Press n Seal! Ingenious!!!
What a clever idea!! Makes it so much easier to control and to clean! And those cookies are GORGEOUS!!
It does my heart good to know that you and Callye are friends and share ideas and inspirations. I’m a big fan of both of you and I’m itching to try lots of stencils and techniques this season (as soon as I can find uninterrupted time!) Thanks!
One more reason to love Press and Seal! thank you 🙂
BRILLIANT!!!! WONDERFUL!!! PERFECT!!!! CAN’T WIAT TO TRY THIS!!! THANK YOU ALL SO MUCH!!!
These are adorable. And they look relatively easy to make…
Pingback: Decorated Jam Jar Cookies
beautiful…simply beautiful!!
I love this idea, Hillary was one of the first ones to talk to me and help me out. I just started back in April, I started out by reading your blog and watching videos. It’s hard to believe I have a page now with over a 1000 likes, Hillary told me this would happen when I asked her one day what I should charge someone for a cookie set. lol
Pingback: Stenciled Valentines Cookies - simplysweetsbyhoneybee.com
Pingback: How to Make Bandana Print Cookies