Pumpkin Royal Icing Accents
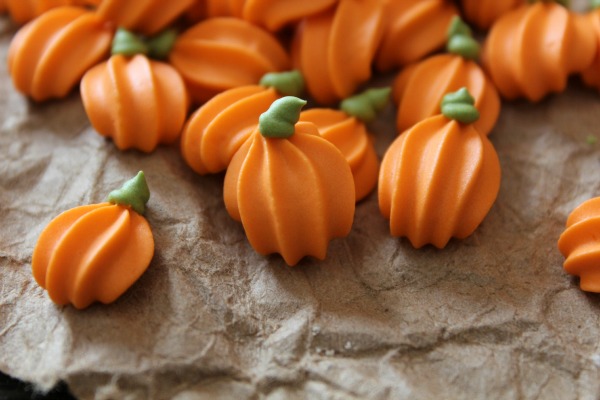
Royal icing pumpkins are widely available this time of year in stores and online, but they’re inexpensive and easy to make yourself.
All you need is:
- Stiff orange royal icing {my recipe is HERE}
- Stiff green royal icing
- Any type of star tip {I used a #18}
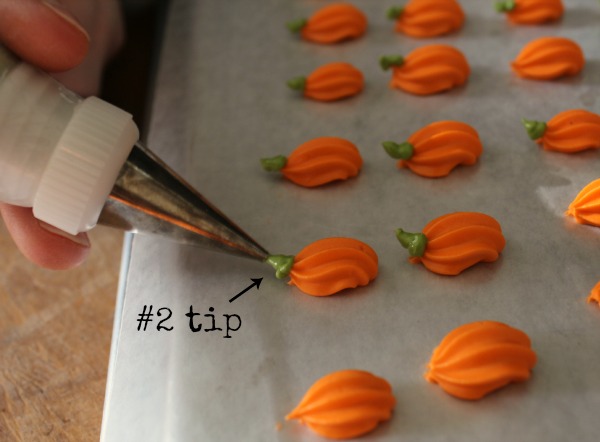
- A #2 tip
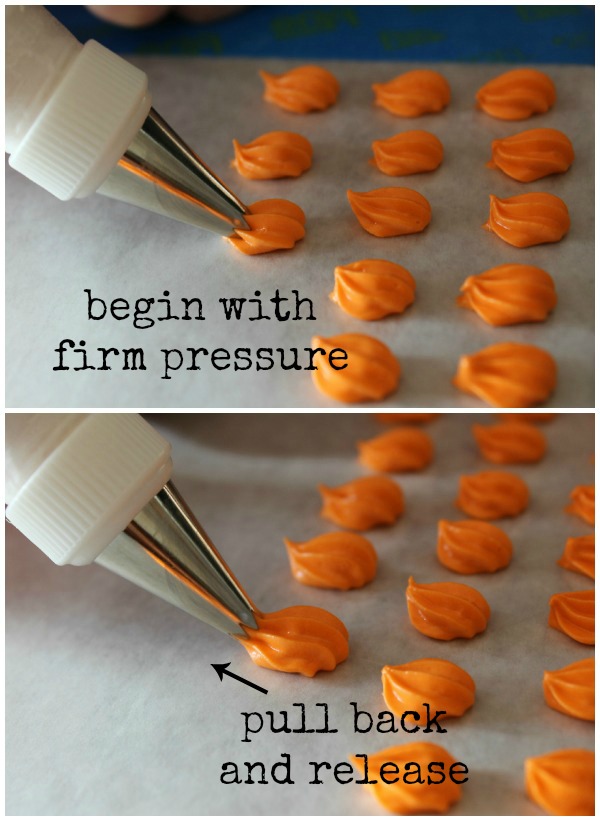
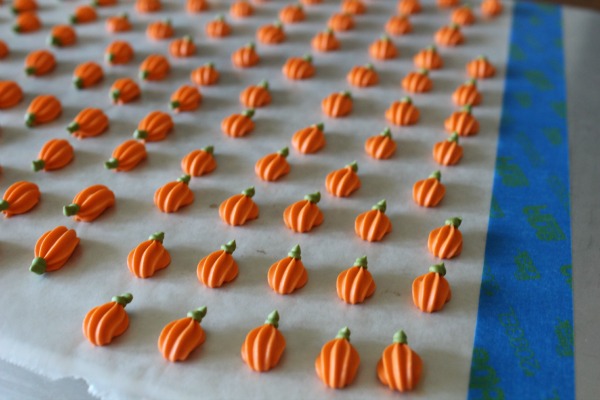
Prepare cookie sheets by taping waxed paper to them with painters tape. Start by forming the body of the pumpkin. The tip should be at about a 45 degree angle to the cookie sheet. Apply firm pressure, pull the tip away until the pumpkin is about half an inch long, release pressure then pull the tip away from the paper.
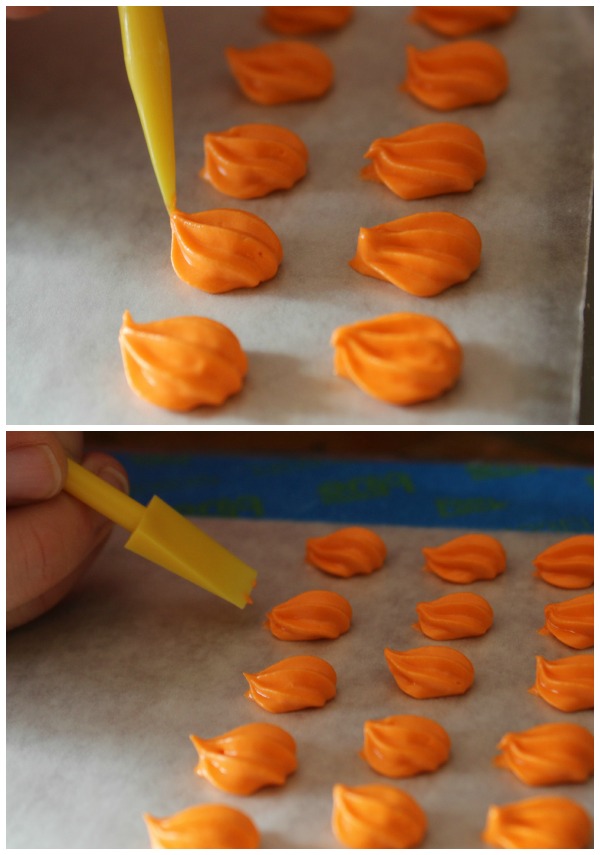
You might get a little point but that’s okay. Simply use either side of a boo-boo stick or a toothpick to gently flatten or remove them.
Let the pumpkins dry for a bit then add the stems using a #2 tip. Be very gentle if the pumpkins are still a little wet. You can actually damage them by applying too much pressure.
If the stems are a little pointy, you can also flatten them with a boo-boo stick…or not. Either way, super cute. Just be sure to make a gazillion of them because you’ll want to put them on everything!
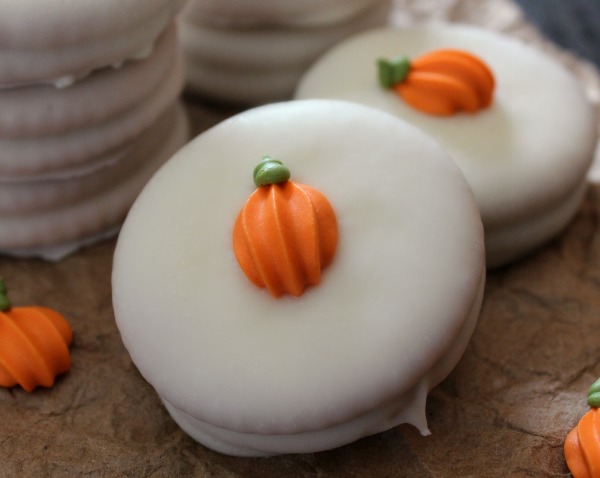
These look great on regular cookies, of course, but they are are also a great way to dress up any dessert. I love how they look on these White Chocolate Dipped Ritz Sandwiches from Kevin and Amanda. Every time I make them people RAVE!
Best of all they keep forever. Some people recommend storing them in an airtight container others in a cardboard box, but as long as you keep them away from light and humidity, they will last indefinitely.
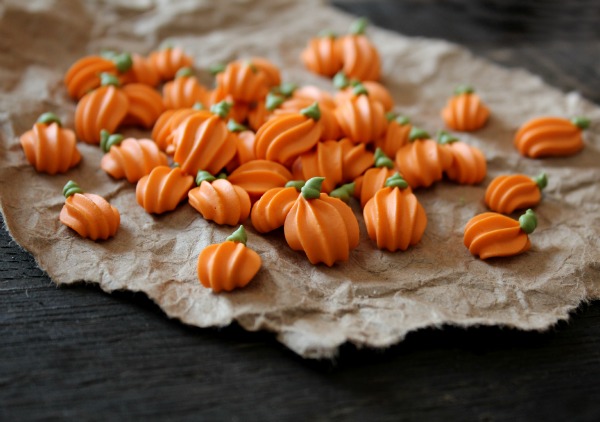 So try these soon and add them to any sweet treat you like…candy, cupcakes, brownies, and more. You can also make different styles and sizes by simply using other star tips. Here’s a handy dandy chart to help you find others that might work.
If you dig these royal icing pumpkins, be sure to check out these fun posts:
- Pumpkin Pops
- Royal Icing Owls
- Perfect Jack O’Lantern Cookies
- Easy Pumpkin Bites by Flour De Lis
- Stacked Pumpkin Cookies By Ali-Bee’s Bake Shop
Have a great week, everyone!


You are so great! Love your tips and tricks! Happy Halloween to you and your family. :o)
Awww – so cute!
OMGosh can these be any more adorable. You are the master when it comes to left over icing LOL. I love these!
I recently discovered your site … you are very good and thanks for all the information and inspiration … a kiss from Italy
Laura
Oh my goodness, these look so good!! I love how much the pumpkins dress up the white chocolate. yum!!!
I recently found your site and have been devouring it ever since. I made some of your ‘The Great Pumpkin Cookie Makeover’ cookies and everyone went on and on about how amazing they looked (I wish I could post a picture – the colors aren’t quite right but other than that they look great – all because of your amazing tutorial writing skills!) I keep having these great ideas for other designs but don’t know enough about the decorating yet to pull them off so I will just keep copying you for now. 🙂 Thank you so much for sharing your knowledge! I hope you have an amazing week.
P.S. My husbands holiday favorite is the candy covered ritz sandwiches – of course now I have to add little royal icing pumpkins to them! Too cute!
I’ve never had these! [hangsheadinshame] I can’t to try them, though, for one of my son’s chorus events coming up. Should be awesome!
I love love love these and the timing is perfect! I just baked 240 cookies this weekend and have to begin decorating them today. I am also making a halloween haunted house cake, 36 cupcakes & your wonderful Pumpkin Lollipops for a co-worker’s 5yr old daughters little halloween party. I wish I could make my hobby my job because working 9-6pm everyday is hindering my decorating time lol. THANKS so much for these icing pumpkins I think I’ll add them to my haunted haouse cake! 🙂
I love your creativity! The tiny pumpkins look adorable!
So simple and perfect! I heart you!
ool! Thank you for sharing! 😀
CUTE!!
LOOOOOVE! Oh my goodness, and I even think I could pull these off! I think 😉
so cute, I love pumpkins.
I love this! 🙂 I am pinning it now and I am your newest follower! 🙂
Oh how cool! I love this!
This is brilliant!
We absolutely love your Pumpkin royal icing accents! The pumpkins are so cute and you could use them for just about everything!! 🙂 We would love to have you link up to our Strut Your Stuff Saturday! We are also hosting a Build Your Blog Conference in Salt Lake City on Feb. 16, 2013. We would love to have you come. You can find a link on our blog sixsistersstuff.com. We hope to hear from you soon! -The Six Sisters
These are so freaking cute! Love the idea of making these yourself and saving some money.
I love these cute, little pumpkins! The Ritz sandwiches look yummy!
you are soooooo clever…any xmas ideas..wondering if there is a simple way to do a pine cone or other accents for xmas…
Look simple with a big impact. Like the step by step photos! Thanks!
Pingback: Merry Christmas! | Kevin & Amanda
They are sooo cute. I’ve been wanting to try and make RI accents for a few years now but never really knew how… Now I have all these ideas formore accents, like little tiny strawberries, hearts and of course flowers. You could make your Poinsettias in cute pastels or dark blue or purple and they would look like Clematises (my favourite flowers).
You should make your own book on cookies and another book on RI accents… Your talent is priceless and I am a huge fan. So thank you for all your great tips and ideas. ?
Millie, Denmark
Excellent notable synthetic attention for
the purpose of detail and may foresee issues prior to these people occur.
It’s awesome in favor of me to have a web page, which is beneficial designed for my know-how. thanks admin
Wow, that’s what I was exploring for, what a information! existing here at this web site, thanks admin of this web page.
Everyone loves it when individuals get together and share opinions.
Great site, keep it up!
Good day! I just wish to give an enormous thumbs up for the good info you may have here on this post.
I can be coming again to your weblog for extra soon.
I have a confident synthetic eye intended for fine detail and may anticipate complications before they will take place.
Hiya! I just wish to give an enormous thumbs up for the nice data you could have right
here on this post. I shall be coming back to your weblog for more soon.
I love to share knowledge that will I’ve accrued through the calendar year to assist improve group efficiency.
I don’t remember seeing these last year but I’m glad I saw them now. These are too stinkin’ cute!
Those are so adorable! I love the way they look on the dipped Ritz too! You’re amazing!
i want to come take a cookie cooking class with you
Pingback: Pumpkin Party: Pumpkin Party Ideas and Crafts - Mimi's Dollhouse
Pingback: Decorated Pumpkin Cookies
Pingback: Aquafaba Royal Icing Ghosts and Pumpkins – Wing It Vegan