Royal Icing Owls
Owls…my obsession of late. Combine them with my long term love of royal icing accents and you have these little cuties.
In a perfect world, there would be a video to go with these photos, but apparently I’m a better cookie decorator than cinematographer. I’ll redo it ASAP, in the meantime here’s what I’ve got.
To make these you will need:
- Round icing tip, #3-12, depending on the size accent you’s like to make, I used a #5
- Piping icing for the head and beak
- Two shades of 20-second icing for the eyes
- Wet towel
- Boo-boo stick or toothpick
Begin by taping a sheet of wax or parchment paper to the back of a cookie sheet with painters tape. This will make it easier to remove the paper without disturbing the decorations.
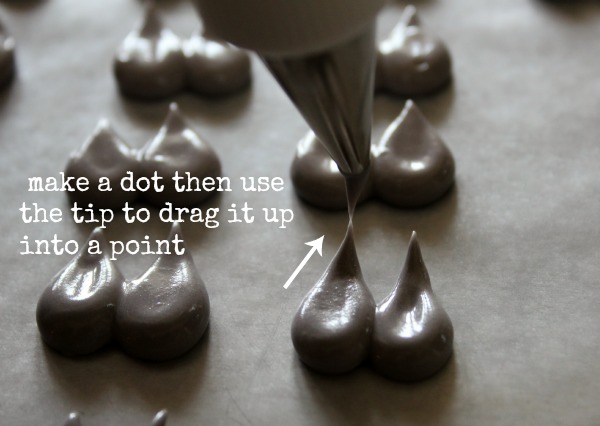
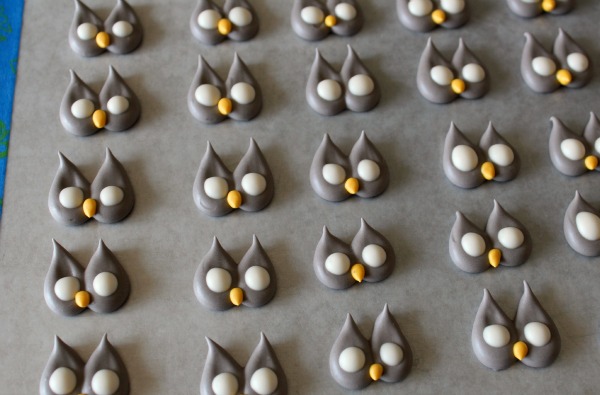
To make the owl’s face pipe a large dot of icing onto the sheet, release pressure, then use the tip to drag it up to a point. Repeat this step to complete the face. Use a toothpick to remove any air bubbles or imperfections.
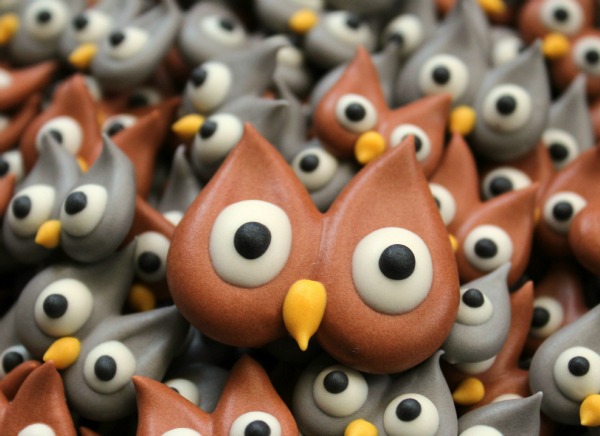
Let the bases dry then use 20-second icing to add the eyes and piping icing to create a beak. Form the beak the same way as the face…make a tiny dot and pull it to a point. I used a #2 tip for both steps.
Give them 30 minutes or so, then finish up with a pupil.
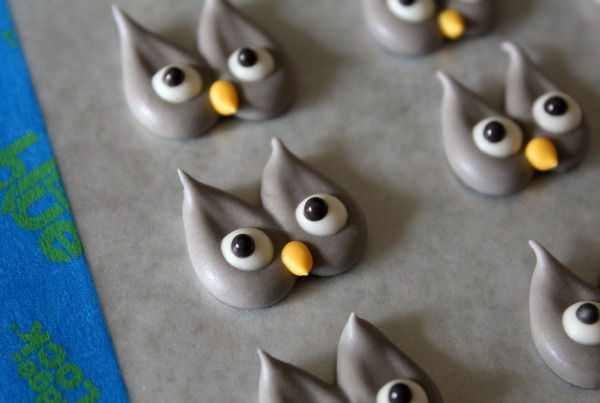 These were so much fun that I made at least a million.
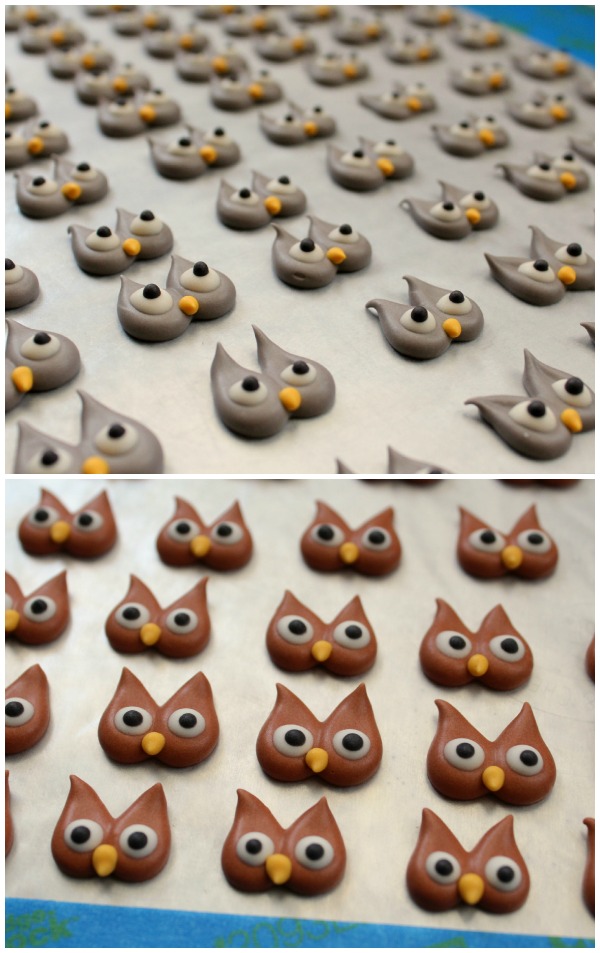 Just kidding, but seriously there were a lot.
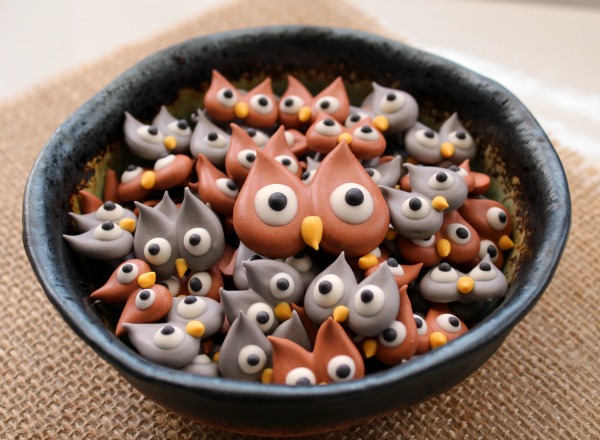
The uses for these royal icing owls go way beyond cookies. Try making larger ones for cupcake toppers or use them to dress up store bought candies and cookies. They would also look great on brownies, cakes, Rice Krispie Treats, truffles, chocolate spoons and more!
The possibilities are endless so make some today. If you like this project, you may also like these fun ideas:
I hope everyone has a wonderful Friday!


LOVE these! I just happen to have some leftover icing right now – I’m totally trying this!
These are SO cute, such a great idea 🙂 you’re so innovative.
What a great idea! I love the colors too!
Super cute Calley
AW! So cute! You do love your owls! ;D
Super duper cuter than anything!
I love that you suggest to put them on chocolate spoons! What a fun idea for a fall hot cocoa treat.
Brilliant, as always!! Love the spooky addition on the top of your page!!
OMG those are so freakin’ cute !!!!
Your creativeness is just absolutely genius, Callye! Genius! I wish I could just have a teensy speck of it for a day! Love these owls. They are adorable!!!
Brilliant as always!! I love ideas for bigger sized royal icing accents that could be cupcake toppers. Keep ’em coming Callye (please!)! 🙂
So cute… can’t wait to see what you do with them! P.S. Hope u and hubby have a great getaway weekend!
These are so cute I kind of can’t stand it! I’ve been wanting to try my hand at royal icing toppers, and you just sold me!
You never seize to amaze me. Seriously. Pure magic.
I seriously don’t know how you think of things like this. Brilliant, as always! But mainly, I want to tell you that I am LOVING your halloween header. How fun is that!??!
I love these. They’re adorable and appear easy to make but I have a feeling I’ll mess these up, BIG time. Do you store these in the fridge?
Adorable and doable. Thank you!
Callye, you’re so creative!! 😀 I love these little guys! What are you going to use these ones for–the decorating ideas that you mentioned? Who eats all of them? 🙂
So cute!!!!
Wow they really are cute!!! And WOW to all your work and creativity!!! I enjoy so much every post you publish, even if I have no time to bake, that I feel bad for getting so much from your work and not giving you anything in exchange. I’m afraid a huge THANK YOU is all I have to offer right now from the other side of the world. Thank you for sharing and giving a bit of colour to our lives!
Just the cutest!
omg fabulous!!
I am loving these little owl eyes and have decided to take a day and play with royal icing!!
These are so cute – you are such a talent!
More owls….I love them Callye! I have become owl crazy too! You keep them coming. Awesome!!!
I love you Halloween themed logo/header!! SOoooooo fun!!
I just want to be your little kitchen elf and follow you around all day! What fun it must be in your kitchen. 🙂
These are a hoot! No pun intended and I love all your suggestions for using them.
These are so darn cute, Callye!!! I love your Halloween header, too!
I’m very new to cookie decorating–I found your blog a few weeks ago and have only made a few batches, but I’m really enjoying playing around with royal icing and seeing what can be done, and I’m also hooked on appliques! I made some of your swirl roses to top cupcakes with. I had a ton in different sizes, pink and white. When people came over for the party, they HAD to know how I got that effect, so I pulled out my container of leftover royal icing flowers. After I showed people, I left it on the counter and wandered off. I kept seeing people pick up a flower, look at it, and then eat it like candy. It made me wonder if there were broader uses for it. So the next time I had leftover icing I added a tiny smear of peppermint oil–just enough to get it good and minty–and piped out little ghosts, and put together some printable boxes for them. I was worried they wouldn’t dry right because of the icing-oil thing, but I guess it was little enough oil that it was okay, because they came out perfectly–and really cute! http://i.imgur.com/5a92U.jpg
These are adorable! I love the simple use of strokes.
As always, your ideas are incredible ! Great great icing.
Morning Callye!
I think these are the sweetest things you have made, and I just love all your things!
Have a Joyful Day :~D
Charlie
Ok, what are you doing with all those adorable little owls? It seems that you make a ton of them, they are so cute. Your are right, they would be awesome in cupcakes , cakes and other treats. Can I also be your personal little kitchen elf and follow you around your kitchen, but only for cookies purposes! my cooking skills are pretty bad.
I am going to stuck them on candy sticks for a chi omega party my mom’s sorority buddies are doing, LOL. Would you have ever guessed? The brown ones are the ones we used =)
OH. MY. GOSH! You inspire me to dig out my piping bags. These are so incredibly cute…I must make them!! Awesome post!!
So stinkin’ cute! I have a little royal icing lurking in my fridge and simply must make these now. I’ll be making snickerdoodle blondies for my daughter’s preschool’s fall festival in a few weeks, and while they’re AMAZINGLY delicious, they’re not the prettiest things. These little cuties should make them much more appealing to the kids!
these are just the cutest little things! my goodness, you are so talented.
Pingback: royal icing owls with a how-to. | Cooking Pics
How do you eat such cute creatures?? Those eyes are calling out to me in desperation … or deliciousness. . .
CUTEST. THINGS. EVER.
I’m obsessed with owls too–these are so adorable! Almost too cute to eat. 🙂
these are such a hoot! lol Great job Callye!
Loved them. So cute <3
I am so happy I found your blog today. My son is having a Harry Potter themed birthday party and these Owls will be perfect for Hedwig cupcake toppers!!
Pingback: Simple Royal Icing Accents
These are so cute! I made some a couple of weeks ago, and put them on cupcakes over the weekend – my five year old daughter was SWOONING. She’s in love with these – thanks for the idea!
Oh! Saving these to make for Mum’s birthday cupcakes next year 🙂
Or just making them because… Thanks for the great tutorial, as always 🙂
I love these owls and am making them for my mom’s birthday party however how long on average do they take to set up?
Love your owls! You mention that you used a #5 tip, how big where the owls? I want to make them for cupcake toppers and wasn’t sure which tip to use. Thanks!
I’d use a larger one like a ten for cupcake toppers
Thanks! So do you think it would be ok to make these a week before I need them (stored in an airtight container at room temperature)?
Pingback: Simple Owl Cookies
Pingback: Vanilla Bean Cupcakes with Vanilla Buttercream Frosting | Lolly's Sweet & Savory Treats
Pingback: Twenty-Plus Halloween and Autumn Cookie Ideas
What’s your recipe for the royal icing? I know there should be only one, but there isn’t…
Hi I have a question could you send me the recipe for bright red royal dicing and black I don’t know how you can make all those bright colors Ashley red and black I never can make that
Pingback: Make Ahead Decorations for Chocolate Candy – Melting Minutes