How to use the Stencil Genie and a Giveaway
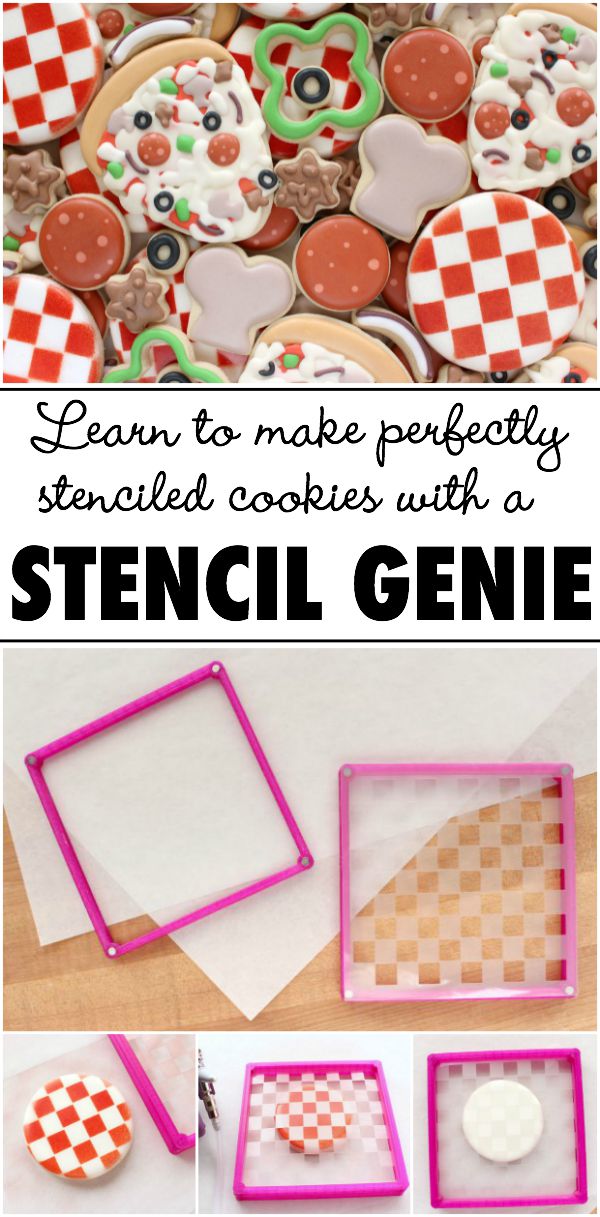
Once upon a time, I bought every single cookie tool known to man. Then, as time went on and I ran out of storage space, I cleared out all the fluff and kept only the things I truly use and love. It’s not often that a gadget that finds a place in my heart, but when the Stencil Genie hit the scene last year, it did just that! So this year, in honor of the Stencil Genie’s first birthday, it’s creator, Ginny Levack and I decided to celebrate with a giveaway. But first, I’d like to tell you a little bit about how the Stencil Genie works.
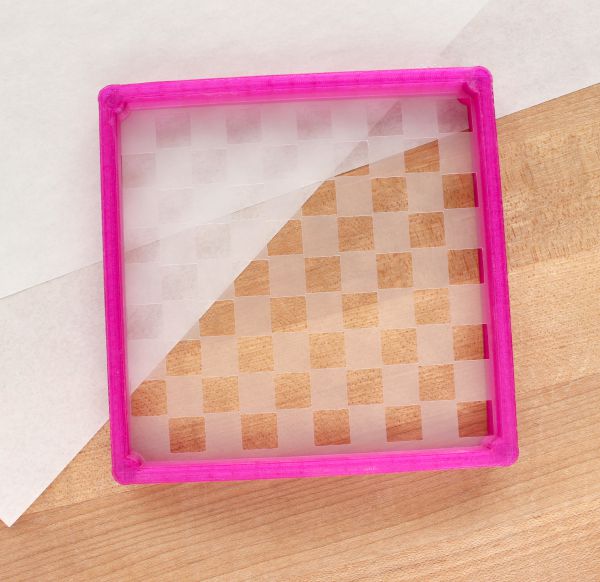
Many of you already use the Stencil Genie, so, this is a review. But for those of you who have not, here’s a quick little overview. The Stencil Genie is made up of four parts. A two-piece frame, plus two additional “Wonderbars” (sold separately) for airbrushing cookies on a stick.  If you look closely you’ll notice that one side of the frame is slightly taller than the other. This is to accommodate cookies of different thicknesses.
 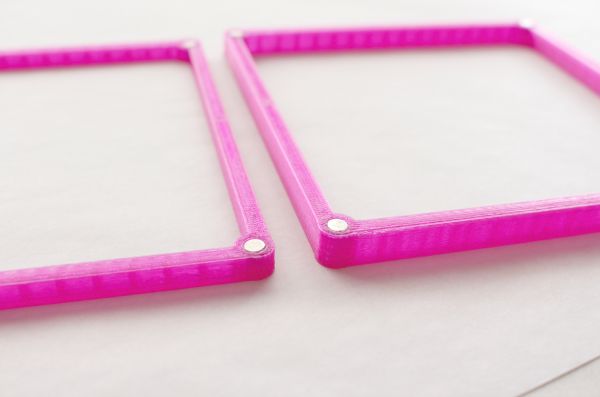 To use the Genie, place the square pieces magnet side-up and position the stencil over one side of the frame.
You may be able to use larger stencils in the Genie, but the best size is a five and a half inch square. I especially like designs from The Cookie Countess, Artfully Designed Creations, and Killer Zebras for my projects.
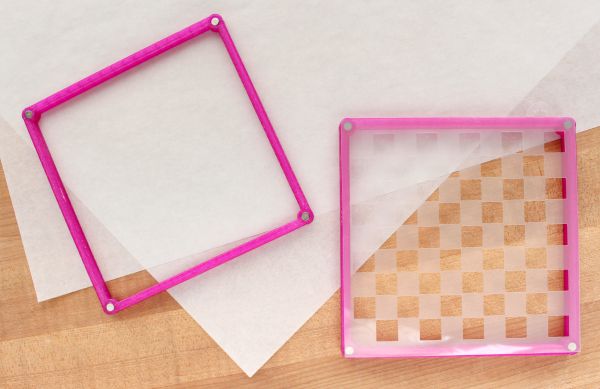 When the stencil is in position, secure it by placing the second side over the bottom, magnets touching.
 Next, place the stencil over a cookie that has been flooded and allowed to dry.
 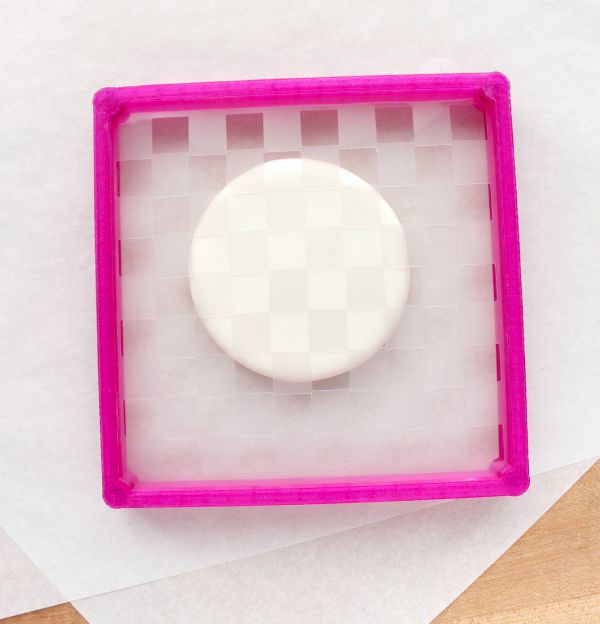 Use icing, an airbrush, or aerosol spray color to apply the color in light, even layers. Remember to be as light handed as possible. If you use too much color or icing the excess can seep under the edges of the stencil and ruin the design.
  After applying the color, carefully remove the frame to reveal a beautifully stenciled cookie.
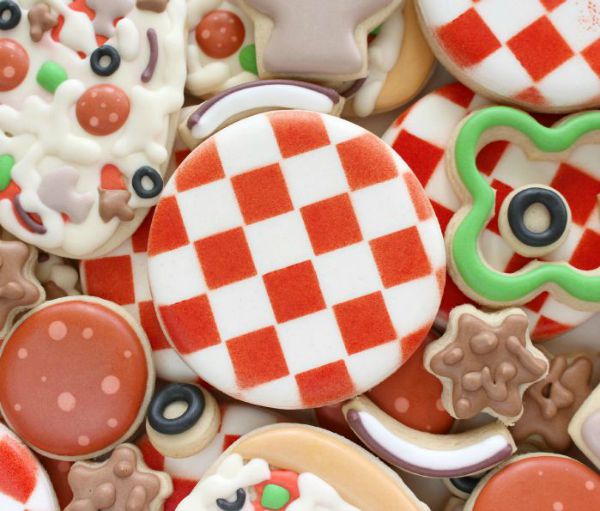
  Stenciled cookies make great stand alone designs, but I especially love to use them in my cookie platters to kind of “tell a story,” if you will.
 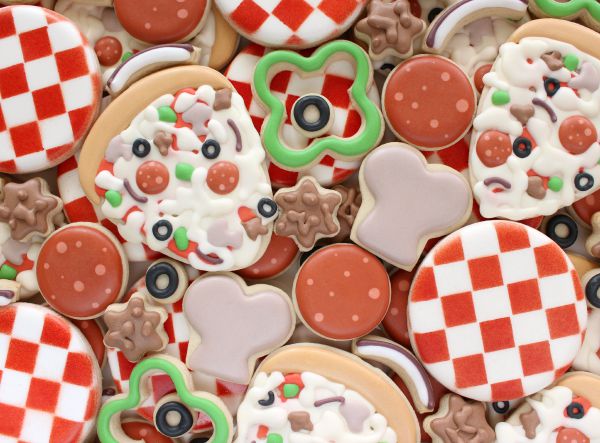 Now that the technical stuff is out of the way let’s talk about the giveaway! In honor of the Stencil Genie’s first birthday, one lucky reader will win:
- one Stencil Genie (second generation with Wonderbars)
- the Air Genie Pro airbrush system
- and five Cookie Countess cookie stencils
Must be 18 years or older to win. Good Luck! a Rafflecopter giveaway


Always wanted a Stencil genie. Just never got me one. Thanks for the chance to win it. You are a good teacher. Love your blog and cookies.
Would love to take my cookie decorating to the next level with these products!
Terry
I would love a chance to win this! I really enjoyed watching the Cookie Countess’ video of her 4th of July stenciled cookies. I knew then that I wanted an airbrush!
Pick me Callye! 😉
I would love to win! I want an air genie to use with my favorite chevron stencil!
How totally ingenious, clever and wonderful! I would love to win this but wanted you to know this Grandma is very impress by your ingenuity!
Oh these look like fun! 🙂 I love the ombre chevron stencil from killer zebras!
I’m still afraid to airbrush!
love your work 🙂
I love these stencils!
I loooooooooove the chevron stencil by the Cookie Countess! This is an incredible prize and I would love the chance to win the stencil genie and airbrush system so that I could recreate some of your amazing cookies! Thanks so much for holding this contest! 🙂
Awesome!!!!
I love the Cher board stencil!
I would love to win!!
This is an awesome giveaway. I like the retro stars.
I’d love to learn to stencil my cookies.chevron is my fav.
There are so many to choose from, but I would have to say the crab one!! You know us Cajuns, we love our seafood!! I had to take a little break from cookie-ing, but am ready to get back to it!
What an awsome tool, i haven’t tried it myself yet, but I have heard only awsome things about the style genie 🙂 Fingers crossed.
I love the 2.0 look. Curvy corners haha
Love the quatrafoil stencil!
I like the baroque pattern! So pretty!
I love my sunburst, straight line, and chevron stencils!
I am partial to the yellow brick road…
I love the paisley stencil! It made an adorable bandana cookie, compliments of a tutorial from Sugarbelle 😉
My favorite stencil design is The cookiecountess’s small quartefoil.
I’ve never used a stencil before for my cookies but I’d like to try some!
This tool looks super fun to use!
My favorite cookie stencil design has got to be the one that makes the bandana design!!!
How can you pick just one?! I love them all!
I don’t know! I haven’t tried stenciling yet!
So excited about this giveaway!!! I love the damask and quatrefoil stencils!!!
I love the baroque and the quatrefoil the most.
I have never used a stencil but would love to win this giveaway…PLEASE!
I like the scales stencil.
I love the ideas they are attractive using stencil
I love the baroque pattern:)
I love the circuit board stencil!
I’ve never used a stencil, but I love the idea of the monograms…a stencil would make it so much easier! The circuit board is also adorable, though.
I love the look of stenciled cookies, but I haven’t gotten into it yet. Maybe this contest will get me started!
I think my favorites are the simple ones, stripes, checkers, harlequin. You can do so much with them!
I love the chevron and the stripes (straight lines)!! I hope I win! I want this so bad!!!
Love what you can do with airbrush and stencils! Would be a dream to win this giveaway and expand my cookie design abilities 🙂
I would love to try this on my next batch of cookies!
I enjoy using classic stripes to create a lot of depth in many different designs
I love chevron & damask designs – fun & classic !
I haven’t actually done any stencilling yet and have been dying to try but am a little scared of the airbrusher. I think the stencil genie might just be the encouragement I need to get started with stencilling!
I’m new to cookie decorating and haven’t used stencils yet. Excited to learn a new skill!
I love chevron and polka dots
I’ve been favoring the houndstooth stencil. Great accent.
I recently ordered a stencil pack of the NYC, London, and Paris skylines… love them!!! I also can’t resist simple pretty damask stencils. 🙂
I love any and all background stencils.
Awesome giveaway! Thanks for the chance to win!
I love the checkered design! Would be adorable for so many cookie shapes!
I think I like the Circuit Board design over at the Cookie Countess the most!
I love the checkerboard. That would be great for Indy 500 weekend!
I have so many of the Cookie Countess stencils, it’s hard to choose just one. I really like the retro stars.
I really like the paisley stencil.
Hi! My favorite stencil is the preppy stripes. As a little girl, my favorite coloring book was Gingham Girls and to this day I still love that pattern. This stencil would be great for making gingham and all sorts of other uses. I like its versatility.
Thanks!
So many cookie possibilities!
I use the Chevron ALL THE TIME
I’ve never used a stencil. I’ve seen a number of designs that are appealing to me
My favorite is the checkerboard since it’s so classic.
I adore your website- thank you so much for the many incredible tutorials, I have used many already! An airbrush would be my next biggest desire for both my cake and cookie decorating, and this stencil genie looks amazing!!! 😀 Here’s hoping 😉
An airbrush is next on my wish list for cookie decorating. I love your designs and I always check out your page for inspiration.
Halloween stencils and Christmas stencils are my favorite. What an amazing giveaway!
Following your blog has taught me so much! I’ve been trying to get up my nerve to purchase an airbrush — perhaps this giveaway is a sign one is coming my way!
Did you ever announce a winner?
Love the buffalo plaid!
This is a great tutorial. Thank for share
Pingback: Sixth Annual Twelve Days of Giving, Day Eleven, The Creative Cookier - The Sweet Adventures of Sugar Belle