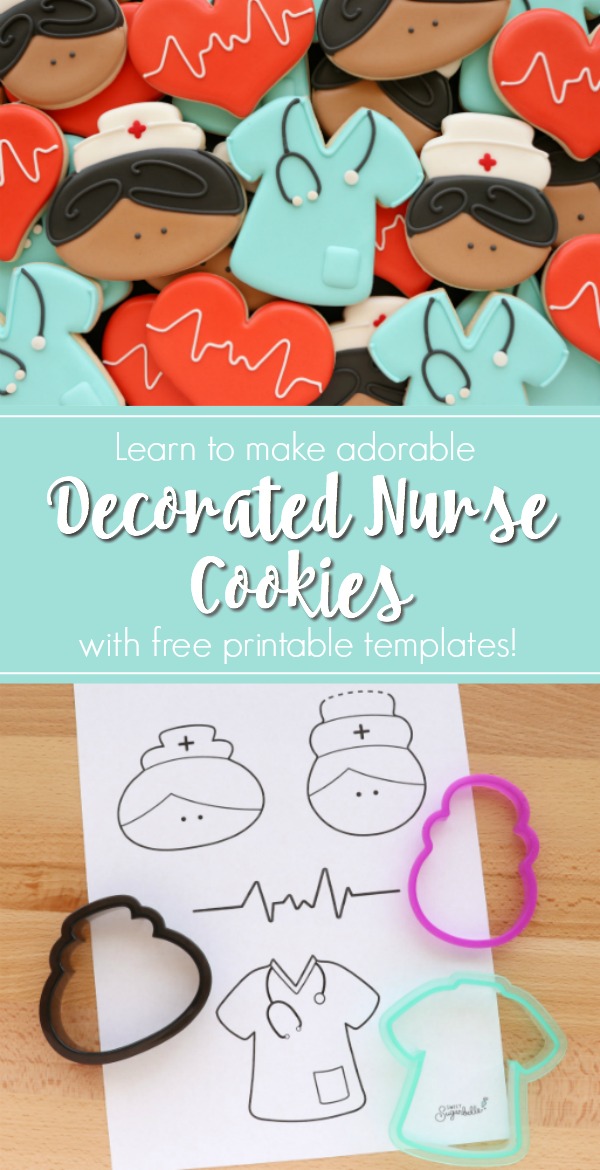
How to Make Decorated Nurse Cookies
I’ve been decorating nurse cookies since the very beginning of this crazy adventure. In fact, this is probably the third or fourth time I’ve featured them on the blog, yet here I am again with another nurse cookie design! After a lot of trial and error, I’ve finally come up with a winner.
 I’ve been decorating nurse cookies since the very beginning of this crazy adventure. In fact, this is probably the third or fourth time I’ve featured them on the blog, yet here I am again with another nurse cookie design! After a lot of trial and error, I’ve finally come up with a winner.
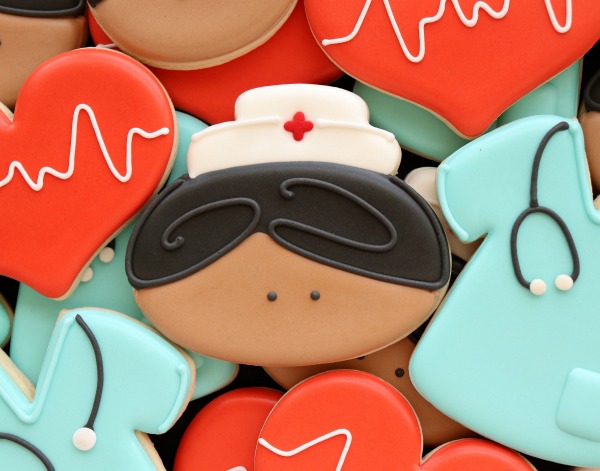
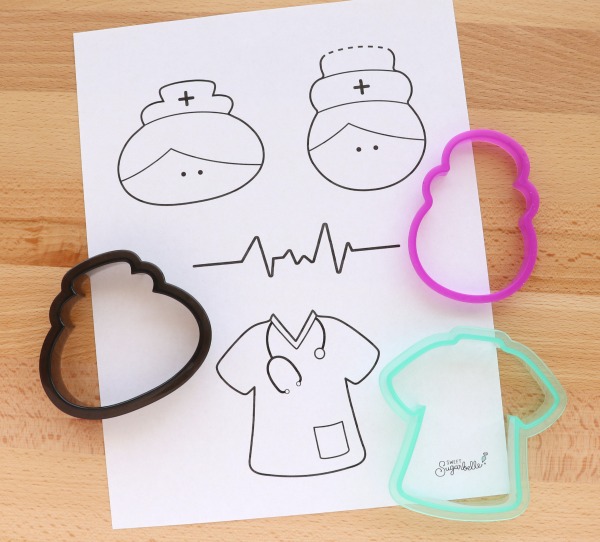
To make things as easy for you, I’ve created free printable templates so you can recreate these designs with ease. To print yours, click here. If you’re not sure how decorating templates work, check out this post.
To make these cookies you will need:
Supplies
- Skull cookie cutter (I used a skull from my 2017 Halloween set, and a generic skull that’s widely available during the Halloween season)
- Curved edge cutter
- Disposable decorating bags
- Couplers
- Icing bag ties
- Icing tips #2
- Icing bottles
- Decorating tweezers
Icing
- White piping and flood icing
- Black piping and flood icing
- Flesh-colored piping and flood icing
- Wilton XO sprinkles, or a small amount of red piping icing
Tip: Personalize your cookies by changing hair and skin color
Depending on which cutters you choose, the cookies may require a pre-baking trim. My Halloween skull worked well as-is, but I used the curved edger to trim the second skull.
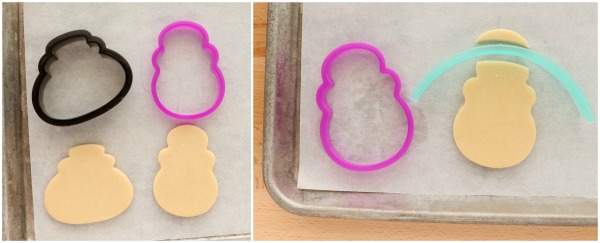
Once the cookies are baked, you are ready to decorate!
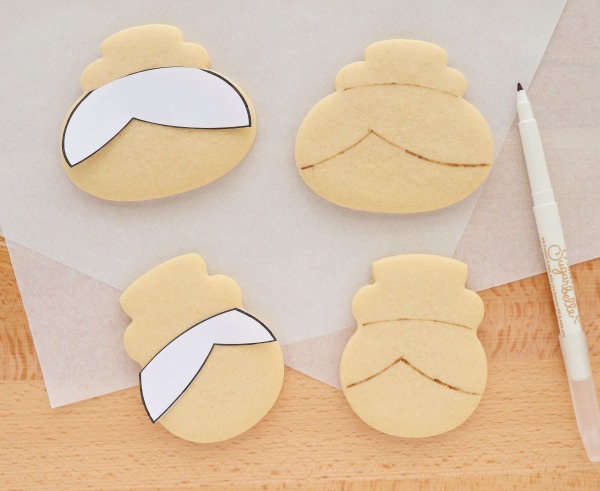
Step 1: Cut the decorating template into sections, and use a food color marker to trace the design onto the cookie.
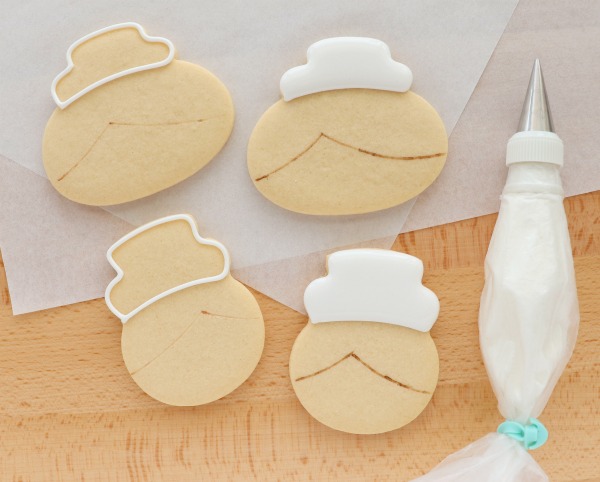
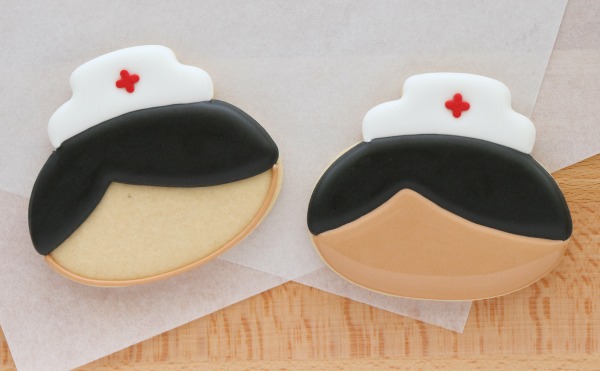
Step 2: Use white piping icing and a #2 tip to outline the hat, then flood the outline once it has set.
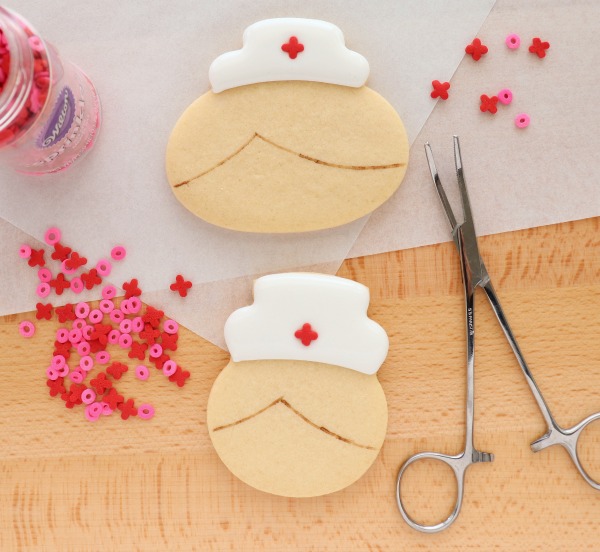
Step 3: Wait a minute or so, then drop a red “X” sprinkle into the wet icing. Use tweezers for accuracy. If you can’t find the sprinkles below, use piping icing to add a red cross in step 6.
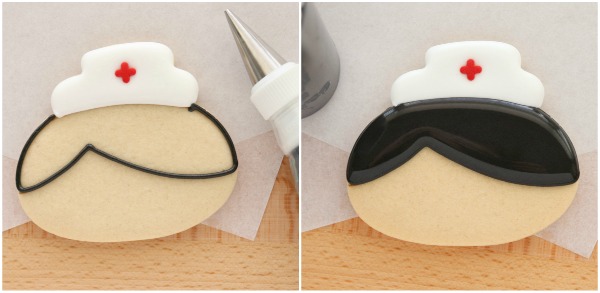
Step 4: When the white icing is dry, outline and flood the next section to create hair.
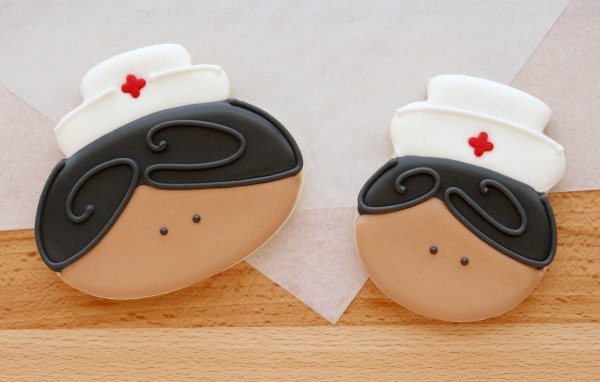
Step 5: When the second section is dry, finish up by using a #2 tip to outline and flood the face.
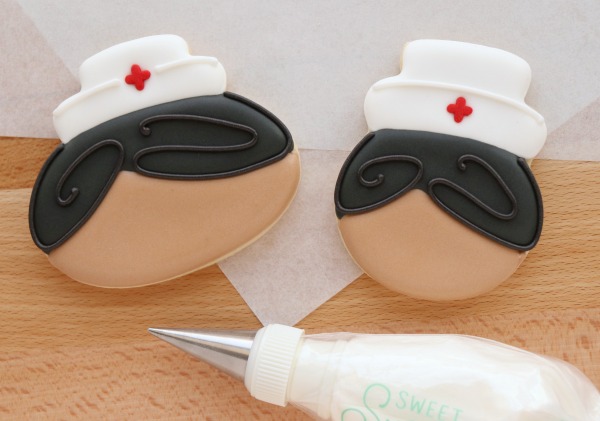
Step 6: When the base layer is dry, it’s time to add a few final details. I used an #1 Ateco tip to add a little line to the hat, and a few swirls to create hair.
Step 7: Last but not least, add facial details. I stuck with eyes, but these would look great with tiny heart sprinkle lips (add in step 5) or sweet rosy cheeks.
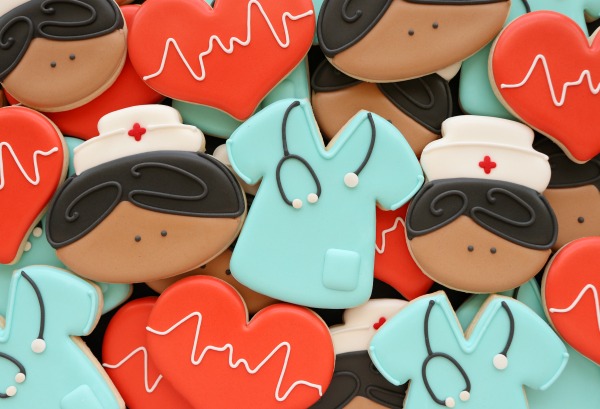
I mixed my sweet little nurses with simple scrubs and hearts, which are also included on the printable template sheet.
And for the record, I didn’t forget the boys, I just didn’t have an idea in mind when I made this set…which means one of these days, you may just see another nurse cookie set! The more the merrier, right?
If you have any questions, please leave a comment below, and don’t forget to check out some of my favorite nurse cookie designs:
- Nurse Cookies by Blyss Cookies
- How to Make Bandaid Colored Royal Icing
- Nurse cookies made with a ring cutter via Jill FCS
- Get Well Soon Cookies
- EKG Cookies via I Am Baker
- Get Well Soon Sugar Cookies via Sugar Dot Cookies


Simply sweet! Thanks for sharing.
Goodness – the use of the “X” – that was just pure, pure genius!
Wow! These are adorable! Love your products and step by step instructions!
Such cute nurse cookies! Thank you for the post! 🙂
I believe you nailed it ! Very Cute!
I love these cute little cookies but wish people would stop representing nurses with the silly white cap with red cross on it. Nurses lobbied and worked hard over decades to get rid of that hat as the costume and porn industries began using it as a derogatory representation of women. They continue to do so today. Nursing caps disappeared permanently from our attire in the 70’s because they were not only sexist but an oppressive symbol of subordination to doctors. As a seasoned charge nurse (who loves to bake cookies) I would respectfully ask you and your followers to please represent nurses as the highly educated and skilled professionals that they are. Perhaps you could replace the redundant white cap with an OR scrub cap instead. It would be more appropriate and every nurse I know will thank you.
I have to respectfully disagree as a nurse of 20 years and cookie decorator myself. The nursing cap is a part of our history. They were originally worn to keep a nurse’s hair neat and tidy and to allow the public to distinguish individuals as nurse’s. Although now no longer part of a nurse’s uniform, many nursing students, myself included, wear them at graduation and in graduation pictures proudly as a nod to Florence Nightingale and nursing history. Yes it is true that there are costumes that portray nurse’s in a sexual manner but the same can be said of many professional uniforms (sexy doctor, sexy cop, ECT..). So I do not take offense at all to the nursing cap but rather embrace it as it is a sign of my nursing history.
I’m a nurse & I love these! Where is the shirt / scrub top cutter from?
That’s from my newest Shape Shifers set. Here’s a link: https://www.hsn.com/products/sweet-sugarbelle-shape-shifters-cookie-cutters-set/8661489
Judith and Stephanie,
I agree with both of you, the nursing hat is very outdated and we don’t wear them anymore. The same can be said for a doctor’s home visit bag. And I always wonder how teachers feel being represented by an apple, pencil, ruler and chalkboard (which they don’t use chalkboards anymore either). I do smile at the EKG rhythm on the heart cookie, this poor patient has some cardiac issues! However……I am totally in favor of anything that recognizes nurses and portrays us in a positive way…and these cookies check both those boxes. The hat is our history and is recognizable, just like any major brand label’s logo, and boy are they really, really cute! Thank you Callye for thinking of us nurses : )
It’s funny, I totally thought of that when I made them. Nurses rarely wear hats anymore (I’ve seen a few graduations where students still wear them) but it’s symbolic, like you said. I actually went down a list of things that are universally recognized symbols, and it made me kind of nostalgic to realize how many things we associate with certain professions/themes that simply don’t exist anymore. The list gets longer and longer, right? But really, what I wanted to say, is that I appreciate your willingness to see both points of view.
An idea for you – I used your cheerleader cutter to do a nurse. You have to cut the pompoms off, but it works out great!
I’d love to see that! That’s a great idea!
How long does it take for the outline to dry before you flood the inside?
Really only 2-3 minutes, but you’ve got to be gentle. If you’re just starting, it’s best to wait 20 or so minutes. I do this by doing most of my outlining first then coming back to fill. By the time I’ve outlined 2-3 dozen cookies, they’re dry enough to move on.
Where to buy the XO? Love all the designs, thank you so much!
I got them at Walmart around Valentine’s. I’ll look for a link, but if I don’t find one, things like these usually come back every year ?
Is there a link to that heart shape? I’ve seen it pictured often but I can’t find it on your page.
That one comes in either the beginner set or in the original Shape Shifters set. I believe How Sweet Is That? has both: http://howsweetisthat.ca/on-line-store.php#!/Every-Day-Cookie-Cutter-Sets/c/19621060/offset=0&sort=nameAsc
I just want to say how happy it makes me to see your sets in stores!! I’ve been following you for years and you made the process of cookie decorating so much easier and so much fun! Congrats on all the success and keep up the awesome work!!
Thank you. I am still in awe, and so very grateful that I have a job I love!
I absolutely love this and am ecstatic to finally find an actual step by step guide that makes sense while also leaving me with a feeling of confidence before my attempt
Which cutter do I purchase to doe the Scrub and the 2 different nurses?
Which cutters can I purchase to do the nurses, scrubs, and heart? I love them .
Hi! I work with a nurse who is retiring. She started nursing in 1965!!! She’s my hero! Her last day of work will be the last Wed. in December 2018. I’m making these cookie for her, they are so cute!! She once told me that she loved the nurses cap! I’ve tried very hard to find the XO sprinkles. They seem to be out of stock right now. Does anyone know where I might get them? I only need about 3 doz X’s