Decorated Pilgrim Cookies with Color Me Cookie {Guest Post}
Hello, I’m Adrianne, from Color Me Cookie, and I have been decorating cookies for almost three years now. Last year, I made pilgrim cookies for thanksgiving and loved how they turned out. I am very excited to show how I transformed my favorite gnome cutter into these precious pilgrims.
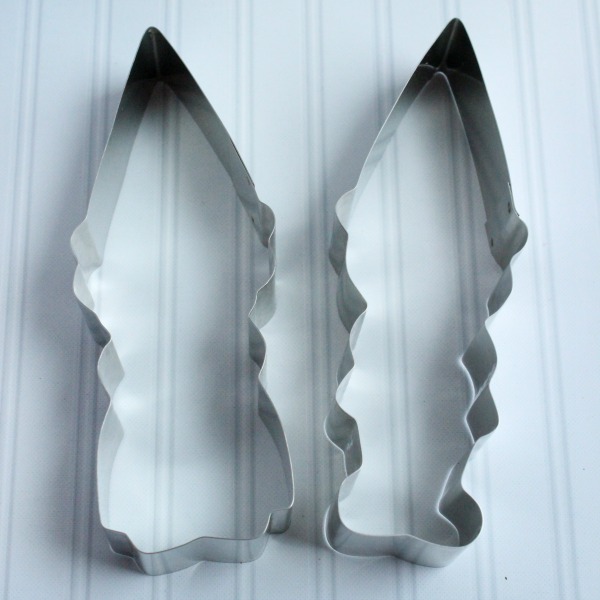
 I’ve said it before, I love cutters that can be used in a variety of ways. Two of my favorites are these gnome cutters by Klickitat Street.
 I’ve used these cutters for almost every holiday, dressing them up in different costumes to fit the season. You may remember my Santa, Mrs. Claus, and elves from last year.
I also created Halloween trick or treaters in different costumes for the Go Bo! Foundation Bake Sale. There are endless possibilities for these cutters. Get creative and have fun.
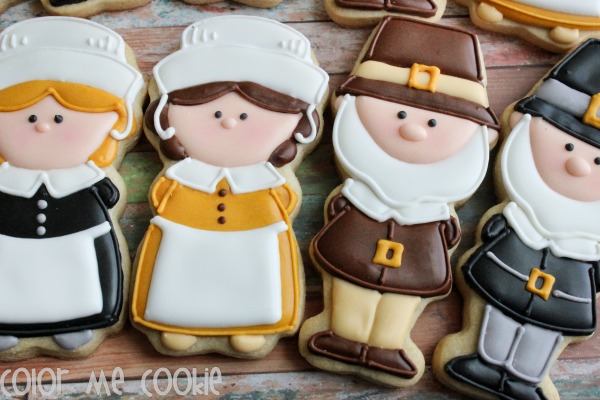
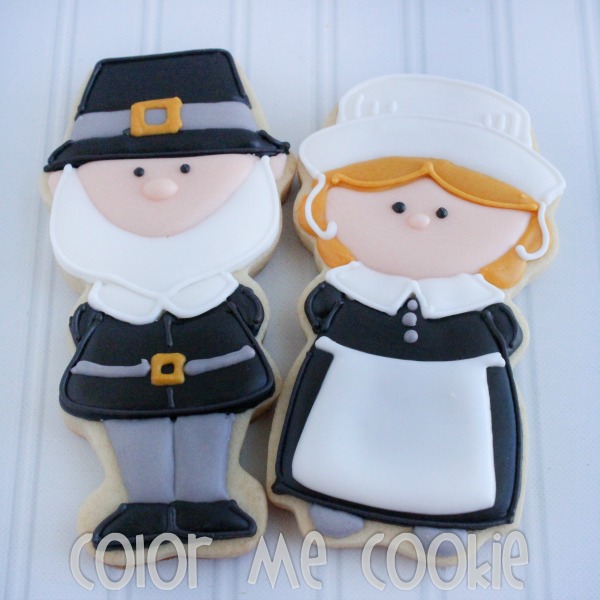
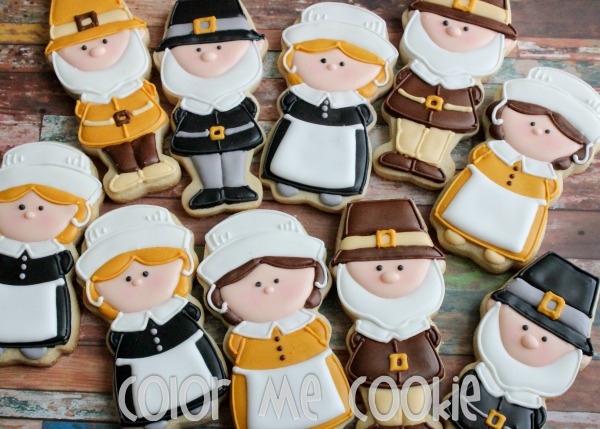
 Since some people are bothered by the bitterness of black icing I tried some new colors for this year. A brown and gold color palette is a great substitution for all black clothing. Either way, these pilgrims will be the cutest guests at your dinner table.
To make these cookies here’s what you’ll need:
- Klickitat Street’s gnome cutters
- Icing somewhat thicker than flood icing (20-second icing) in black, white, grey, gold, and flesh tone
- Pink petal dust
- Small food safe brush
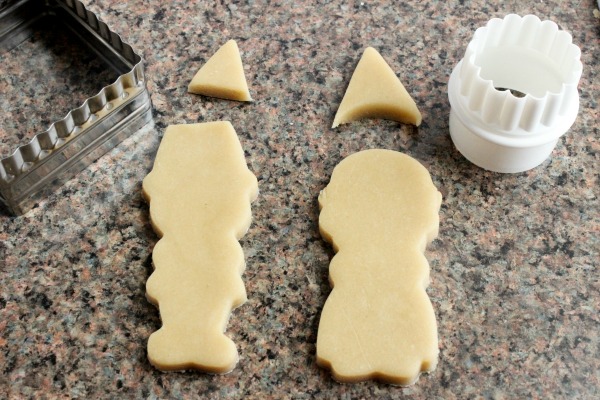
Begin by trimming the gnome’s hats. The man needs a flat top, so cut the edge with straight-edged cutter. Be sure to leave enough room for a band and buckle and also the upper portion of the hat.
The woman’s hat needs to be trimmed into a rounder, bonnet-like shape. I used a small circular cutter for that.
 To decorate, follow the steps below leaving a bit of drying time in between sections. Begin by applying the faces.
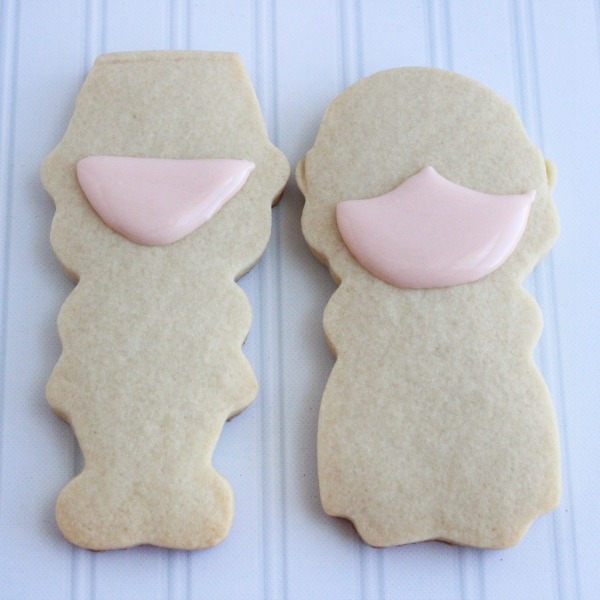 Next, use 20-second icing to add the white and black sections pictured below.
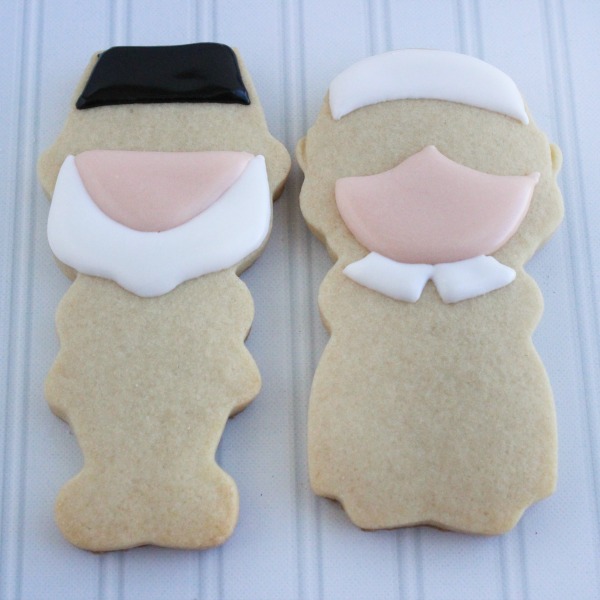 After a bit of time has passed, fill a few more sections including the hair and clothing.
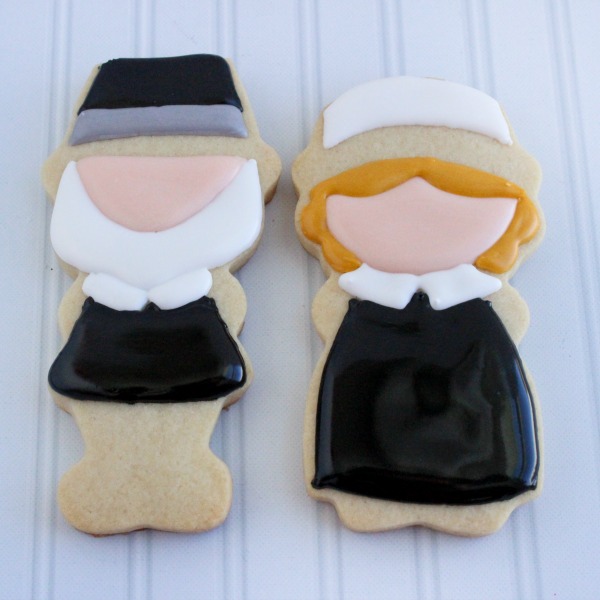 Wait a bit longer, then fill the remaining sections. It may seem that there’s a lot of waiting in-between sections, but this is to ensure the colors won’t bleed into one another…something I hate!
 When the base is filled let the cookie dry. This will ensure that you’re able to add the final details without damaging the layer underneath. Finish up by piping eyes, noses, buckles, belts, or blushing cheeks, and add any other details you’d like.
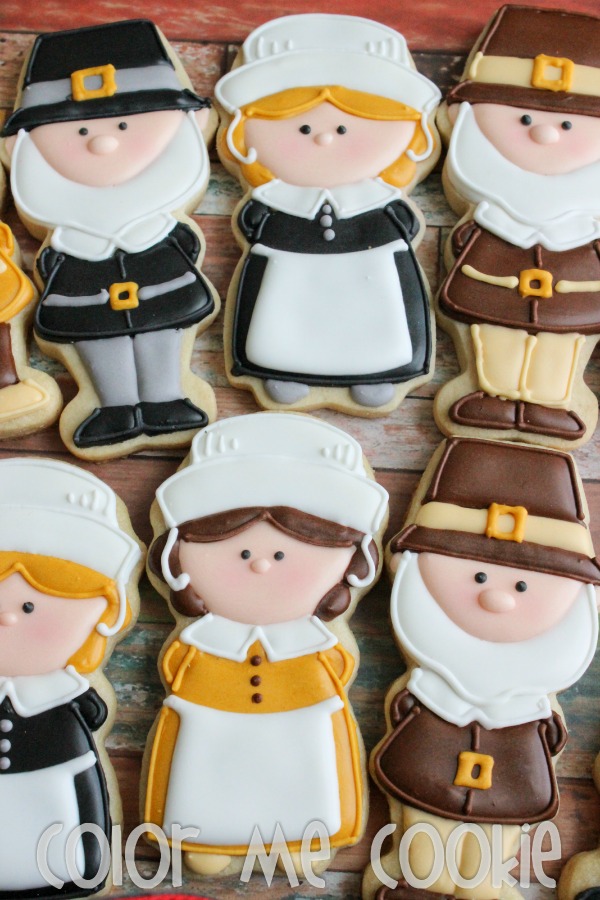
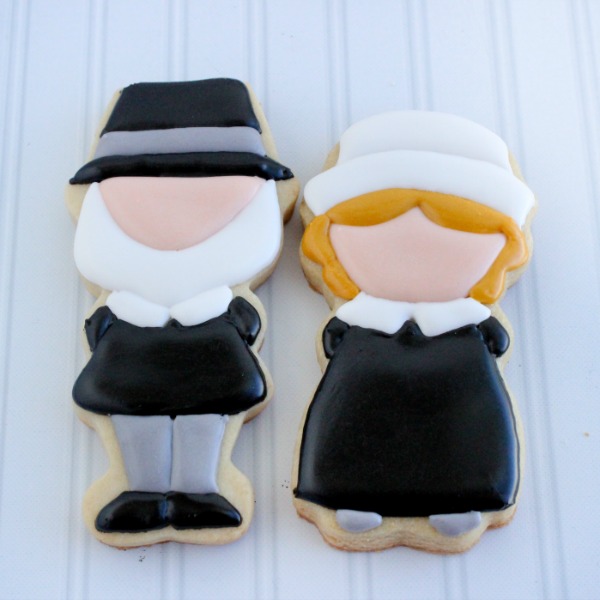
 If you look closely at each of my pilgrims you’ll notice that each one is a little different. Sometimes it takes a few cookies to figure out what look I like best. In this case, after outlining a few, I thought to myself, “Why’d I do that?”
It was then I realized I liked them better without the outlining. That’s just part of the process. That the details and colors you select are what makes the design unique to you.
I hope you’ll make these for your Thanksgiving feast.
 Be sure to follow Color Me Cookie on Facebook to keep up with Adrienne’s latest creations…or, if you’re not into decorating yourself, order cookies of your own.
For more fun Thanksgiving cookie ideas, check out the following posts:


Cute. I very much like this post.
Adrianne, Thanks for the great tutorial. The pilgrims are adorable. I am buying these gnome cutters soon! Hope you come back and post more tutorials on how to make more cookies with these gnome cutters:)
Thanks for the great tutorial. I have these cutters and have not used them enough. I will be trying some pilgrims for sure.
Love your tutorial. So clear and easy to follow. Would love to make these for Thanksgiving. Thank you!
WOW! Cutest pilgrims EVER!! I must have those cutters. Thanks for sharing!
Such adorable cookies and a wonderful tutorial. Great idea to use the gnome cutters…they make for cute little pilgrims for sure!!
Thank you so much!! Adorable, great job.
OH MY WORD!!! THESE ARE SO ADORABLE!!!
Adrianne, you are the master of the gnome cutter. Each and every figure you create using them is so stinkin’ ADORABLE!
Wow, these cookies are so beautiful!!! I like a lot these gnome cookie cutters (ups, these cutters are not on sale now, what a pity!).
The cutters are available now 🙂
https://www.etsy.com/listing/165332937/boy-and-girl-gnome-cookie-cutters-6?ref=listing-shop-header-0
Adrianne, these cookies are beyond adorable!Thanks for sharing your tutorial.
They are available again!! https://www.etsy.com/listing/165332937/boy-and-girl-gnome-cookie-cutters-6?ref=listing-shop-header-0
Hi Adrianne! I just want to congratulate you for an awesome output ! If you dont mind can you show us how to trnsform Spongebob into cookies? thank you so much Because I do love spongebob!
these are sooo cute! I invite you to share at my Thursday blog hop. Hugs!
Thank you for all your WONDERFUL instructions on cookies. I bake only for family and friends and once a month for our local USO. Your designs and hints are awesome and the USO branch here loves you!!!