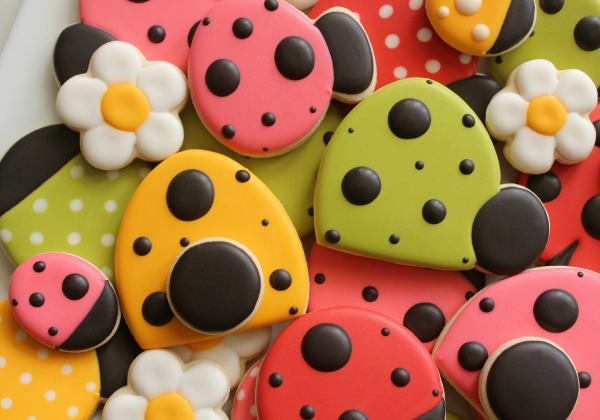
Decorated Ladybug Cookies
Over the years, I’ve decorated more ladybug cookies than I can count. To keep things fresh, I like to experiment with new colors and designs. This is the latest batch to come out of my kitchen.
 These little ladies are unbelievably simple to make. I created both versions with an egg and small circle cutter.
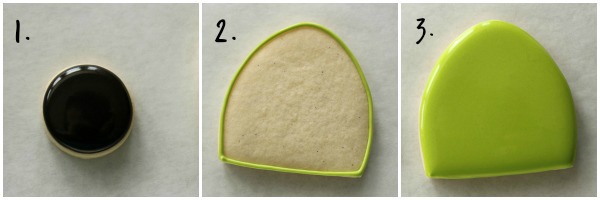
To make the first version, cut the bottom from the egg and gently position the circle into a pre-cut notch.
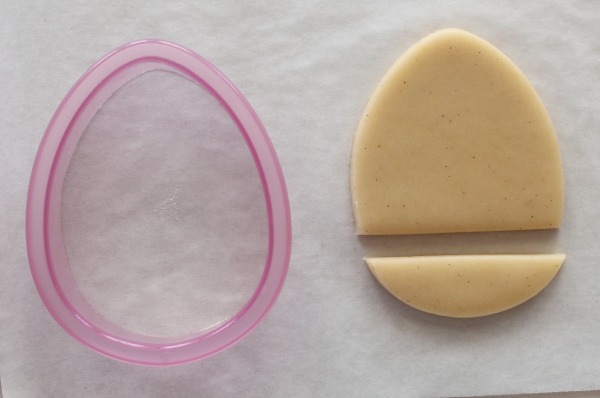
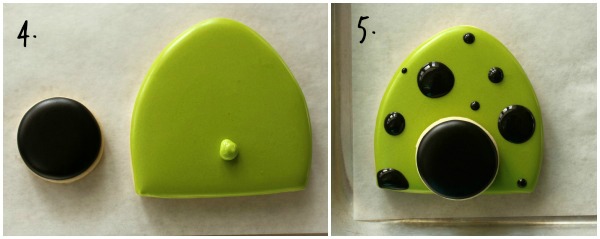
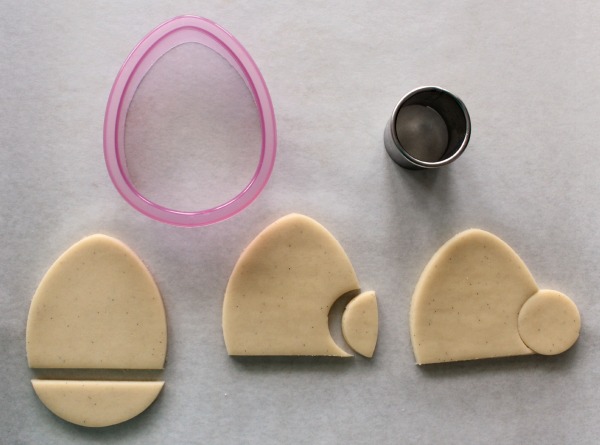 Version two, which also happens to be my favorite, is even easier . Simply trim the bottom of the egg and bake a separate circle for the head.
 To decorate these cookies you will need:
- Black 20-second icing
- Piping and flood icing in the color of your choice {to make red icing that does not have a bitter taste, check out this post}
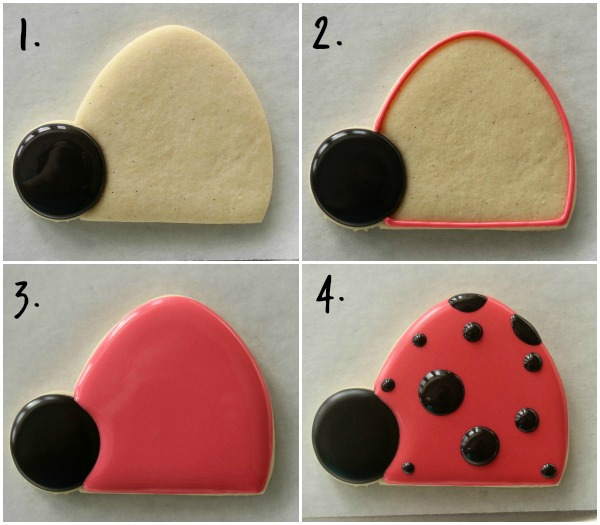
For version one, follow the steps below:
- Use black 20-second icing to fill the head portion of the cookie
- Outline body in the color of your choice
- Flood the body
- When the base is completely dry, use 20-second icing to add dots
 To decorate version two:
- Use black 20-second icing to flood the head portion of the cookie
- Outline the body in the color of your choice
- Flood the body
- When the cookies are completely dry, use a bit of piping icing to attach the head
- Use 20-second icing to add dots
 Easy, easy, easy and oh so cute!
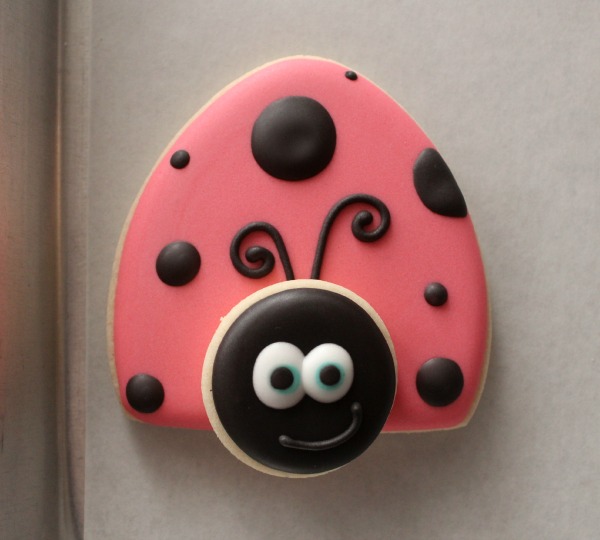
If you’re looking for a lady with a bit more personality, add antennae, eyes…the possibilities are endless. I’m pretty sure I’ll me making ladybug cookies again very soon!
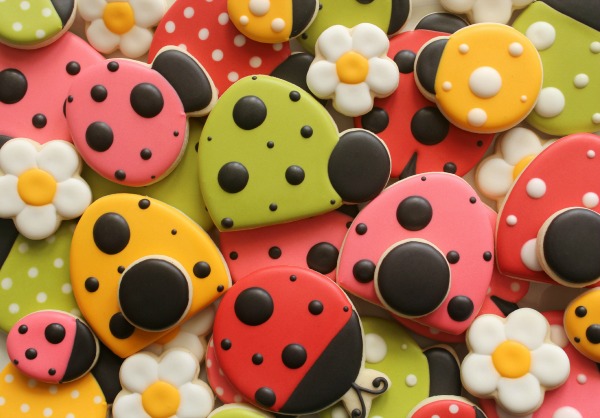
 To add interest mix with flowers and other ladybug designs.
 For more adorable ladybug inspiration, be sure to check out the following links:


I have seen a million ladybug cookies but, these are hands down my favorite! The colors, the shapes, everything is PERFECT!
Way too cute!!!!! These ladybugs have just been moved to my “bake today” list!!!
The Queen of Cookies is Back!!!!!!!! Love the Lady bug!!!! So So Cute.
omg I LOVE these! They are so classy and modern! The eyes are cute, but I think I even like the plain one betters. So fun with the different size spots and gorgeous colors!
So darn C-U-T-E Callye! They definately have oodles of personality. I especially love the one with the googlie eyes.
Darling!! I particular love that you added other colors and even white spots – never would have thought of that. It sets off the platter so perfectly!
These are so adorable Callye! I bought Abigail a ladybug dress last week and now all I can think about is making ladybug cookies – when my schedule allows! Yours are just too cute! I don’t know how you make time for cookies with 3 children AND a newborn baby! You’re amazing! Cristin
This is adorable! I would have never thought to do a side view of a lady bug 🙂
Pingback: Royal Icing Flower Centers and Free Printable Templates
Pingback: Cute Ladybug Cookies