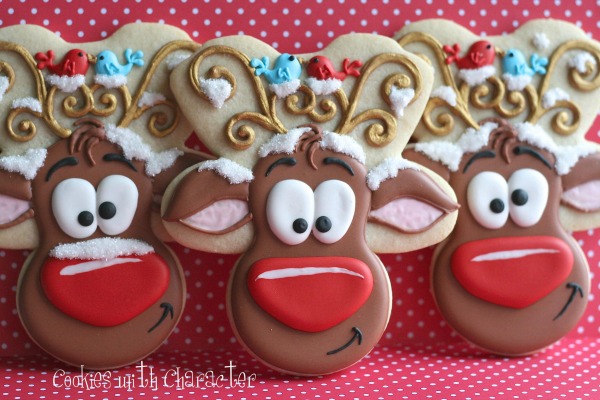
Whimsical Reindeer Cookies with Cookies with Character {Guest Post}
What happens when a former Disney animator becomes a cookie artisan? Amazing things, is all.
 What happens when a former Disney animator becomes a cookie artisan? Amazing things, is all.
I fell in love with Krista, of Cookies with Character a few years ago. Besides being amazingly perfect, her cookies have so much…CHARACTER!
When this amazing cookie landed in my inbox, I was completely inspired. I’ve seen gingerbread reindeer, but never like this!
![]() Hey there fellow cookie lovers! I’m Krista from Cookies with Character.
Hey there fellow cookie lovers! I’m Krista from Cookies with Character.
When Callye asked me to do a guest post, first I picked myself up off the floor, then I started racking my brain for just the right thing to do. These fun whimsical reindeer were something that I have always wanted to do, so what a better time than now? Thanks for having me!
 I’d like to say that this is not my original idea. The idea of reindeer made on an upside down gingerbread cookie has been around for a long while. This is my take on it.
Supplies:
- Baked “Female” Gingerbread cookies in any size {I used a cutter like this}
- Brown piping and flood icing
- Pink flood icing
- Red 20-second icing
- Blue 20-second icing
- White 20-second icing
- Black piping icing
- White sugar sprinkles
- Gold petal dust and some form of alcohol to mix with it {I use vodka but any extract with a percentage of alcohol will do}
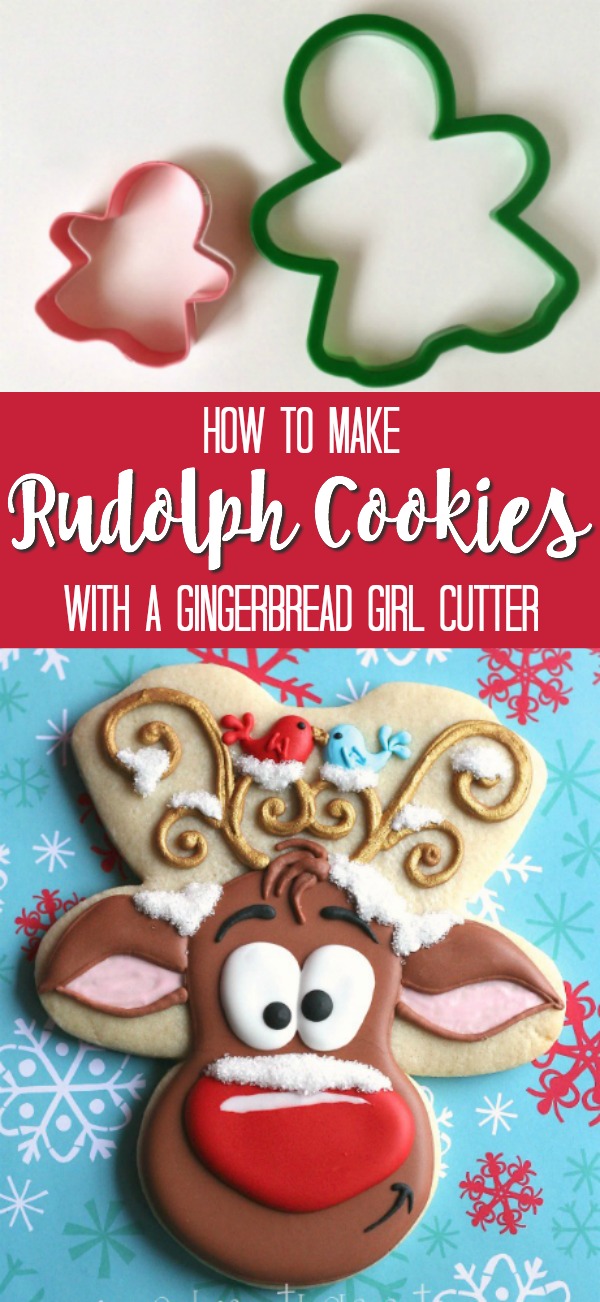
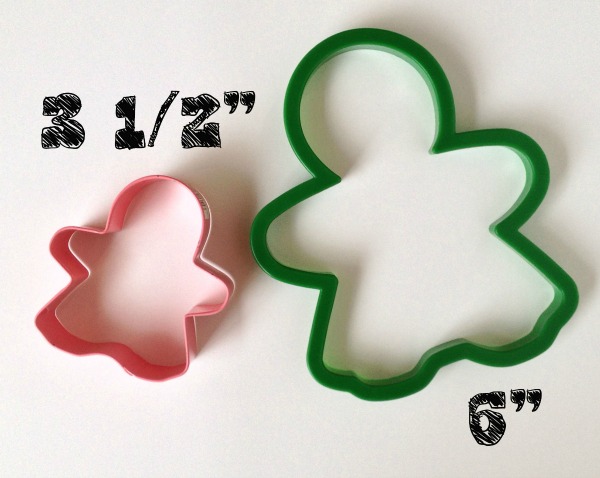
First off, choose a cutter. I went with a large gingerbread cookie cutter, six inches to be exact, because I knew my kids would love them. You can pick any size you want.
 Flip the cutter upside down. I chose the female gingerbread because of the skirt allows more room for the lovebirds and whimsical antlers.
Begin by outlining the head of the reindeer with edible markers. Sketching a design on a cookie before hand is a great way to keep things straight, especially if you don’t have a Kopykake.
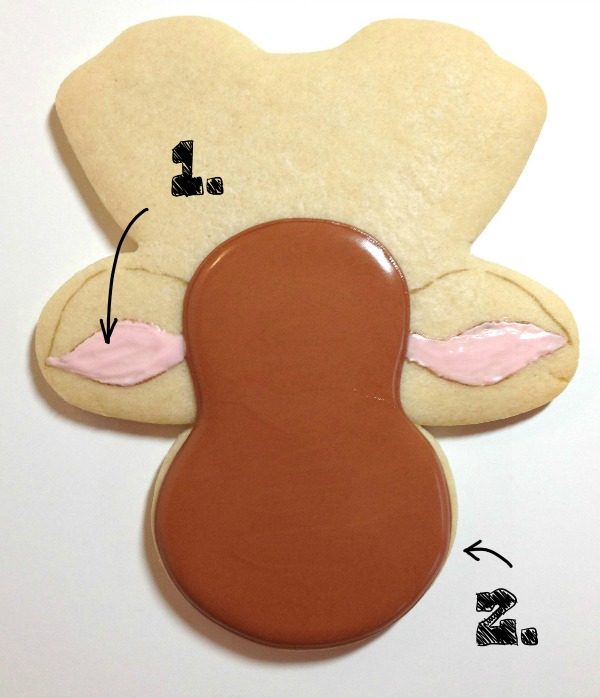
Just make a big heavy bottomed pear shape, then add some big ‘ol floppy ears.
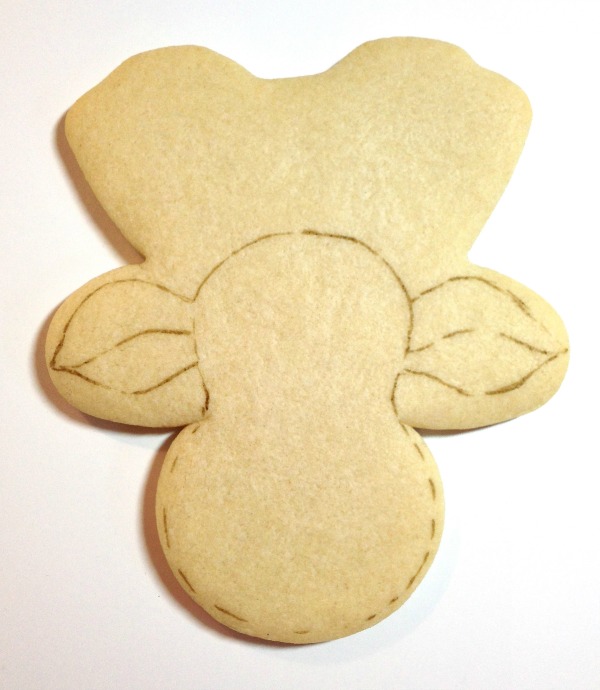 Brush a very light coat of flood consistency pink icing on what will be the inside of the ears. This will dry fast due to how thin it is.
 - Outline and flood head and snout with brown.
 Next, outline and flood ears, squeezing a little heavy on the lower line on the ears.
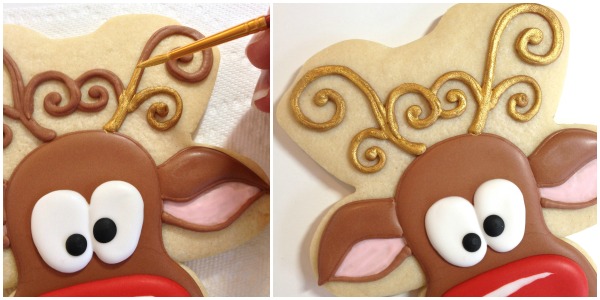
 Grab your edible marker again and draw on the antlers.
- Pipe the antlers on to the desired thickness.
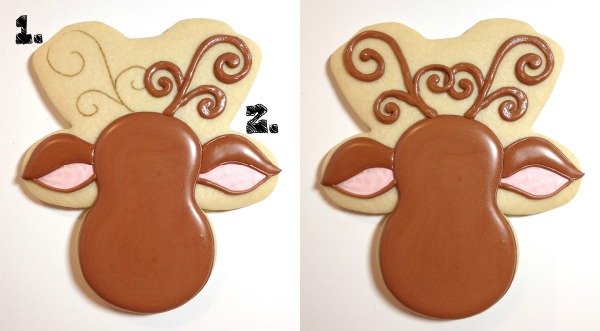 Let the antlers dry completely! Its very important that you let the antlers dry for at least twelve hours before the gold painting. Otherwise the icing will pit.
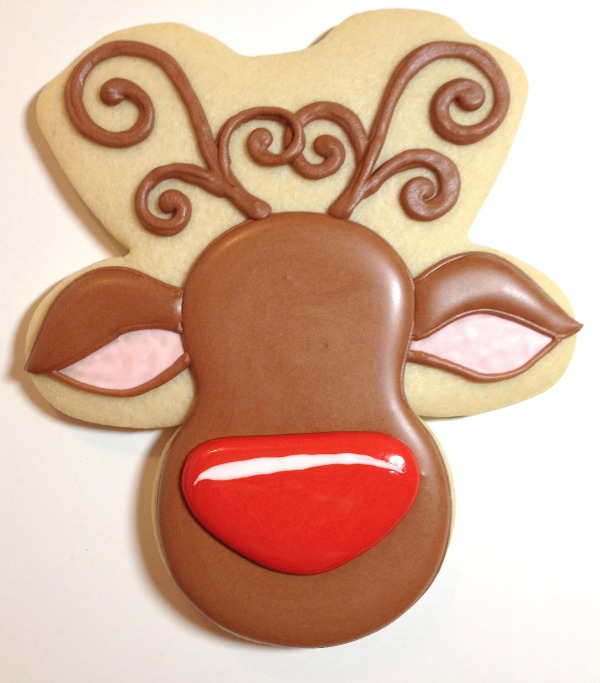
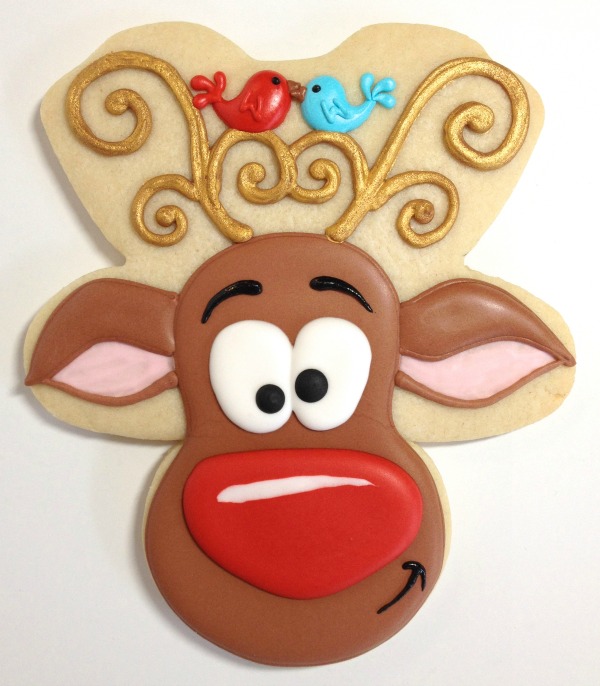
Using the red icing pipe on a large cute nose. While it is wet, use the white icing and a #2 tip to pipe one reflection line across the top of the nose. Tap the cookie lightly to make the white icing settle into the red.
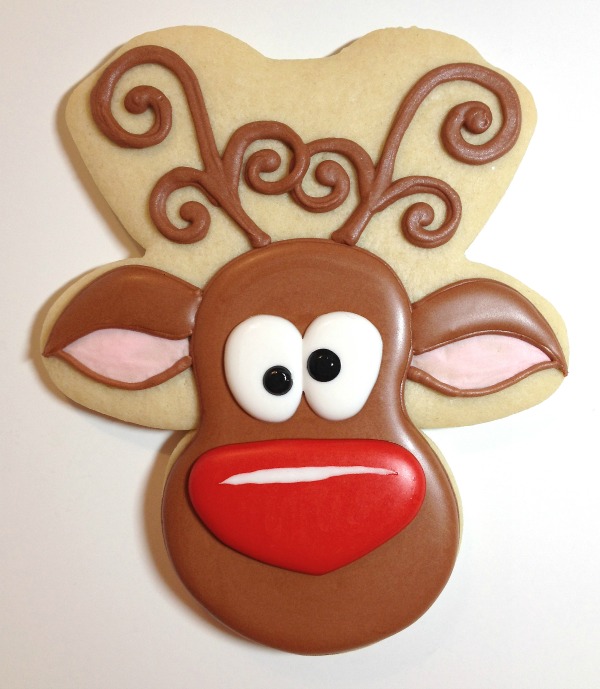
 Pipe one large oval with the white icing and immediately add a pupil. Allow the first eye to dry for about ten minutes before doing the other one so they don’t become one large lump.
 Once the antlers have had time to dry, paint them gold using a paint brush. They should be dry after at least 30 minutes and ready for the next step.
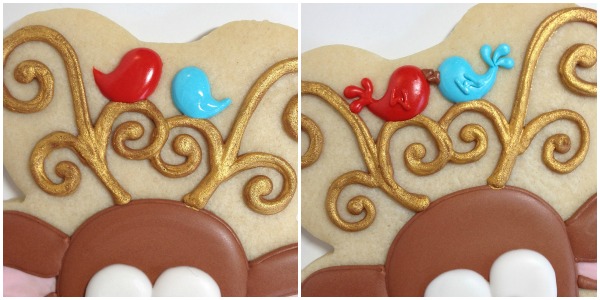
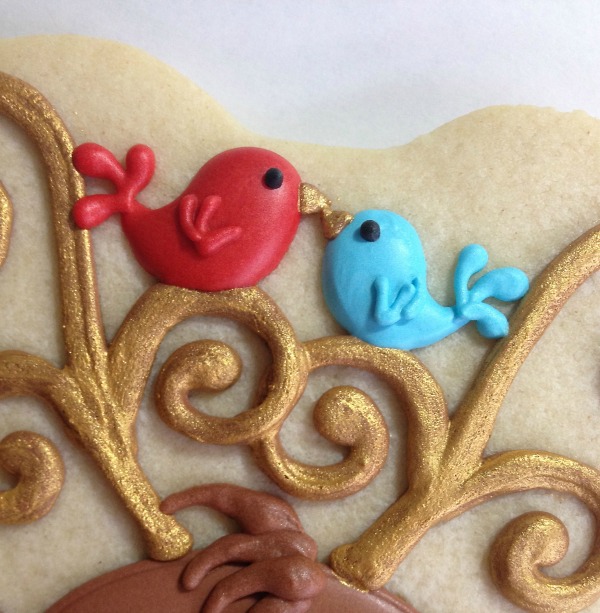
 Using the red and blue icing pipe little birdies on the antlers. You really could do them anywhere and in any position you like. Use a toothpick, boo-boo stick or scribe to drag up the tail, into a nice point.
Add details, such as feather tails, wings and little beaks in the brown piping icing.
 Next, add the black elements: eyebrows, small crooked smile, and the dot eyes on the birds
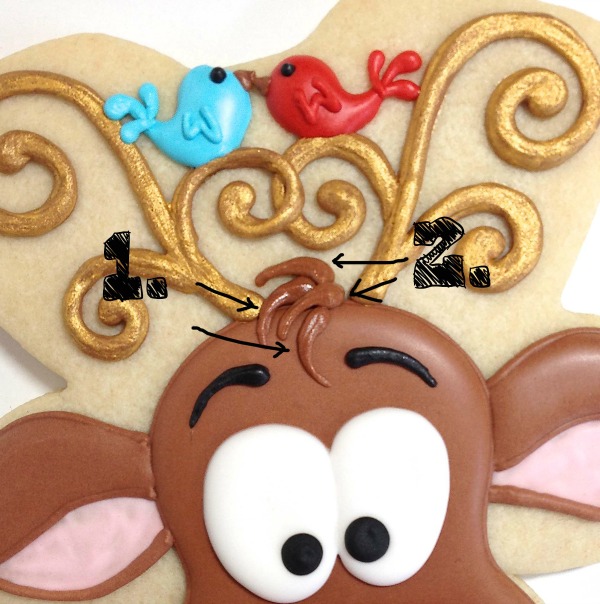
 To create the small hairs, pipe them in opposite order.
- Pipe the second and fourth one
- Then pipe the first and third
 Also, don’t forget to paint the little beaks gold. It’s the little things.
 Looking at the cookie I felt it needed a little more detail, so, I added some white piping icing as snow.
While the snow was still wet, I sprinkled with white sanding sugar. Make sure the rest of the reindeer is dry before you dump the sprinkles on it, of course!
Feel free to add any other snowy elements. I tossed in just a few snowflake shaped sprinkles.
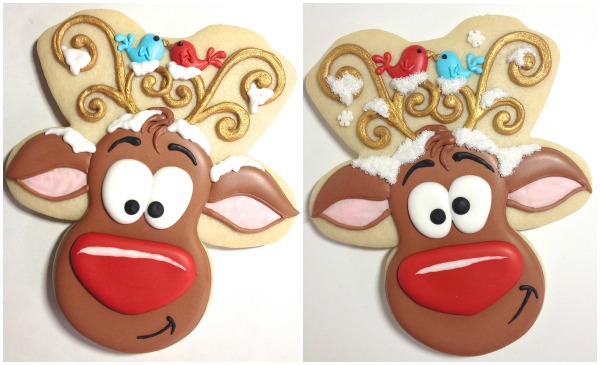 And just for fun, a little snow on his nose!
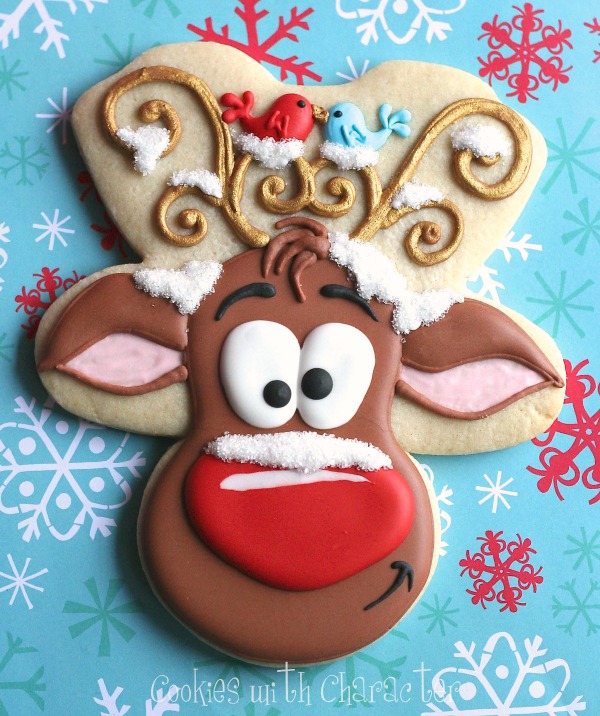 Anyway you do it, these little-big guys are so much fun to make.
Happy Holidays everyone!
![]() Be sure to “like” Krista’s Facebook page, Cookies with Character and follow her blog, here!
Be sure to “like” Krista’s Facebook page, Cookies with Character and follow her blog, here!
For more Christmas characters, check out these posts:


