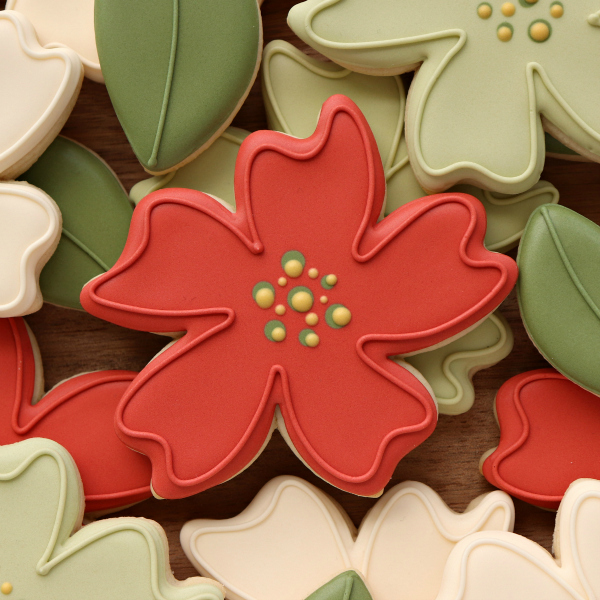
Whimsical Decorated Poinsettia Cookies
When Georganne (Lila Loa) and I began organizing this old-school ‘Christmas in July’ “blog-hop,” I was super pumped! I had big plans to pull out my external hard drive and choose from my long to-do list of cookie ideas and sketches. Except, my hard drive was hopelessly lost and a few unexpected things came up at my day job. Add these to the fact that it’s my nature to procrastinate, and my kids are out of school for the summer, and… I blinked and it was July 23rd! I hadn’t even started THOUGHT ABOUT my cookies!
As I went back and forth in my mind, simultaneously kicking myself and trying to figure out what to do, it hit me! In addition to sharing how I made whimsical decorated poinsettia cookies, I’d share something even more useful… my SERIOUSLY tried and true tips for making cookies in a crunch.
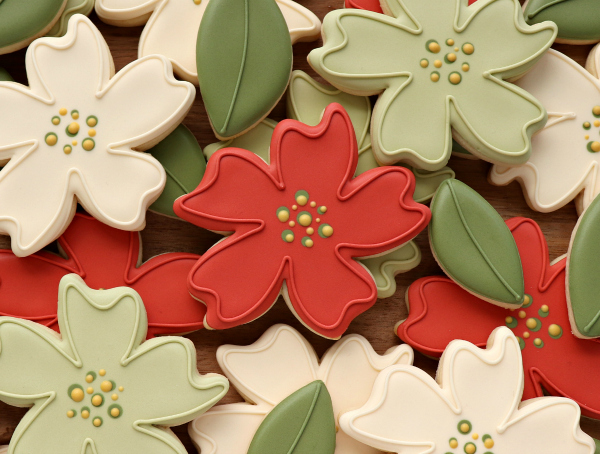
First, I always try to keep things as simple as possible. Instead of debuting a new design, I try to choose fun and easy designs that I’ve made before. To take it up a notch, I use pretty palettes and incorporate simple, smaller cookies to add color and texture to create an eye-catching display. While it takes a bit of time to mix extra colors, it’s a very quick way to add interest without the time and effort it might take for a new design.
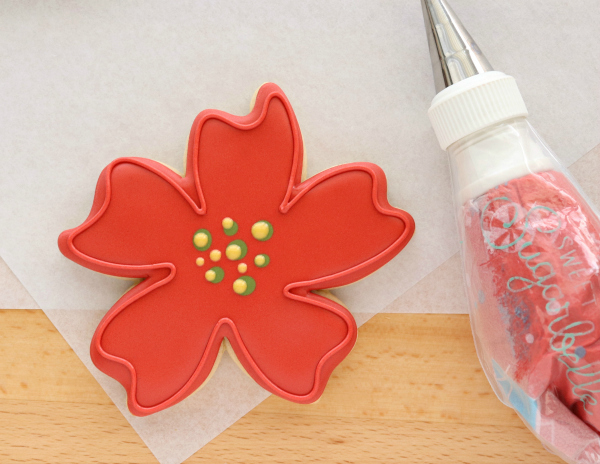
Since the moment I purchased this flower cutter from That’s A Nice Cookie Cutter, it has been a poinsettia in my mind, so, that’s what I chose for this project.
To make these cookies you will need:
Supplies
- That’s a Nice Cookie Cutter’s Flour Power cutter, or similar design
- Ateco #2 piping tips
- PME #1.5 piping tips
- Sweet Sugarbelle Decorating Bottles
Icing
- Rustic red piping and flood icing
- Dark green flood icing
- Golden yellow flood icing
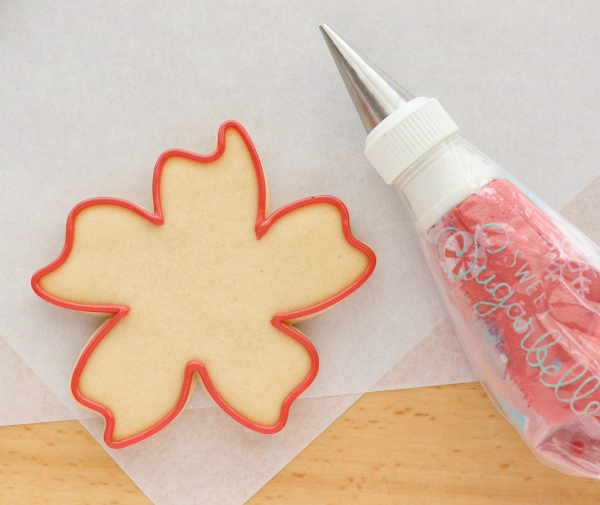
Step 1: Use a #2 tip to outline the cookie.
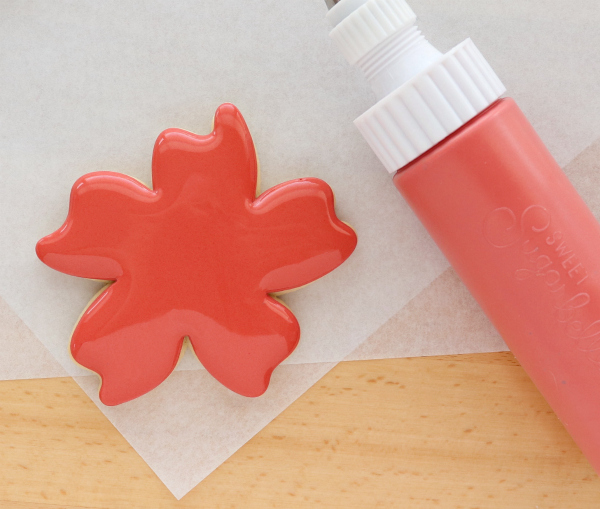
Step 2: When the outline is dry, fill the inside with flood icing.
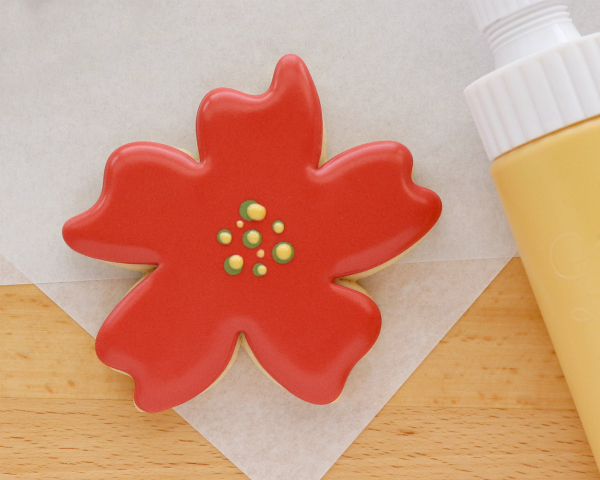
Step 3: Let the flood icing set for a minute or two, then use dark green icing to randomly drop a few dots into the center of the wet base. The wet-on-wet technique is all about timing. If you add dots too soon, they can spread and become distorted. Too late, and they will never fall flat and become completely flush. Royal icing can be affected by many variables, so it’s important to be aware of this as you work, practicing until you know how the icing will react in your environment.

Step 4: When the icing base layer dries enough to have formed a crust, use golden yellow flood icing to add smaller dots over the green dots, along with a few smaller dots to fill in voids if necessary.
Step 5: When the base is dry, create definition by using red piping icing and a PME #1.5 tip to loosely outline the cookie.
That’s all there is to whimsical poinsettia cookies in about five easy steps.
In the past, I’ve made realistic-looking poinsettia cookies, but as I’ve matured as a decorator, I’ve become a little more aware of “eatability” (is that even a word?) and mouth feel, as well as my own personal style.
All in all, this is a pretty simple cookie, but this whimsical design reflects my artistic journey and my long-time approach of combining simple cookies and techniques to create small parts of larger displays including my poinsettia and turkey cookie platters. It is always fun when life and procrastination force me to stretch my creative skills in unexpected ways.
As I mentioned before, this is an old-fashioned “blog hop,” so be sure to check out even more Christmas in July Creations from some of my long-time cookie decorating friends:
- Lilaloa’s Tropical Santa Cookies
- How to make Christmas Llama Cookies with Semi Sweet Mike
- Elegant Jumbo Snowflake Cookies via the Partiologist
- Easy Christmas Buttercream via The Decorated Cookie
- Christmas in July Santa and Snowman Ice Cream Cookies via Bake at 350
- Shark Christmas Cookies via The Barefoot Baker
- Watermelon Snowman Cookies via Haniela’s
- Christmas Angel Wings via Laurie and Jeanette of Blyss Cookies
- Decorated Santa Cookies via Montreal Confections
- Swimming Santa Cookies via Jill FCS
- Build Your Own Elf Cookies via Mrs. P’s Biscuit Trove
- Milk and Cookies with Santa Cookies via The Painted Pastry
- 3-D Gingerbread Christmas Tree with Mehndi Design via The Hungry Hippopotamus
- Holly Wreath and Berry Cookie Cutter Set via Bobbi’s Cookies and Cutters
- Christmas Gnome Cookiescape via Munchkin Munchies
- Gingerbread Cookie Accordion Village via Bee in Our Bonnet
- Tropical Gingerbread Men Cookies via Sugar Baked
- Cozy Christmas Mini Cookies via Swanky Sweets


I have to say these are the most beautiful poinsettia cookies I’ve ever seen. The colors are beyond fabulous… I just want all those colors! Thank you so much for hosting this fab collab!
I love these!! And I really love the idea of designs that are simpler to achieve, yet still so elegant.
Clearly, I’ve been out of the [cookie] loop too long. How do you achieve rustic red?
Hey Gail! My favorite combo is a red-in my case, Wilton Crimson or Americolor Tulip Red, and Americolor Warm or Chocolate Brown.
Adorable! What size cutter did you use?
Thanks
Mary Ellen
How do you make rustic red?
My favorite combo is a red-in my case, Wilton Crimson or Americolor Tulip Red, and Americolor Warm or Chocolate Brown.
Hi! Last year I made your all poinsettia platter cookie designs in your cookie cutter kit and they were a big hit. I love these simpler poinsettia cookies and have purchased the cutter and made a batch. Now I’m going to decorate them and wondered what colors you used for the poinsettias that aren’t red? The light green and off white? Thanks and Merry Christmas!
These are gorgeous. What a great use of the flower cutter. I LOVE the color palette. Would you mind sharing the recipe for the greens?
I came across a picture on pinterest of these gorgeous cookies. I love how you have given them a 3D look. Can’t wait to try this technique. Thanks for sharing.