How to Make Snowman Cookies with a Paisley Cutter
You didn’t think I could share seven printable cookie decorating templates without a tutorial, did you?
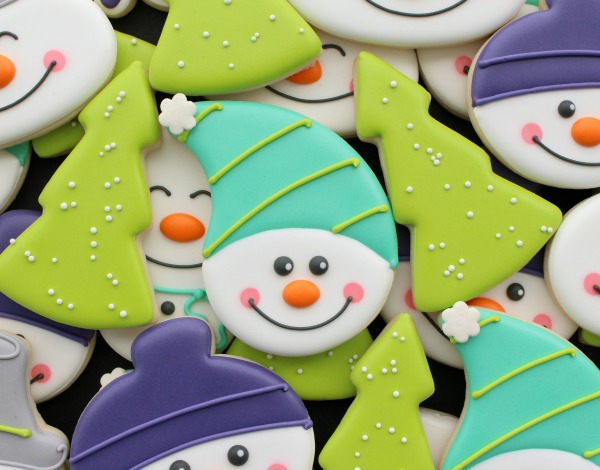
Of course not! I picked this adorable snowman, my personal fave. Can you guess what cutter I used?
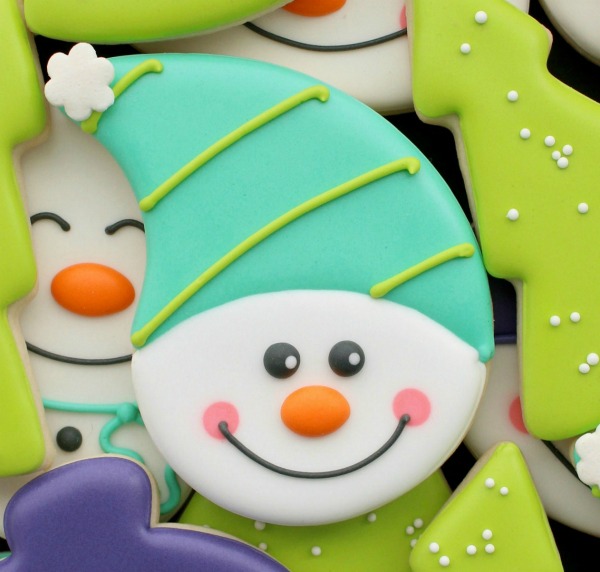
If you guessed the paisley cutter from the original Shape Shifter set, you’re right!
Begin by baking cookies using your favorite cut-out recipe. If you don’t have a favorite, click here to try mine.
To decorate these cookies you will need the following:
Supplies*
- Shape Shifters paisley cutter
- Free printable decorating template
- Scissors
- Painter’s tape
- Transparency film, wax or parchment paper
- Food color marker
- Disposable decorating bags
- Couplers
- Icing bag ties
- Icing tips #1.5 and #2
- Icing bottles
- White Wilton jumbo flower or snowflake sprinkles
*Most of the supplies listed above are available at craft stores like Michaels, Joann, and Hobby Lobby, or Walmart. You can also find them by shopping the online shops in the sidebar.
Icing (get my recipe here)
- A small amount of orange 20-second icing
- Turquoise piping and flood icing
- White piping and flood icing
- A small amount of pink flood icing
- A small amount of green piping icing
- Black piping icing
- Pre-made royal icing eyes or black decorating pearls
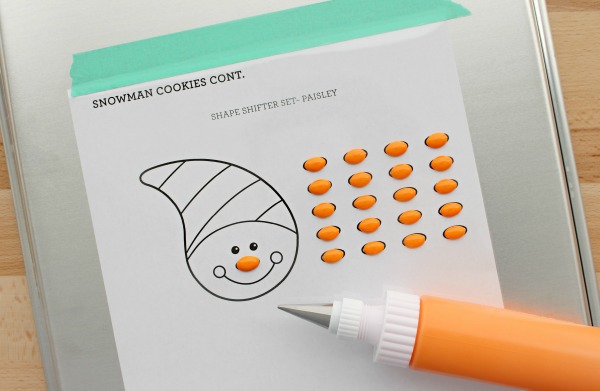
Step 1 Print out the provided transfer sheet to make carrot noses. If you need a little more in-depth look at making icing transfers, click here.
You can also skip this step altogether and add the details all at once when you reach step seven. Totally up to you.
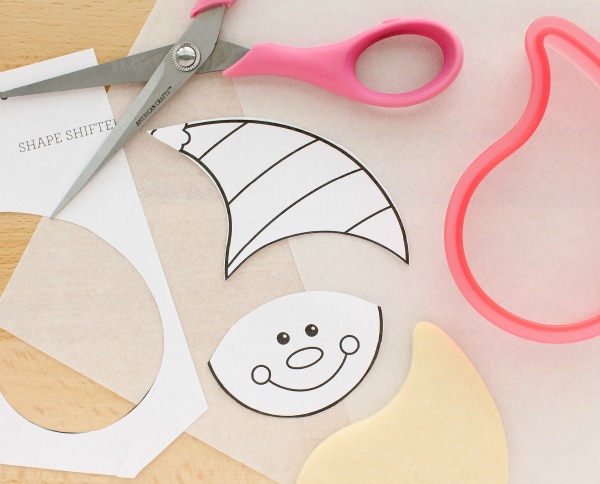
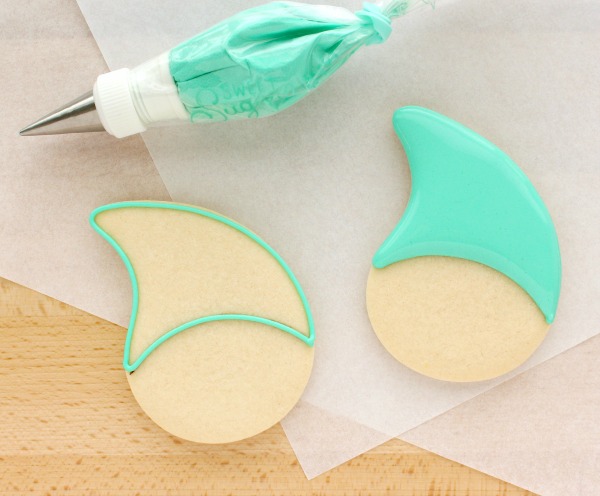
Step 2 Cut out the paisley snowman design on page four and cut into sections as pictured below.
Step 3 Next, place the template on the cookie and use a food safe marker to “map out” the design.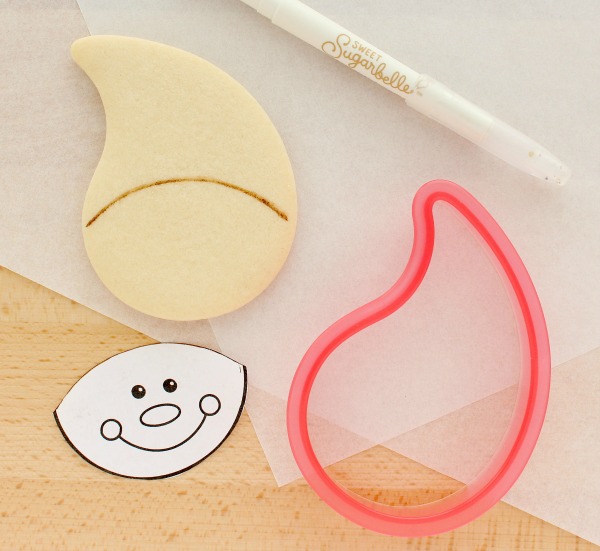
Step 4 Outline and flood the top section and let dry. This can take anywhere from four to twenty-four hours depending where you live.
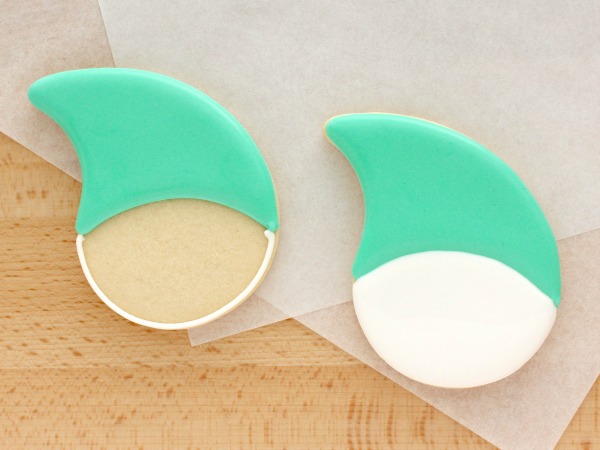
Step 5 When the top section is dry, use white icing and a #2 tip to outline and flood the bottom portion of the cookie.
Tip: When placing darker colors next to white, it’s good practice to let the cookie dry throughly in between steps in the least humid environment possible. This will help prevent bleeding.
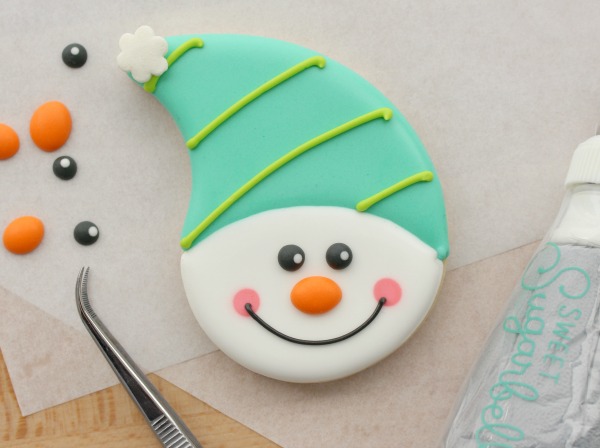
Step 6 While the icing is still wet (within a minute or two) add two dots of pink flood icing to create cheeks. If you’re using black icing pearls for eyes, this is the time to add them.
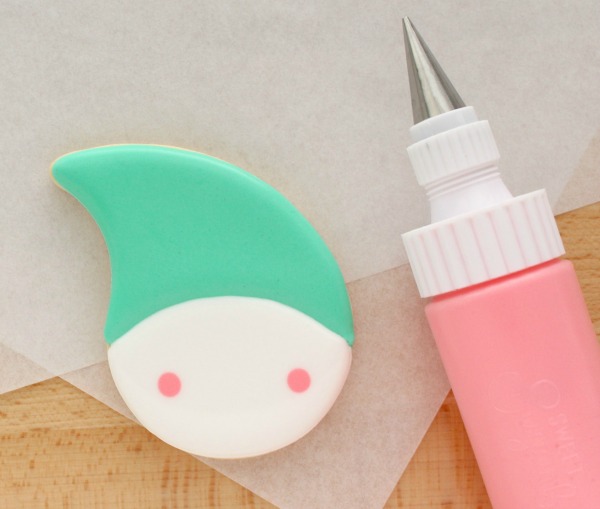
Step 7 Let the base dry, then use a #2 tip to pipe green stripes on the hat.
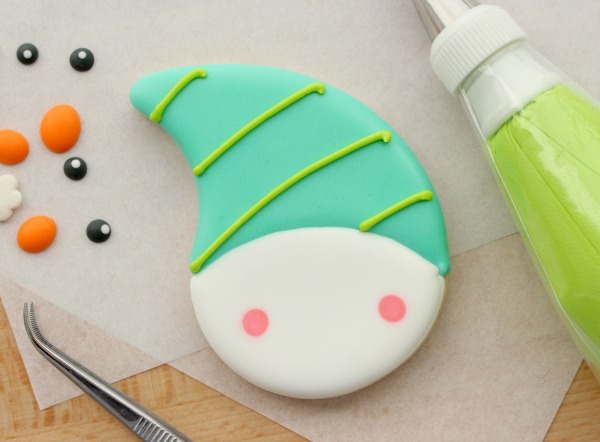
Step 8 Add the final details to really bring the cookie to life.
Use white piping icing and tweezers to position and attach the carrot nose and eyes. Attach the flower sprinkle in the same way, but use turquoise icing to attach it instead. Finish up by piping a smile with black icing and a #1.5 tip.
Tip: Not down with sprinkles? Use a star tip (#18 or so) in place of the white flower or snowflake.
This little dude is a friendly guy, so you should probably make a few friends to keep him company. To meet the rest of the crew and to print your free templates, click here.
My original Shape Shifters set, can be purchased at Michaels, Hobby Lobby, or select Joann Fabrics Stores, or by visiting the retailers featured in the sidebar and at the end of previous post. Just remember, don’t forget your coupons!


Eeeeeek my favorite!
I love these! Thank you for the tutorial!
I love it. But what do you use to do his mouth?
In step 8, use black piping icing and a #1.5 PME tip to add a mouth. If you don’t have a #1.5, a regular #1 or #2 will work fine.
Awesome! Thanks love finding new ways to use the cutters ??
Those are adorable.
These little guys are so adorable! I am just obsessed with your cookies! Cutest things ever! Thank you for always sharing with us!
How adorable! Thank you for sharing.
LOVE these and I have the cutter set!!
How’s do you blend in the hat and the face.