Glorious Friends
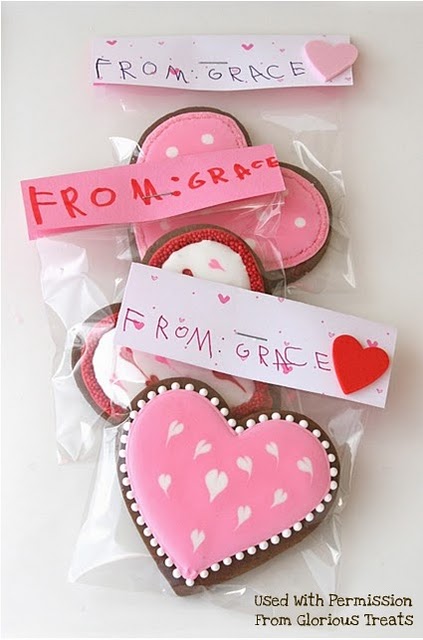
Ever since I came across this adorable photo on my friend Glory’s Flickr page, I have been dying to make cookie Valentines with my kids.
This is the photo that started it all…
The problem was, even though I know my way around a cookie cutter, I’m not so patient great with paper crafts.
So, late last Sunday night I called Glory for a last-minute, one-on-one, how-to on making printables.
Did I mention I have a one track mind? She tried to explain, but I was way more interested in the cookies I was working on than label designing. I zoned out pretty QUICKLY…
Luckily, I have GOOD understanding friends. Instead of letting me worry about it on my own, she designed some labels and posted them along with step-by-step instructions on her blog. {In other words she did the part I didn’t want to do and gave me written instructions so I could construct them}
*THANKS GLORY-BEE =)*
Yay for me, because with little effort on my part, I made these little cuties, and yay for you, because you can do the same! {click on the photo to get your FREE PRINTABLES from Glorious Treats}
As a beginning cookie Valentine-r, I did learn a few things this week that I would like to share to help others avoid some of the headaches I encountered…
- Make simple cookies for kids. Save the masterpieces for grown up events.
- Stock up on treat bags, small and large.
- If it’s hard for you to fold cardstock cleanly, use a butter knife, or even better, use regular computer paper instead of cardstock. Then it’s easier for the kids to help staple {for some reason staplers intrigue my boys}
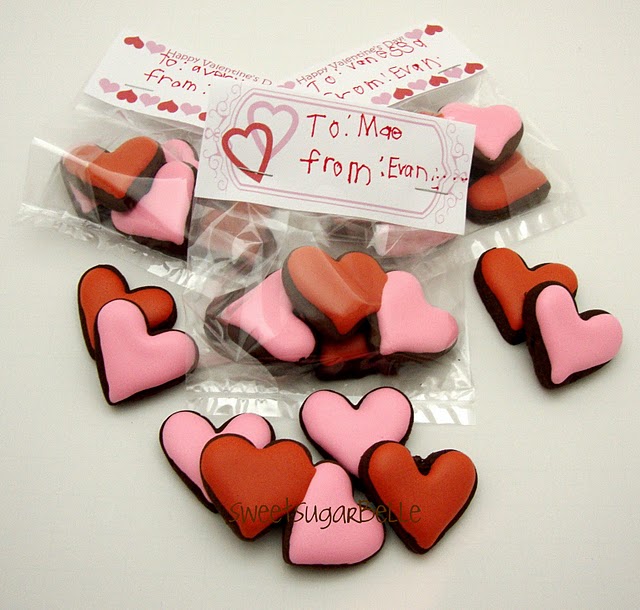
- Since these toppers are a little small, if you have a child that still writes a little on the LARGE side like my Evan, keep a fine tip Sharpie handy. It’s WAY neater.
- Print extras so that mistakes are no big deal.
- Bite size cookies are a good idea for younger kids.
Before I go, I also wanted to show you one more set of cookies.
I was so inspired by The Celebration Shoppe’s free printables that I showed yesterday, I made some simple cookies to go with the owl version. {Click on the photo and then follow the instructions to get your printables}
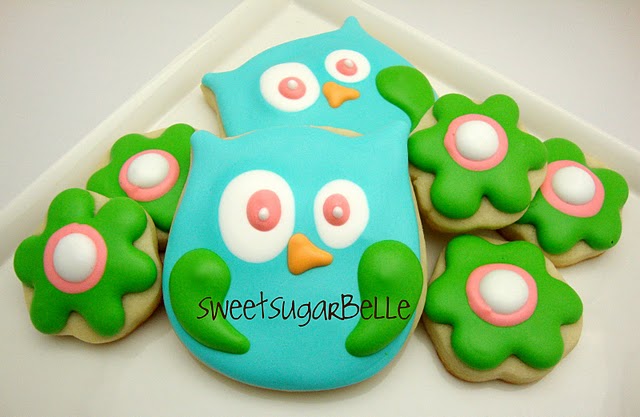
To make the owls, I modified a tulip cutter by trimming off the middle petal. It made a perfect little owl. I hope this week gave everyone tons of ideas and inspired a weekend of fun baking with the kids!
By the way, I just noticed Glory posted a heavenly looking Cranberry White Chocolate Bar Recipe on her blog . Check it out. It looks like a good option for filling GROWNUP Valentine bags. While you’re there, tell her thanks for helping me with the technical part of this project. She deserves a medal for being patient with me =)
Happy Friday everyone, have a wonderful relaxing weekend!


Great tips about Valentine's Day cookies!
I love how perfectly "imperfect" your owls are and the bright colors they are done in…adorable and they don't look too difficult. Thanks for the inspiration you share everyday~
Great V-Day idea! I think I might do this with my kids =) Thanks for sharing.
The owls are way too cute!!!
Absolute perfection!!! Love these so much!!
I am so glad I stumbled upon your blog last week!! In addition to all the adorable sweetness you have on here, you have given me such wonderful ideas to do for my son's class this year, something other than the boxed cards. He will love these ideas. Thanks so much!
Oh my! Beautiful! You are so ahead of the game! I haven't got my cookies started for our V-day party yet! But now I have lots of inspiration!!! What gorgeous cookies!!! I am still working on my decorating skills! ha ha!
P.S. Thanks for the tulip cutter tip b/c I am loving those owls!!!
You are so stinkin' cute! I love that you keep calling things "simple"… the owls… the "simple" dinosaur plate. HAHAHAHA!
Thanks for sharing all of these adorable Valentine ideas. And I agree to keep it simple for the kids. I too have had my heart broken when the kids just don't appreciate the masterpieces lol! Your Evan reminds me of my Ethan. 🙂
yayayay you made the owls! you are fantastic!
So cute! We make paper toppers a lot. We always use card stock, but we score and fold it with a bone folder. You can get one at Michael's or just order one online. I heard about bone folders on Martha, many years ago.And those owls are too cute for words!!
I saw these on Glorious Treats as well. I love your cookies, the dark cookie looks great with the frosting. Awesome job.
Plan B
I love the owl cookies!
Love you!! =)
Love this! We have a Granny who collects owls…I think I'll make her a special cookie! Thanks for all the tips…even some of us who have been doing cookies for awhile still need help!
Posh Pixel Design Studio was generous eognuh to revamp their Memorial Day printable set just for the Fourth of July. The circle stickers and the mini party flags would be a great addition to the set above.
Pingback: "Owl" Always Love You Cookies
Love your beautifule cookies 🙂