Easy Zombie Cookies with Flour de Lis
I’m a little behind on the Halloween treats, so today my sweet friend Samantha, of Flour de Lis is here to show you how to make these easy and adorable zombie cookies!
![]() I am not sure if you have noticed, but zombies ARE actually taking over the world. I mean they are everywhere! TV shows, movies, games, 5k’s, there are survival guides and bubble gum and I am pretty sure last time I drove through Oregon, one of them pumped my gas! On a side note, I always forget that it’s illegal to pump your own gas in Oregon and I always get out the car and then I have to pretend that I was going inside all awkwardly, so I buy junk food to make myself feel better 😀 ANYWAY…. These creepy brain suckers are no longer hiding out until Halloween, they are moving into everyday life. So I am going to share with you some easy, peasy, kid-friendly zombie cookies. You can make them for Halloween if you want or for a birthday party or just for fun treat for your favorite zombie fan.
I am not sure if you have noticed, but zombies ARE actually taking over the world. I mean they are everywhere! TV shows, movies, games, 5k’s, there are survival guides and bubble gum and I am pretty sure last time I drove through Oregon, one of them pumped my gas! On a side note, I always forget that it’s illegal to pump your own gas in Oregon and I always get out the car and then I have to pretend that I was going inside all awkwardly, so I buy junk food to make myself feel better 😀 ANYWAY…. These creepy brain suckers are no longer hiding out until Halloween, they are moving into everyday life. So I am going to share with you some easy, peasy, kid-friendly zombie cookies. You can make them for Halloween if you want or for a birthday party or just for fun treat for your favorite zombie fan.
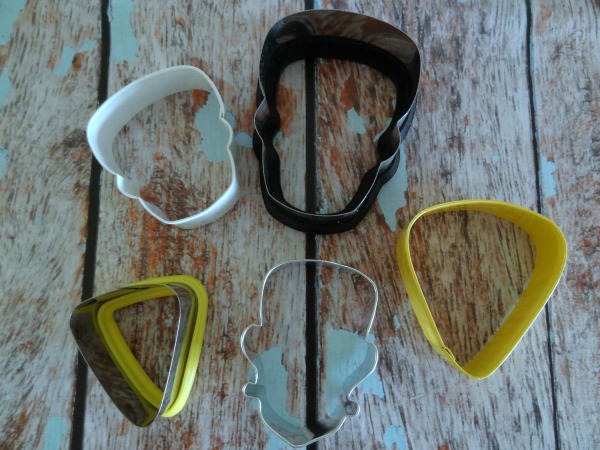
 You can mix up your favorite batch of cookie dough for these cookies. I used this Wilton skull cutter but I am sure they would look just as good with any of these.
 Once your cookies are baked and cooled, here is what you’ll need:
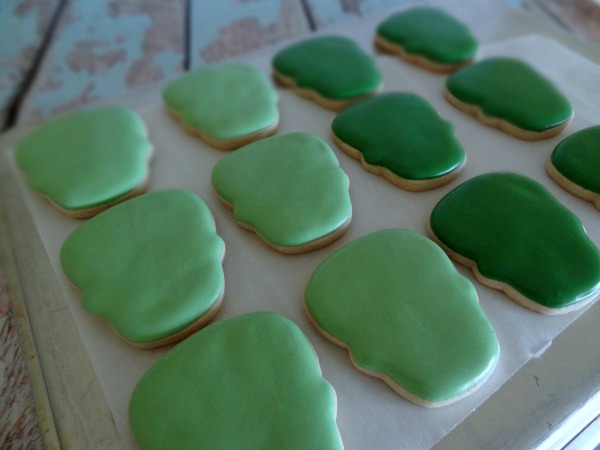
- 20 second (flood icing) in your favorite zombie shade. I used equal parts leaf green and ivory for the darker one and about 5 to 1 ivory and leaf green for the lighter one.
- Red, black, white and any other colors of details icing.
Grab a cookie and use one of the green zombie colors to outline and flood. I use only one consistency to outline and flood my cookies, but if you use a different method just follow your own process.
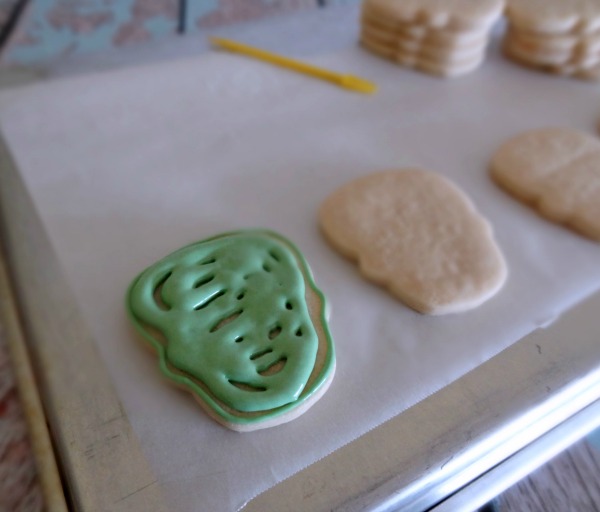 Outline and fill until all the cookies are done. I let them set for about 20 minutes, so they have a little crust, but the detail icing can still sink in a little. Or if you use a heat gun, just give each cookie a quick 4-5 second wave of that little magic and move right along.
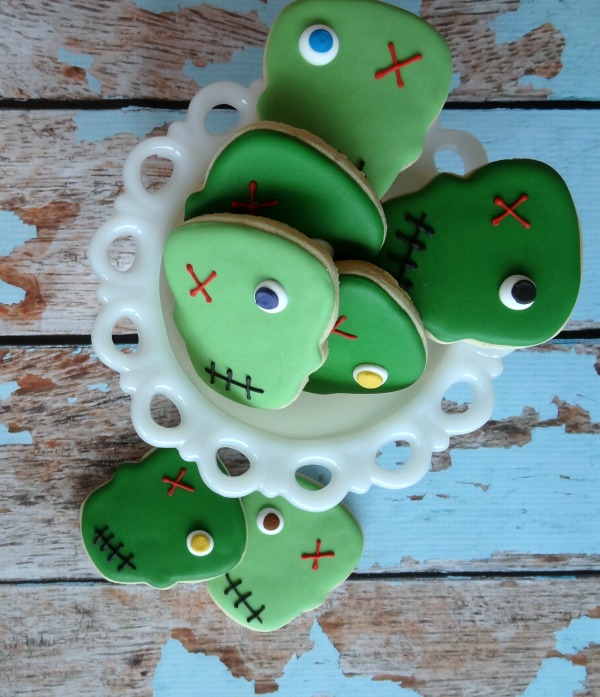
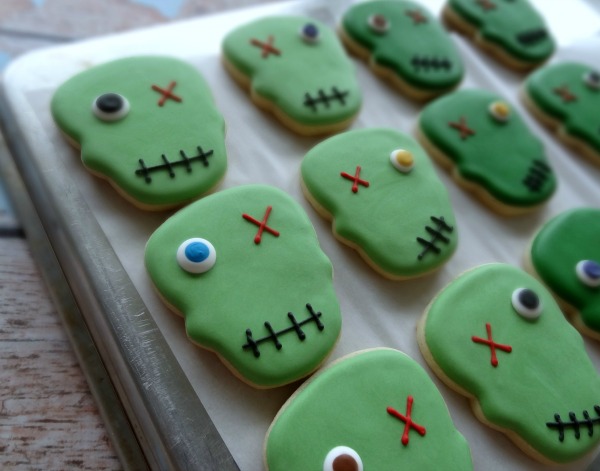
 For these, I just gave each cookie one good eye and one missing eye. For the good eye, squeeze out a good size round dollop of white icing and then add a smaller round dollop of another color ( I had some left over icing from another batch, so here I have purple, blue, brown and gold).
Opposite the good eye, make an eye size X with red detail icing. The mouth is just as easy, a simple black horizontal line and a few little vertical lines and voila!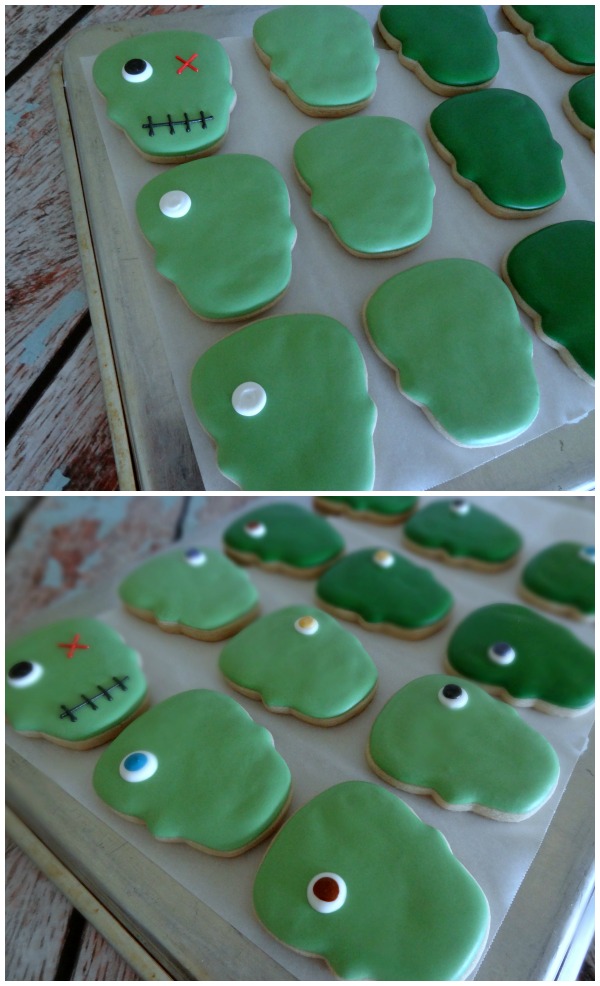 I am thinking these will be a perfect little snack for a little zombie fanboy I know!
 Thanks for letting me share Callye!
![]() Be sure to follow Samantha’s Facebook page, blog, and Instagram steam to keep up with all of her adorable creations! She’s also got an ETSY shop if you’d rather buy than bake.
Be sure to follow Samantha’s Facebook page, blog, and Instagram steam to keep up with all of her adorable creations! She’s also got an ETSY shop if you’d rather buy than bake.
Thanks for coming, sweet Sam! For more creepy sweet treats, be sure to check out these posts:


Thanks Samantha! I think could actually handle these zombies…to make, and to look at, haha! Great job!
YOU can totally handle them Sue! You are AMAZING 😀
I love zombies! If there ever is a zombie apocalypse, stick with me. I’ve watched so many zombie related movies and TV shows that I have thousands of tips & tricks in my head! Beware of fast moving zombies, you better have your running shoes on!
4 more days until The Walking Dead!
I would be one of the first to DIE! hahaha and HOPEFULLY not turned into a zombie. Even with my running shoes, I think they would get me 😉
I love these zombie cookies Sam! I’m with Nikki I have watched a lot of zombie shows that I think I have a plan and some skills.
Thanks for linking my zombies Callye 🙂
I’ll have to move closer to you and Nikki for protection! I’ll bring supplies and leave the zombie butt kicking to you girls 😉
these are “cute” zombies….and yes, they are everywhere! And Kudos to Oregon….I hate pumping my own gas!!!!!
Samantha, these zombies are awesome! And that awkward walk after getting out of your car to attempt to pump gas in Oregon happens to me Every. Single. Time. So glad I’m not the only one. 🙂
Callye, thank you so much for linking my ear necklace cookies!!
Easy maybe Samantha and totally cute too!
They look great 😀
I’m making these – My kids love zombies! I didn’t have a skull cutter so I’m using a foot cutter from the big set of wilton cutters. I cut the toes off the top and it makes a great zombie face!