Airbrushed Koi Fish Cookie {Guest Post}
I’ve said it before, and I’ll say it again. One of the best things about this cookie adventure is the friends I’ve made. Even after two years, I am constantly amazed by the talent, ideas, and generosity of the women with whom I share this crazy obsession.
As I mentioned before, I am recovering from arm surgery. Before it even happened, I was pretty nervous about the effect it would have on my ability to decorate and keep up with blogging. Of course, I shared these concerns with my cookie friends.
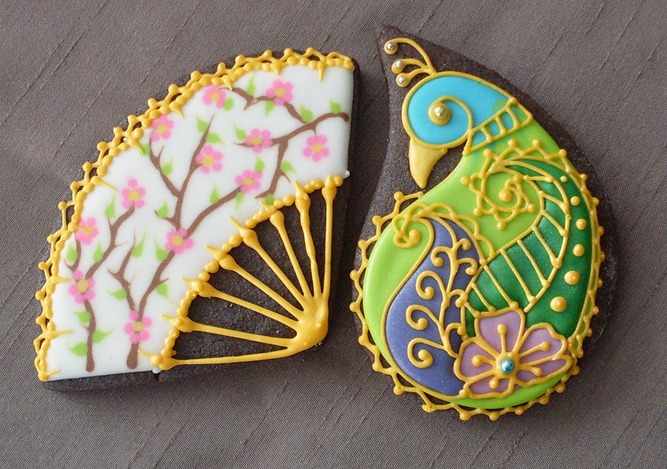
Enter Marlyn, one of the oldest {duration, not AGE} and dearest of these friends, and also the creator of these cookies.
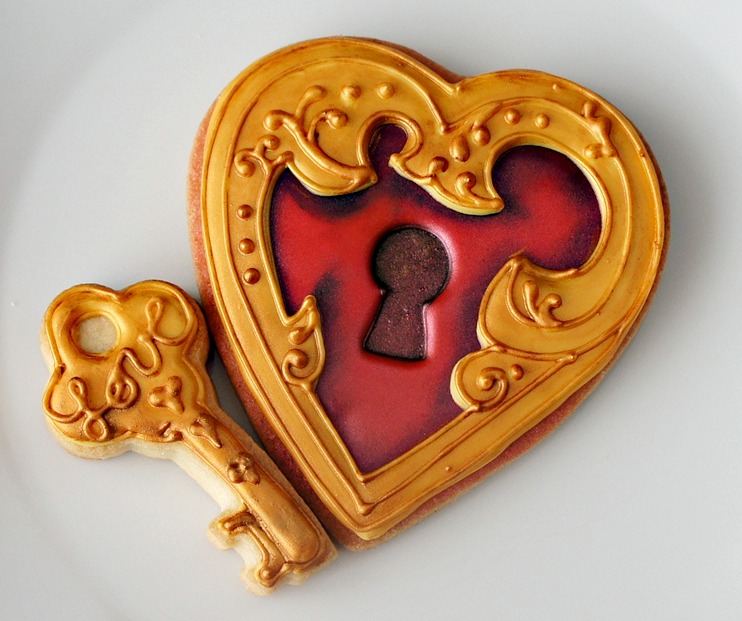
The peacock is about my all-time favorite cookie, and I don’t even have words for the heart…
ANYWAY, now that you have met Marlyn…the rest of the story…
After mentioning to
Marlyn that I was nervous about the upcoming weeks, she surprised me with this amazing tutorial.
I don’t know if I was hormonal or what, but it brought me to tears. Not only was I AMAZED at what she had to offer {I’d never even considered this until reading this tutorial} I was deeply touched that she took my words and invested the time and knowledge into creating something so wonderful to ease my worries.
From the bottom of my heart, THANK YOU, Marlyn. I am PROUD to call you my friend.
Okay, hormonal, mushy spew over OVER. ? you, M.
Now, for the REAL fun! Marlyn has created this awesome tutorial to demonstrate a way to airbrush cookies, without an airbrush. YES, it’s as cool as it sounds!
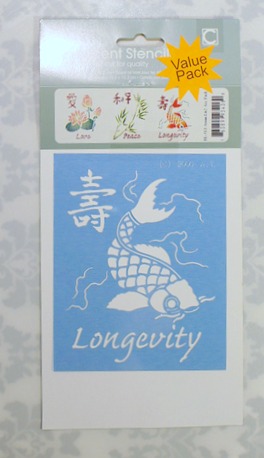
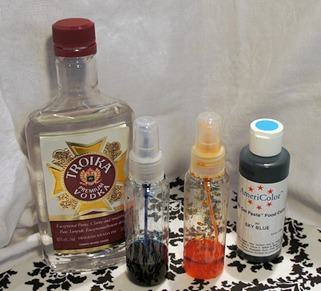
To make these Koi cookies you will need the following supplies:
I began the process by adding a few drops of Americolor gels into the spritz bottles. I then poured about an inch of vodka into the bottle with the gel and shook it up, then sprayed it into the sink until the color came to the top.
I chose to use vodka rather than water because it dries much more quickly. I did not test whether water would work but I suppose you could give it a try if you don’t want to use vodka.
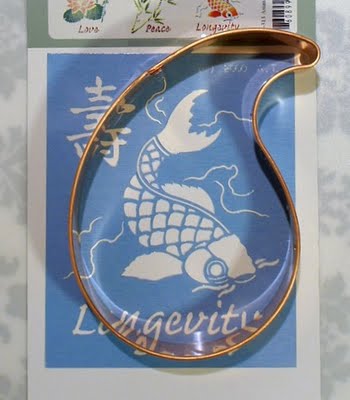
For my cookie design, I found this cool koi stencil and a PERFECT paisley cutter from Ecrandal.
To begin, you will need to bake and flood your cookies so that they have a smooth base of white icing.
It is preferable to dry them overnight since the stencil and color will be wet and could possibly damage the surface of a semi-dry cookie.
NOW TO DECORATE
First, I placed the stencil onto a piece of card stock to test both if my color was dark enough {if not add more gel} and secondly it was to mark the areas that needed to be masked before spraying the cookies.
I sprayed the paper, let it dry, and then cut out the image as close to the outline as possible.
I then placed the slightly damp cut-out in a book to ensure that it dried flat.
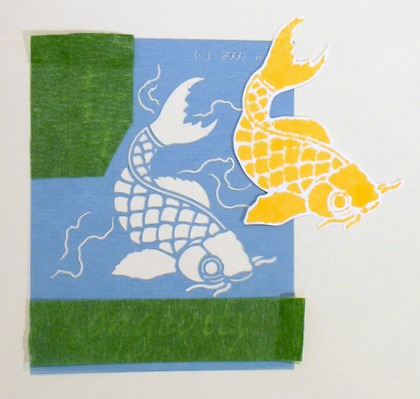
Next, I positioned the stencil cut-out on the cookie. Keep in mind you can use corn syrup to hold in place if the misting happens to move it. Also, I recommend doing this project on a paper towel to reduce mess.
Before spraying the cookie do test spray into the sink to ensure that the color is flowing properly. THEN, spray the cookie. It took 3 spritzes to get the coverage I had in mind.
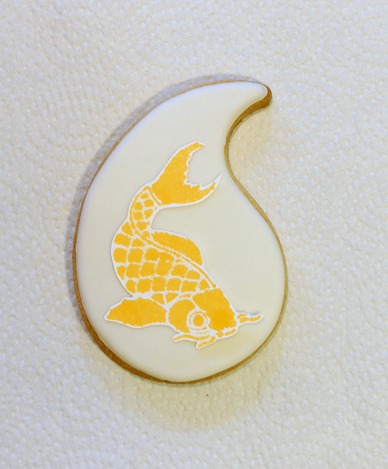
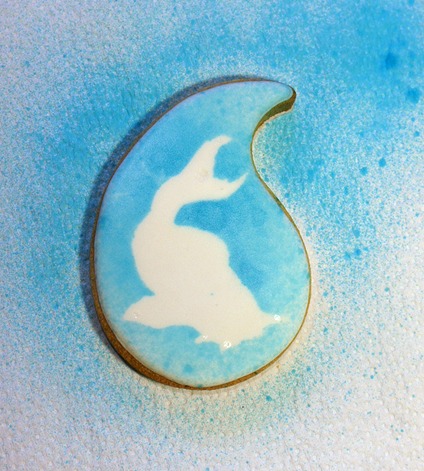
I then removed the card stock to reveal a white spot for my stencil.
Wait for the first color to dry, {it took mine about 5 minutes} then place your stencil over the white spot on the cookie.
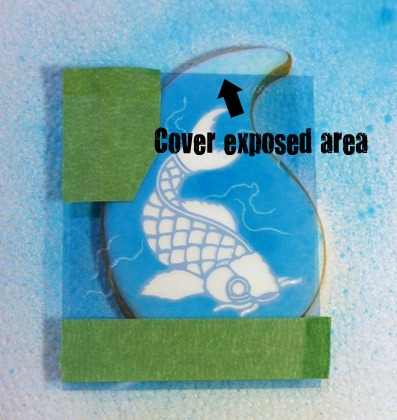
The next step is VERY important! Before moving on, check to see if any of the cookie is exposed beyond the edge of the stencil. If it is, you must cover the area to protect it from overspray…I used masking tape.
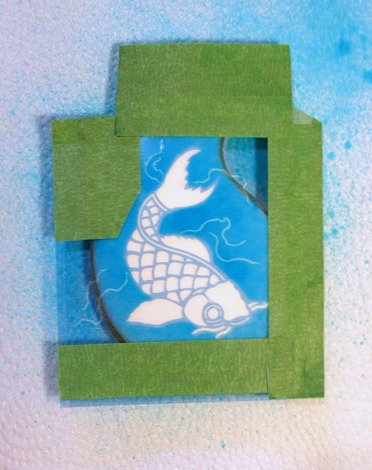
Voila! Now, you’re ready for color number two!
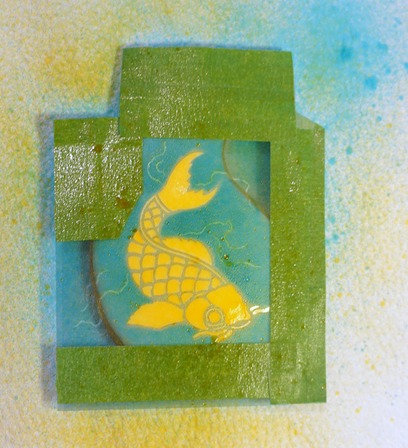
Once again, mist color into the sink to get it flowing, then spray the koi design.
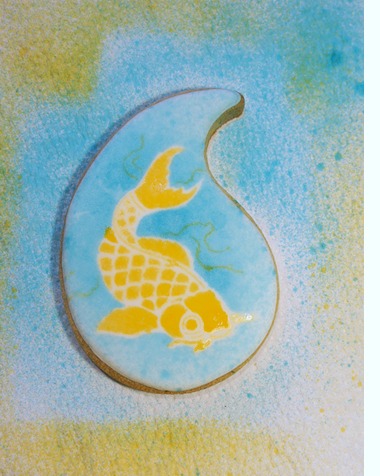
This layer also took three sprays. See the little beads that accumulated on the stencil? Gently remove the stencil to ensure that none of the color beads fall back onto the cookie.
At this point, the cookie could be considered complete, however, I felt it would look better with some definition.

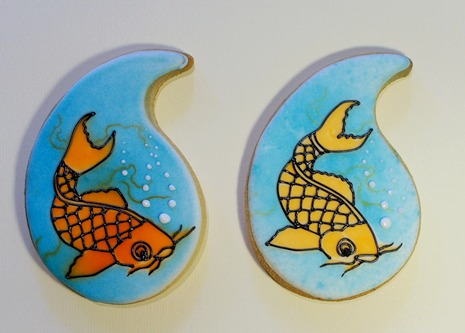
Just for the sake of experimentation, I did two versions of this cookie, one using the method demonstrated above {left}, and another using my airbrush {right}…
I think I prefer the spritz version, although, I wish I had added a bit more color to the vodka mixture.

Back to the details. I mixed up some black and white RI {piping consistency} and proceeded to outline the white lines on the fish. Then as a finishing touch, I added a few white air bubbles.
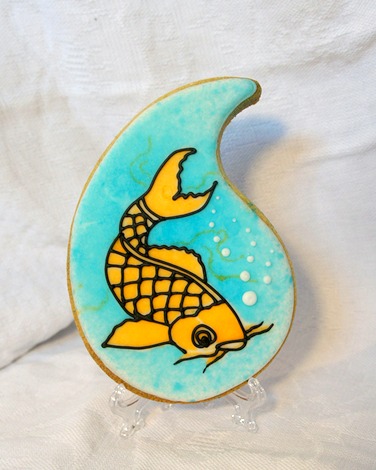
The final result, an airbrushed cookie, without an airbrush!!!

It does not always take expensive or specialized equipment to get a professional effect. A little creativity, thinking, and determination go a LONG way!
I am still in awe of this technique, and most of all my wonderful, friend Marlyn. Thanks again for sharing this with us, and teaching me yet another new skill. I plan on incorporating this technique into my designs very soon!


This post made me do a happy dance. My husband laughed at me, but that’s ok. I am so excited; I can’t wait to try this.
Pingback: Little Red Wagon Cookies
Pingback: Gender Reveal Cookies
This is just brilliant!
Wonderful work and amazing idea. I was wondering if you know any non-alcoholic replacement for the vodka and if we could use gel food colors. Many thanks for sharing your wonderful idea with us ^_^
Does anyone know where to find this stencil?? Can’t find it in craftstores anywhere… It’s hard to make out the brand name because of the flash..
The cheapest place to go is walmart if not there try target 😉
Any substitutes for the alcohol?
Fab idea
cool
Happy dance