Decorated Jelly Jar Cookies
Jelly jar cookies have been on my to make list for a very long time. I meant to make them over summer, but it slowly slipped away without any cookies.
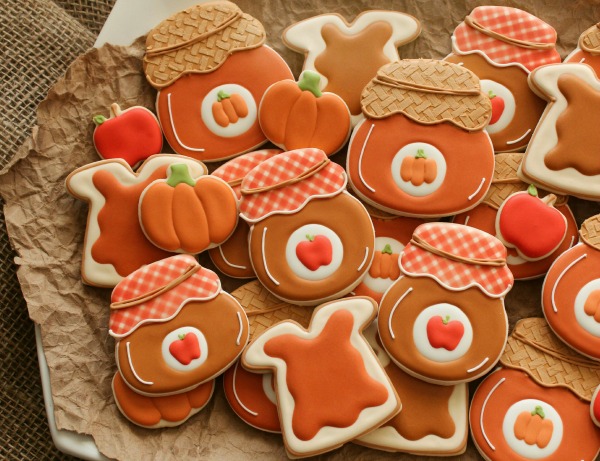
My jars were almost forgotten, until I dug out my Halloween cutters again saw jelly. So instead of fun fruity jam, I ended up with autumn butters. Almost the same thing, right?
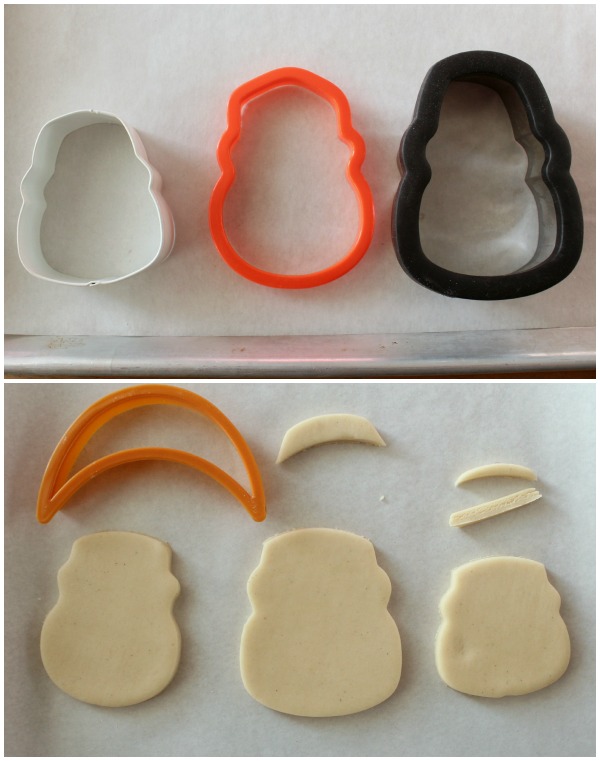
 I used a variety of trimmed skulls for the cookies. The black and white cutters are both Wilton brand, while the orange skull came from this set.
To trim the cookies, I used a large moon cutter but if you don’t have one, this genius tip from Klickitat Street will help you out.
 To make these cookies {apple butter} you will need:
- Ivory piping and flood icing
- White piping and 20-second icing
- Gingham stencil {I used this one because I had it on hand, but the mini-stencil I linked to is easier to maneuver}
- Red food color or airbrush spray
- Tan piping and flood icing
- A tiny bit of red 20-second icing
- A tiny bit of green piping icing
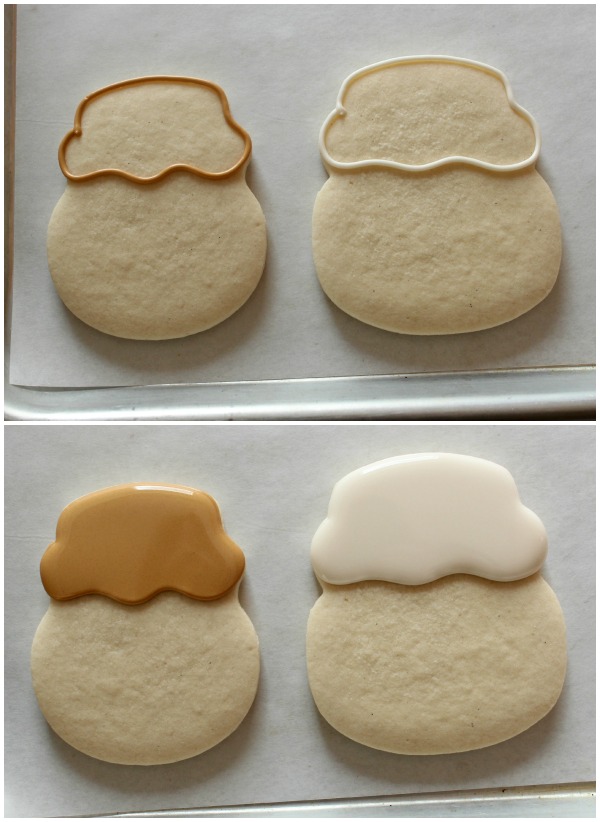
Begin by outlining and flooding the lid section.
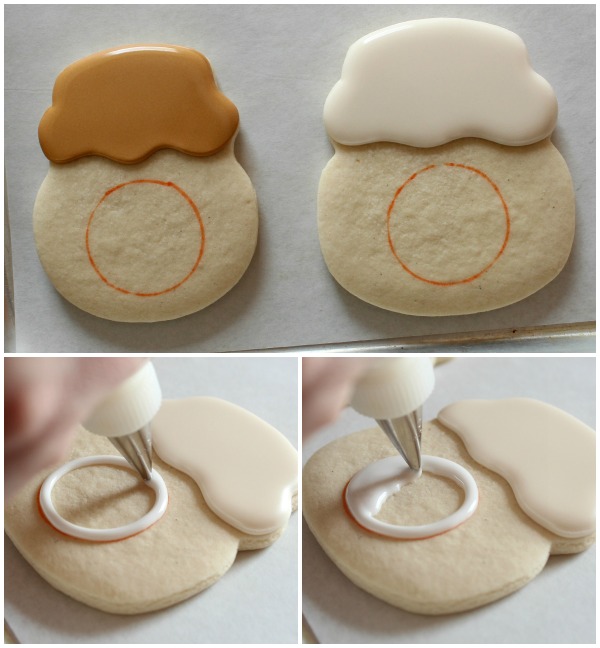
 Next, use a fine tipped food color marker to pre-mark a round label and fill with white 20-second icing, as shown below. You could do this prior flooding {to be on the safe side}, but for the purpose of spacing I wanted to see the lids before positioning the label. Let dry.
 When the cookie is dry, it’s time to add gingham print to the lid. Mask the label with Press and Seal wrap {we talked about this here}. Then, using the magnet tip I shared, position and secure the stencil as shown, and lightly mist with red.
I used Wilton color mist, but an airbrush works too. Regardless of the product, the key to success is a light even application. If you go spray crazy the color is more likely to puddle and seep underneath the stencil.
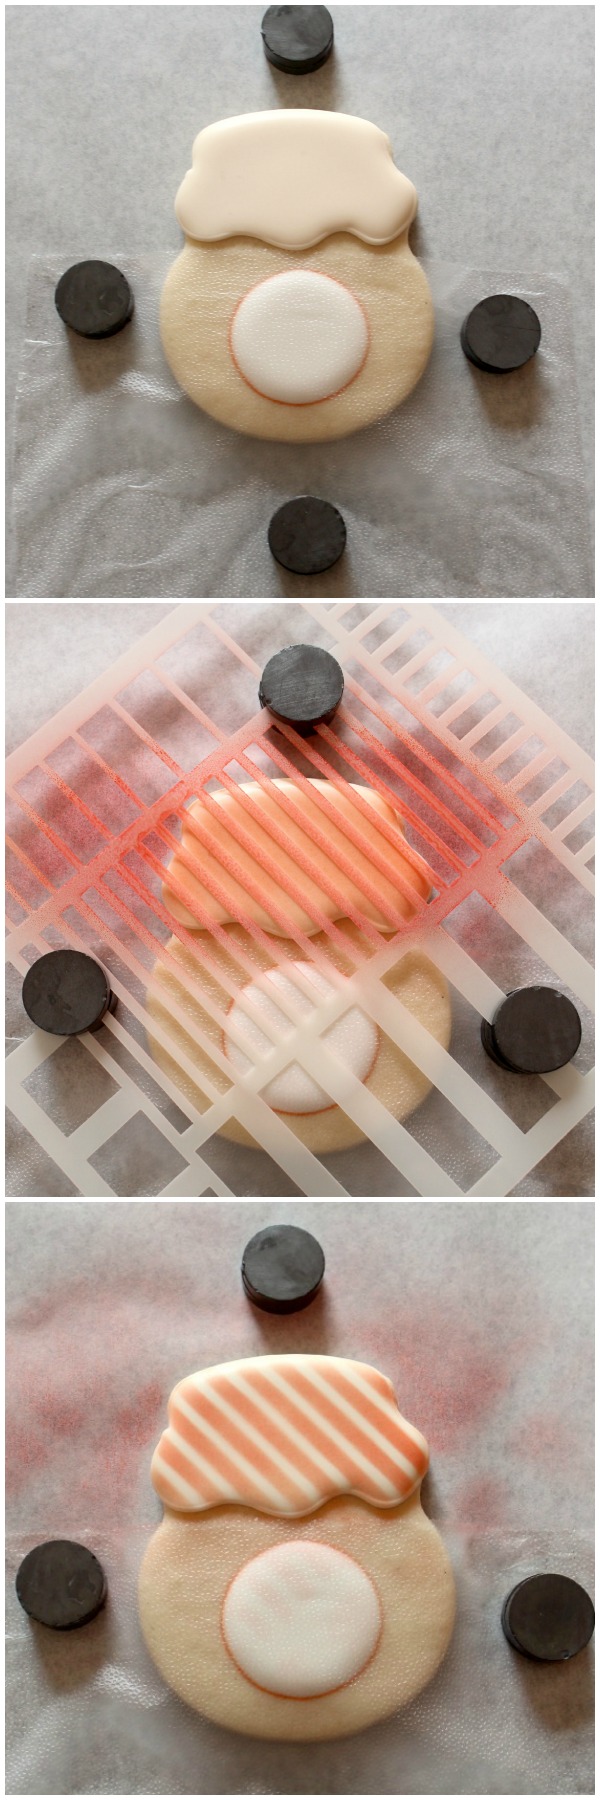 After applying the first layer, reposition the stencil as shown {clean between applications, if necessary}, then add another light mist of spray. Gently remove the stencil to reveal a perfect gingham pattern.
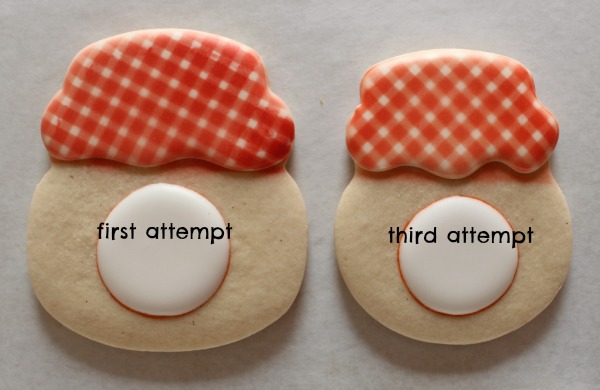
 As I’ve mentioned before, stenciling takes practice. You can definitely see the difference between the first and third cookie. Again, the key is a lighter spray.
 When the lids are finished, outline the and flood the jar. I used white icing for outlining and flooded with tan.
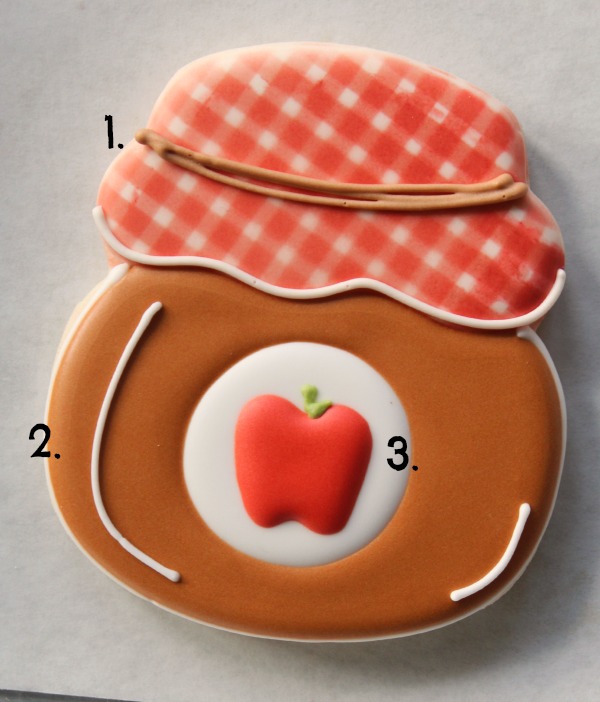
 When that is set, add the finishing details:
- Use a #2 tip to pipe twine around the lid
- Add accents to the jar
- Pipe a tiny little apple on the jar label
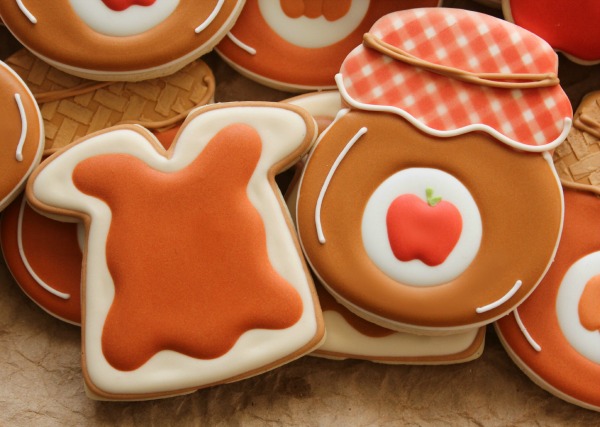
 Since most people like toast with their butters, I added a few slices. To see the cutter I used {and a how-to} click here.
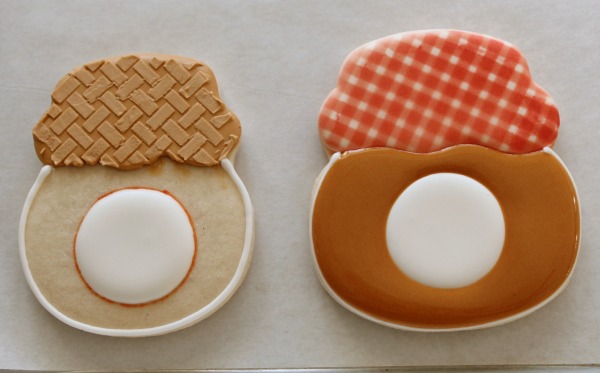
 For the pumpkin butter version of this cookie follow the same basic steps, but use the technique shown in this post for a burlap lid cover.
 For more tips and inspiration, check out these links:


Never would’ve guessed it was a skull! Fantastic!! Also, the glare lines really kick these up a notch! Love ’em <3
Callye, these are among my all time favorite “Sugarbelle” cookies and I’m definitely going to be making them in the future!
I too never would have guessed you used the skull cutter for these. Love!
I love these. Everything about the jars are perfect and the twine on top finishes them off perfectly!!!
These are so cute! Love that gingham!
I love the stencil! Thanks so much for sharing your talent with us. I recently started decorating cookies and find you to be a wealth of tips and creative inspiration! With your help, I have surpassed what I ever hoped I was capable of. 🙂
These jars have me totally and completely in awe! I have never used airbrushing at all – way too much of a novice cookie decorator at this point. But, I’m truly amazed at these. Stencils, airbrushing, magnets, gingham? Oh my gosh…….
Love, love, love this! Thank you so much for sharing and inspiring as always.
This has to be one of my favorite Sugar Belle designs! I am so loving this and the creative way that you did them! So, so, so cute!
For somereason I do not get your post on my fedd now, how did I miss these beauties!! Ive them, they are just adorable.
I got this for my 7 year old daughter. It is an amzaingly ingenious product. It includes stencil sheets of clothes that can be placed over a simple drawing of a Bratz-like girl. Includes ideas for patterns and accessories. Really fun and entertaining. Has many pages of girls to dress. I want to get my daughter all of these books because this one has been wonderful!
These are so very cute Callye. What a perfect gift to give someone who makes their own jams and jellies.
I can’t even begin to tell you how much I love these!!! Only you would think to add the bread with the jam:)
All I see is Mrs. Claus…and I don’t have a skull cutter!!! Can you believe it?! These are one of my favorites of yours. So sweet!!!
Coming soon =) You read my mind! And I think I need your addy. YOU MUST HAVE A SKULL CUTTER, NOWWWWWWWWW!
Hee hee! If you’ve got an extra! I asked my cake friend if she had one, and she told me she had a skull candy mold, if that would work. 😉 I just put a skull cutter in my cart at Karen’s Cookies and now waiting for the big bag of meringue to come in stock so I can click “place order”. Then I’ll be just like the cool cookie kids with their skull cutters! 🙂
Inbox me! sweetsugarbelle@gmail Worst case scenario, you wind up with two, which is not a bad thing =)
I love these, Callye!!! The gingham topper is the cutest idea ever!!! I bought some magnets, but haven’t had a chance to use them yet. You come up with the most awesome solutions!!! And thank you, thank you, thank you for linking my little jam jars 🙂 You’re sweet <3
You are SO talented!!!
Es usted una artista todos sus trabajos son hermosos, ademas en increible como usa otros moldes para hacer ciertas figuras felicidades y muchas gracias por compartir, 🙂