Recently we took our kiddos to see the movie Rango. First of all, let me say, although I LOVED it myself, it might have been a little too “adult” for my kids. If they had watched it instead of spending most of their time fighting over the lone pickle, I might have had some explaing to do.
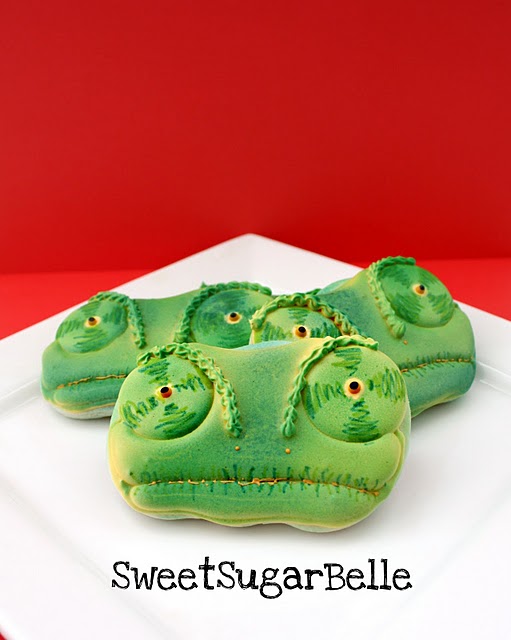
Aside from that, Rango was pretty darn hilarious. So, I cookie-fied him!
This is kind of a two or three day project, so start early.
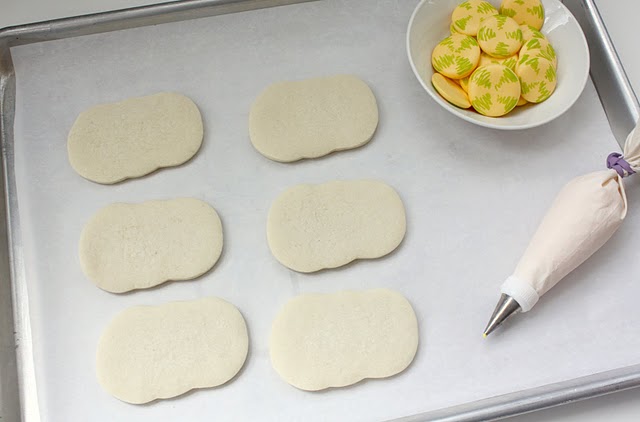
The day before, you should bake your cookies. To cut these, I used a metal dog bone cutter that I stretched out a little.
After the cookies were baked, I spent the rest of the morning making royal icing accents to use as Rango’s eyes. For more information on how to do this, read my post on
what to do with leftover royal icing.
I didn’t really make the disks an EXACT size, I just used my mangled cookie cutter to gauge how big to make them.
Once you make it here, you are at a standstill until they dry. This is when I do laundry and other un-fun stuff like that.
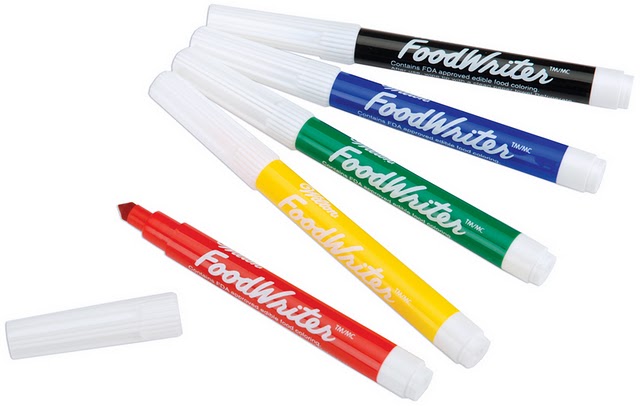
The next day, I used Wilton Foodwriters to make the markings around Rango’s eyes.
In this tutorial, I used the neon green color, but I’d recommend the dark blue or green below. Those colors will show up a lot better on the finished product.
Using a Google Image as reference, I made the appropriate markings on the disks.
?
Now for the decorating
To make Rango cookies you will need:?
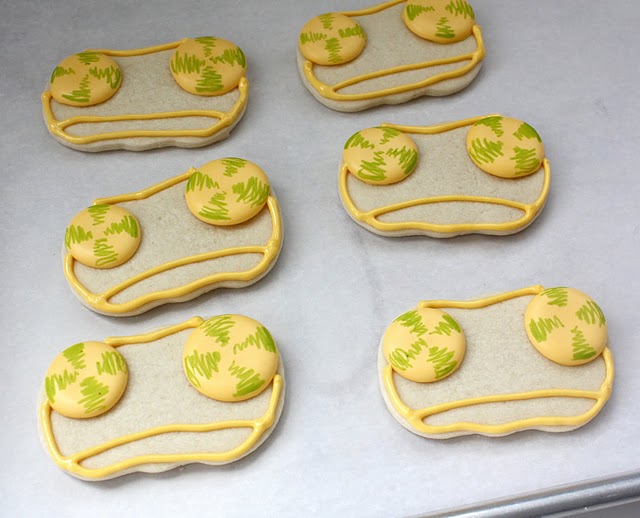
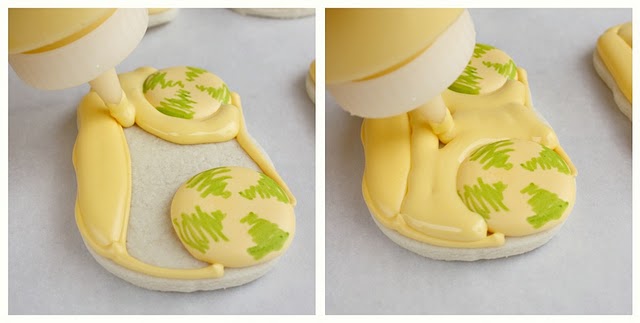
Begin by attaching the eyes
?
Then, outline his face…
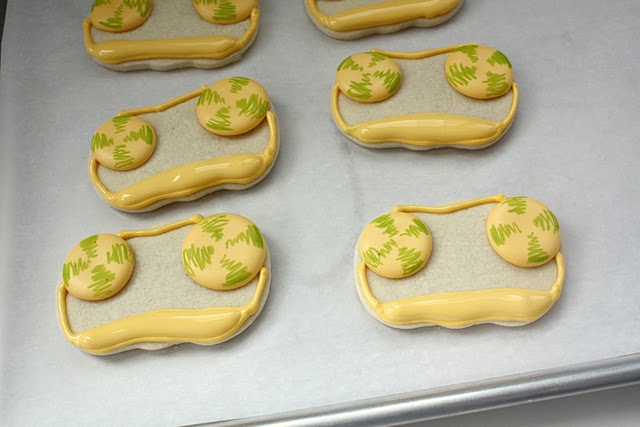
Then, fill. When you fill, you are going to want to flood in sections. Fill one area and let it dry a bit, THEN, move onto another. This gives your cookie dimension and texture.
See?
Now, let this part dry completely. It may take a whole day. *Is anyone beginning to think I am insane yet*
Notice his icing is a little flawed in places. This wasn’t by mistake. The good thing about being a lizard is a bumpy face actually makes you look better, so instead of removing any air bubbles that came up, I left them.
Too bad this doesn’t apply to my complexion!
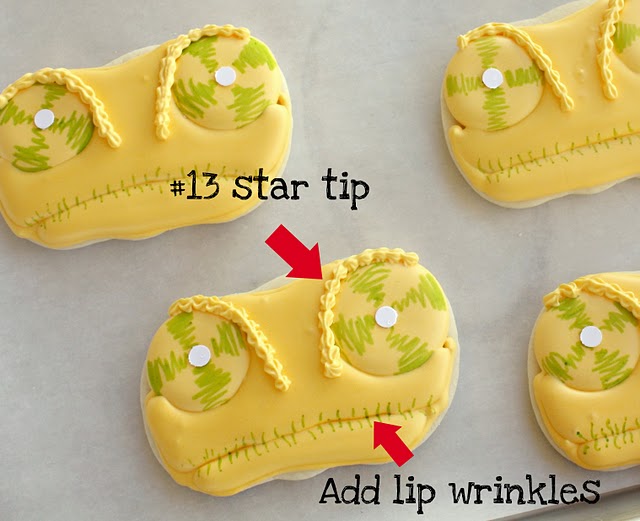
Pardon the photo gap…I accidentally erased a few important ones, so I had to improvise. At this point, use a #13 tip to add the ridge above his brow and food color markers to add lip wrinkles…pardon the disgusting description…lip wrinkles was all I could come up with.
?
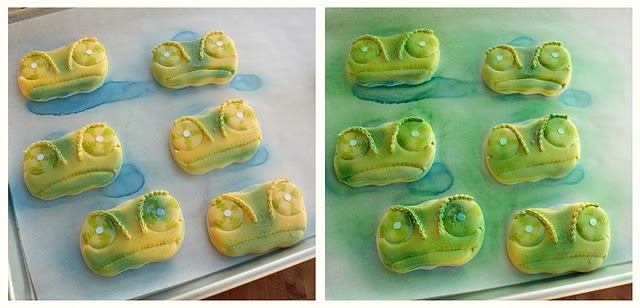
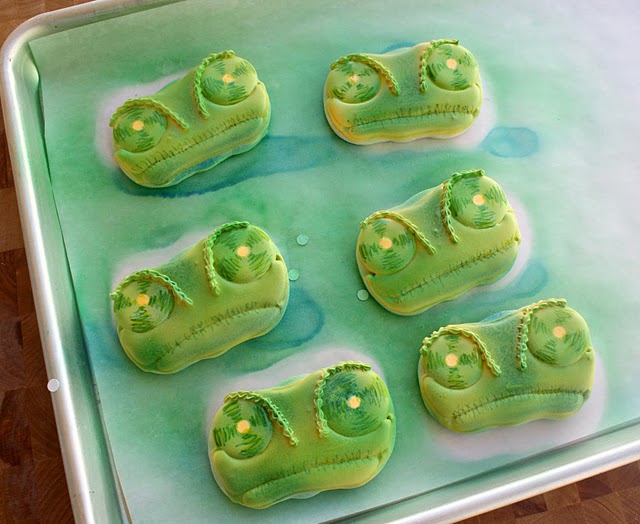
Here comes the cool part. I needed a way to keep the bright yellow color around his eyes “safe” while I sprayed him. So, I used a regular old hole punch, and applied these dots to the area I wanted to protect.
I made them stick by using the very tip of a toothpick to apply a tiny speck of corn syrup as an adhesive and then attached the dot. I didn’t worry about the corn syrup because ultimately, it ends up hidden.
?
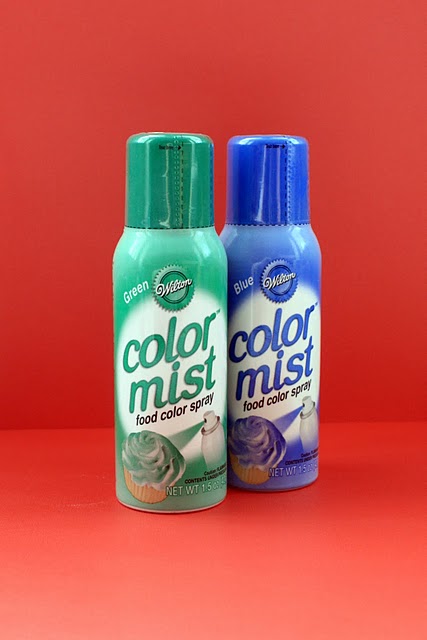
This is where things get FUN! Have you ever seen this stuff?! I use it all the TIME! It’s how I get the airbrushed effect without actually owning an airbrush. {BTW, I plan on changing that REALLY soon}
I’ve used it for on many projects like my fruit cookies and my sunset baby feet cookies it to get a beautiful shaded effect.
SPRAYTIME!
First the blue, then the green. Don’t get carried away. A little goes a long way. And word to the wise, do this in a well ventilated area. It smells pretty ROUGH!
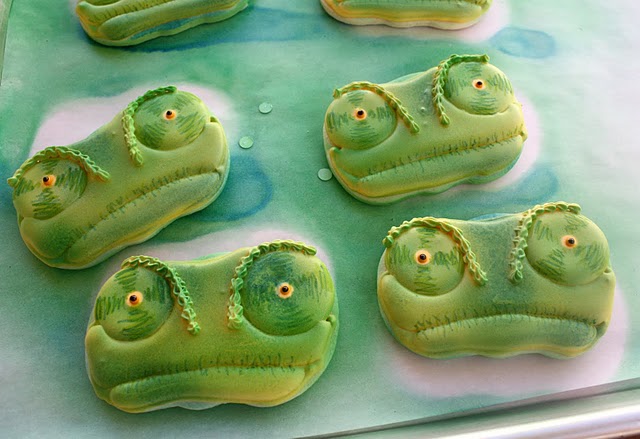
Let them dry a bit, this goes pretty quickly, and then use tweezers or another toothpick to pop off the dots. See? I told you it was cool!
Then using your yellow and black flood icing, add little eyes. Use the #1 tip, and first make a yellow dot, then quickly come back and add a black dot, wet on wet style.
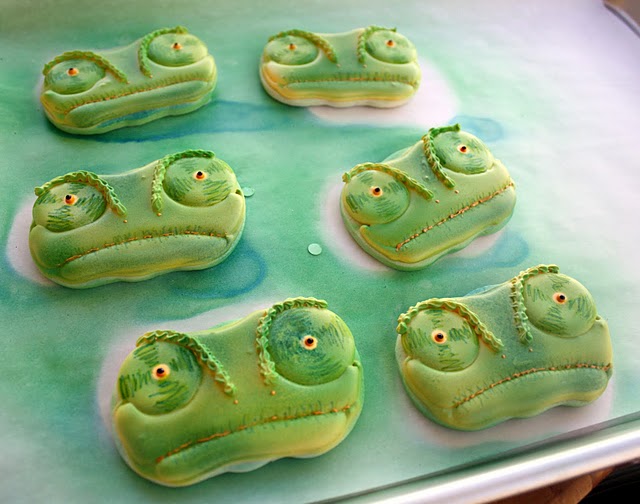
Then use the yellow {still with a #1 tip} to add the last little details…I did nostrils and more lip wrinkles.
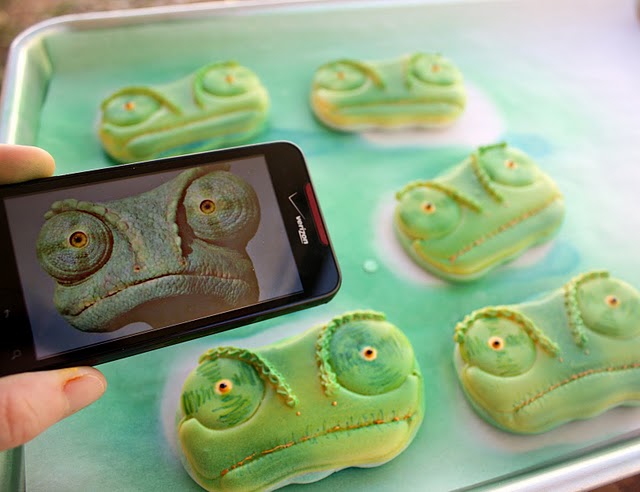
I mentioned referring to Google Images before…this is what I meant. The WHOLE time I am working, this little guy is not far from my side.
Oh yes, and my hubby came up with this idea right after I finished these. I thought it was cute, so I am throwing it out there. I even baked a few with some leftover dough, with good intentions of decorating them. BUT, I ran out of steam and they ended up in the freezer. I’m sure they will end up making a cameo at some point…
And there you have it…
RANGO cookies
Have fun with these.
If you want to make matching cupcakes, my friend Kristan has the cutest Rango cupcakeson her blog. You should definitely check them out!









Great tutorial, i love it very much. thanks for sharing
Oh my….you are the most creative cookie maker I know! lol