Olympic Gold Medal Cookies
These should be some sort of law requiring people to snack while watching the Olympics. It’s impossible to view that much strenuous activity without it rubbing off, right? As a matter of fact, I’ll take it a step further and propose that baking should be the newest Olympic sport. I mean, if curling counts than rolling should too. Maybe not, but in any case you’ll need sustenance. I recommend cookies, of course.
I don’t own a medal cutter {believe it or not} so I came up with several combos that could work. I think my favorite is the tie/circle combo {last photo}.
I acquired these cutters over time so some of them are no longer available. You can find the rest by clicking on the following links: small gift tag, toothpaste, tie, coffin, and tombstone.
There are two key elements to baking shapes together. First, make sure there is a large amount of surface area touching and second let the cookies cool completely before moving them around.
To make these cookies you will need:
- Red, white, and blue piping and flood icing
- Super gold lustre dust
- Vanilla extract, vodka, or Everclear
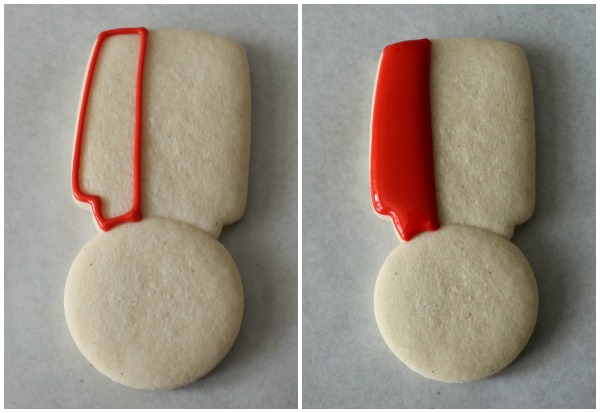
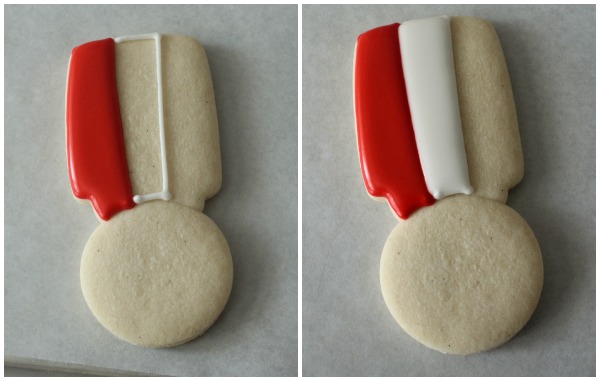
Begin by dividing the top of the cookie into thirds and outlining each section.
 Its best to let the sections dry a bit before moving on to the next color. This will prevent the colors from bleeding into one another. For added protection, you can also use an oscillating fan for drying. Trust me, it works.
Pretend there is a picture of me adding the blue stripe here. I didn’t think y’all would miss it.
At this point let the ribbon dry for a bit then use a round cookie cutter to pre-mark the circle. You can do this with a marker, but these days I have taken to using a needle tool…especially with white. When the marker matches the icing it’s not really a big deal, but food color markers tend to bleed into the wet icing which is no bueno when you’re working with white.
Just be sure to dust off the crumbs with a paintbrush before piping or the cookie or your perfect circle might be a little wonky, LOL! Normally, mistakes like this really get my bloomers in a bundle, but since I was going to add a border I let it go…this time.
Anywho, outline the circles, fill with white, and let them dry completely.
The circles need to be 100% dry before applying luster dust or the icing might pit. I use Everclear {thanks Landa} to apply lustre dust, but if “almost moonshine” makes ya nervous, use vanilla. It all works.
After adding the luster dust, use a star tip and stiff white icing {13-16} to add a shell border. If you want to see what a shell border is REALLY supposed to look like, click on over and visit Bridget. She’s got the shell border thing down.
 For a quick how-to on applying lustre dust click here. If the gold is a little translucent the first time around, don’t panic. Another coat should fix ya right up.
Let the border dry then give it a little coat {or three} or gold luster. See the difference an extra coat makes?
Let them dry and you’ll have cookie fit for a gold medalist or an overexerted spectator, whoever gets there first.
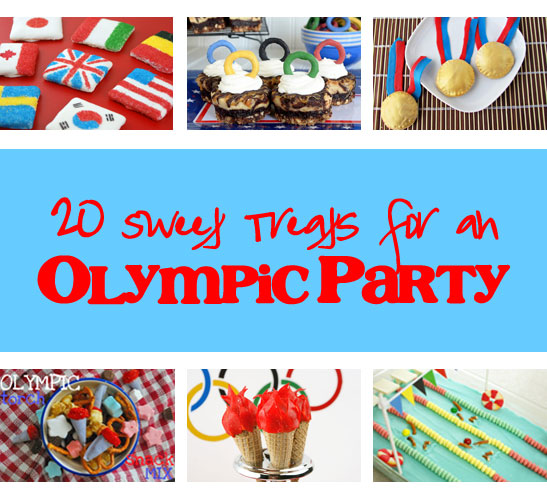
I made these cookies as part of the Olympic Party Roundup on the Miss Candyquik Blog. You will have to head on over to see 19 more inspiring Olympic-themed treats! I especially like the idea of attaching ribbon to simple gold cookies or crackers. So easy, but SOOOOOOOOOOOOO very cute.
I missed Monday {orthodontist must’ve ate it} so happy Tuesday, everyone! Hope y’all are having a wonderful week.
GO TEAM USA!


These are AMAZING! x
Love these! And I love how you used different cutters for different ribbons.. you so smart!
those are so cute and I can totally see them working for kiddo when he is in sports too, but I am way to lazy for that;p
Pingback: Olympic Party Roundup! 20 Sweet Treats for an Olympic Party | MISS CANDIQUIK
Love it – I had to laugh at “or your perfect circle might be a little WONKY”, haha. I really like the second version of these cookies, too! Thank you so much for participating 🙂
-Sarah
LOVE these! I made some simple gold medal cookies last week – but there are definitely not as pretty as these babies! The border is the perfect touch 🙂
Callye:
I LOVE these!!!!! I have spent the last two nights googling gold medals and trying to figure out how to do some. I came up with a different idea, but like yours better…………. !!!
These are so great! And I totally vote for baking as a new olympic sport!!
Are those little vanilla bean flecks?! I would love to sink my teeth into one of those cookies!
Oh wow! These are SO fun Callye! I never would have thought of painting gold luster dust on white icing! These look amazing!
Another amazing post!!
The frugal gal in me love how you show multiple cutter options to make your gorgeous cookies! Brilliant and so wonderfully helpful!
You get the gold medal for cookies girl! 😉
You are the BOMB!!!! I love these cookies. I’m so excited for the Olympics to start. I love watching gymnastics! We used to have a mesquite tree that grew all crazy and part of the trunk was parallel to the ground like a balance beam. Another limb hung low and this was like the parallel bars. I used to dream I was in the Olympics. Don’t even get me started on roller skates—I thought I was a speed skater. LOL!
Hi Sugarbelle!
This is Meimoirs of amiguruMEI.
I’ve just nominated you for a couple of blogger awards. You can see it here: http://www.amiguruMEI.com.
Really love your blog! 🙂
Love your ideas! You are such a cookie genius…but then you knew that!:)
Gorgeous! Everyone can be a winner with these 🙂
These are beautiful! Boy, imagine if they gave THOSE out instead of medals. YUM! I have a gift tag cutter, so I can do these too! 🙂 But mine would only be bronze. I couldn’t do your justice. 😉
These are PERFECT!!! Very creative
Pingback: Gold Medal Desserts for the 2012 Summer Olympics | Yummly
They’re perfect! Love the GOLD!
These look great! I am heading to the kitchen to try some Olympic cookies of my own (will not be anywhere near as nice as these…I might blame the lac of moonshine in my cupboard…hehe…). I have pinned your post and shared at http://creativityunmasked.blogspot.com.au/2012/07/olympic-diy-round-up.html 🙂
These are so perfect! We’ve been having so much fun watching the games so far, yay!!
These look so perfect!
These are so cute, Callye!
Pingback: Mike2.com » Blog Archive » Gold Medal Cookies
Pingback: Olympic Cookies | The Cookie Chew
Pingback: Gold Medal Cookies! - B. Lovely Events
Pingback: Friday Link Love + Last Minute Olympics Party Ideas - The Sweetest Occasion — The Sweetest Occasion
Pingback: Gold Medal Sugar Cookies | options - gold options
Pingback: Olympics Opening Ceremony Party Recipes
Pingback: 5 Olympic-Inspired Snacks for Kids | RoomMomSpot