Royal Icing 101 and My Favorite Recipe

My favorite royal icing recipe.
Ingredients
- 4lbs {two bags} confectioner’s sugar
- 3/4 c. meringue powder
- 1 1/3-1 1/2 c. warm water
- 2-4 tbsp. oil-free extract or flavoring
Instructions
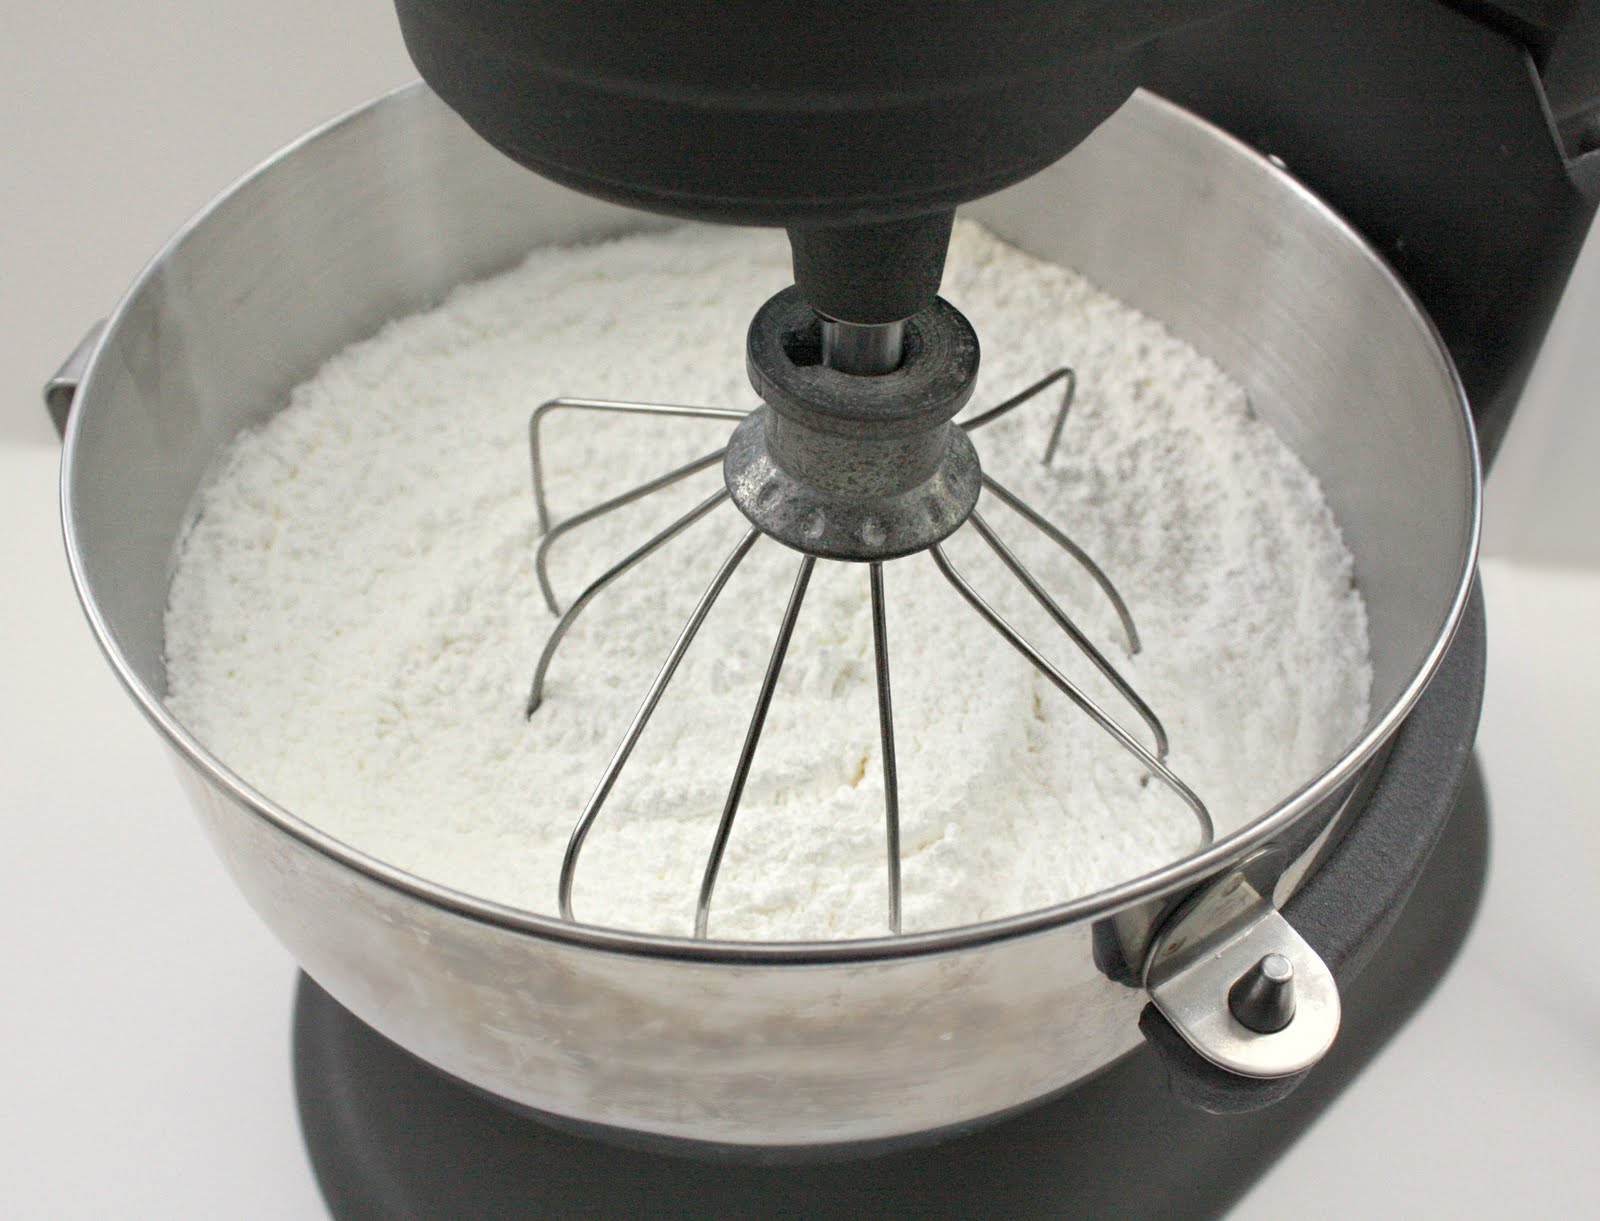
- Add the dry ingredients first. Use your mixer’s whisk attachment to incorporate the sugar and meringue powder.
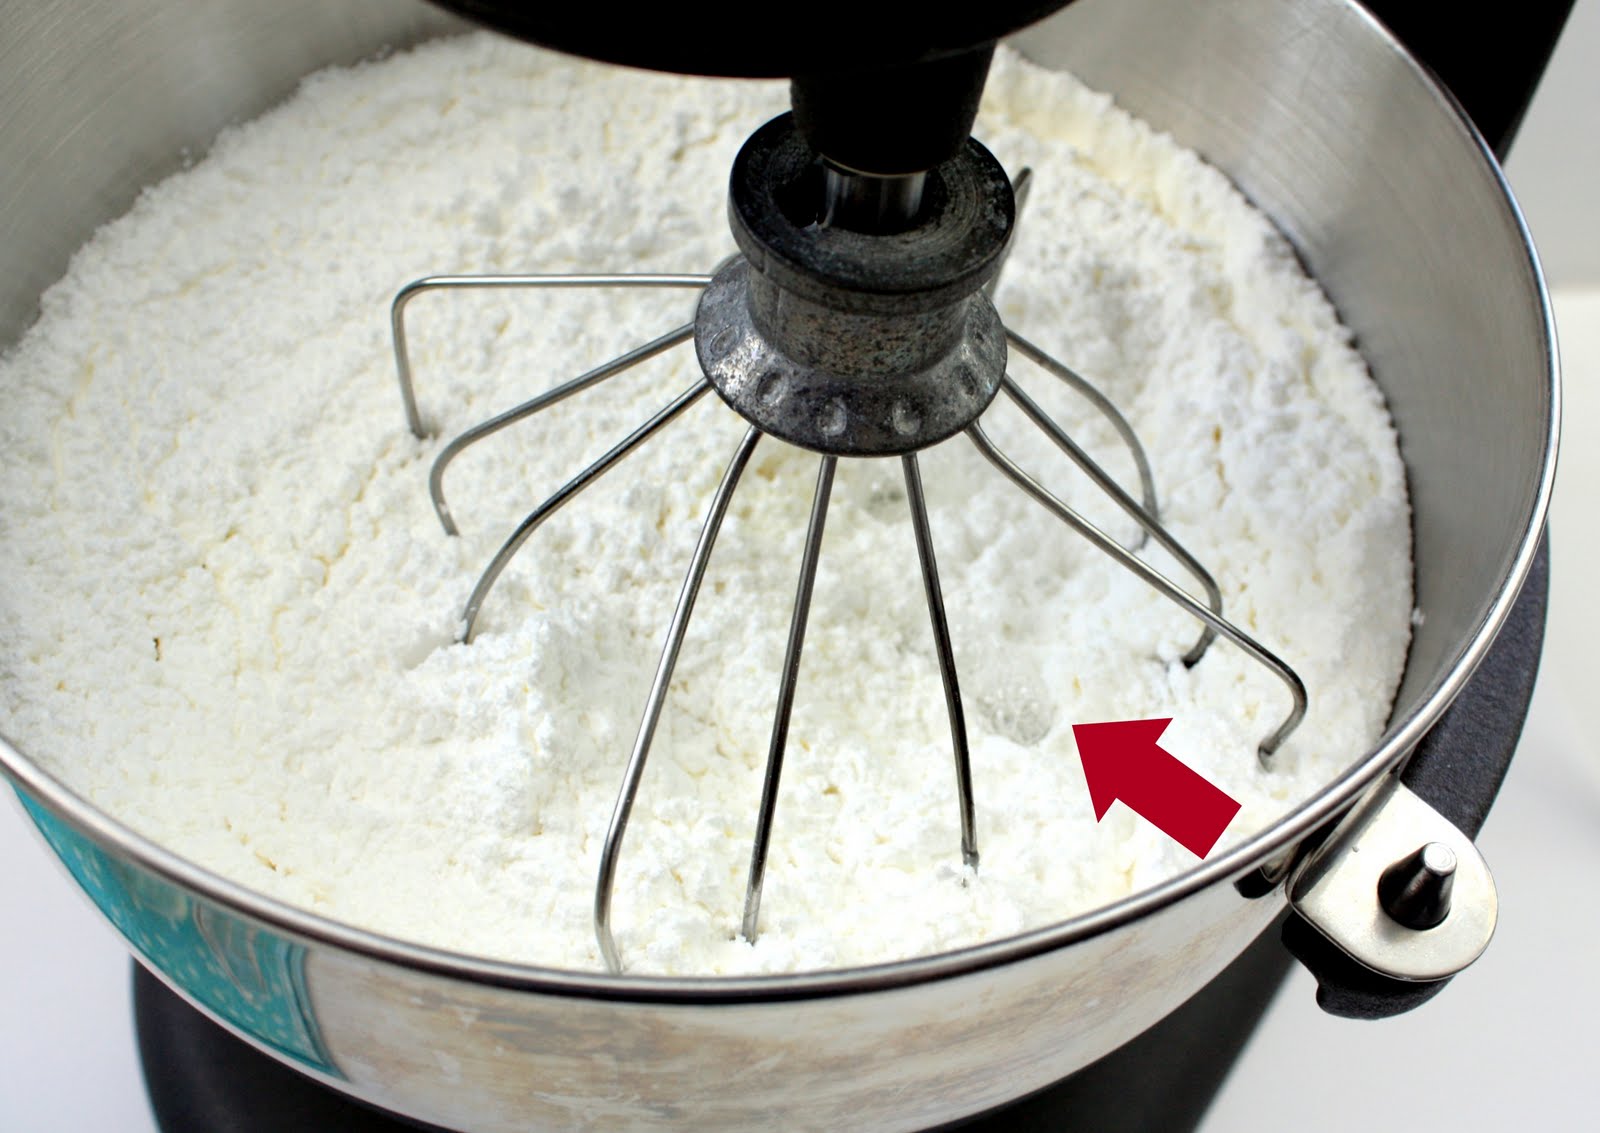
- Add the extract to the water and slowly add it to the dry ingredients while mixing. At first the icing will be very liquid-like.
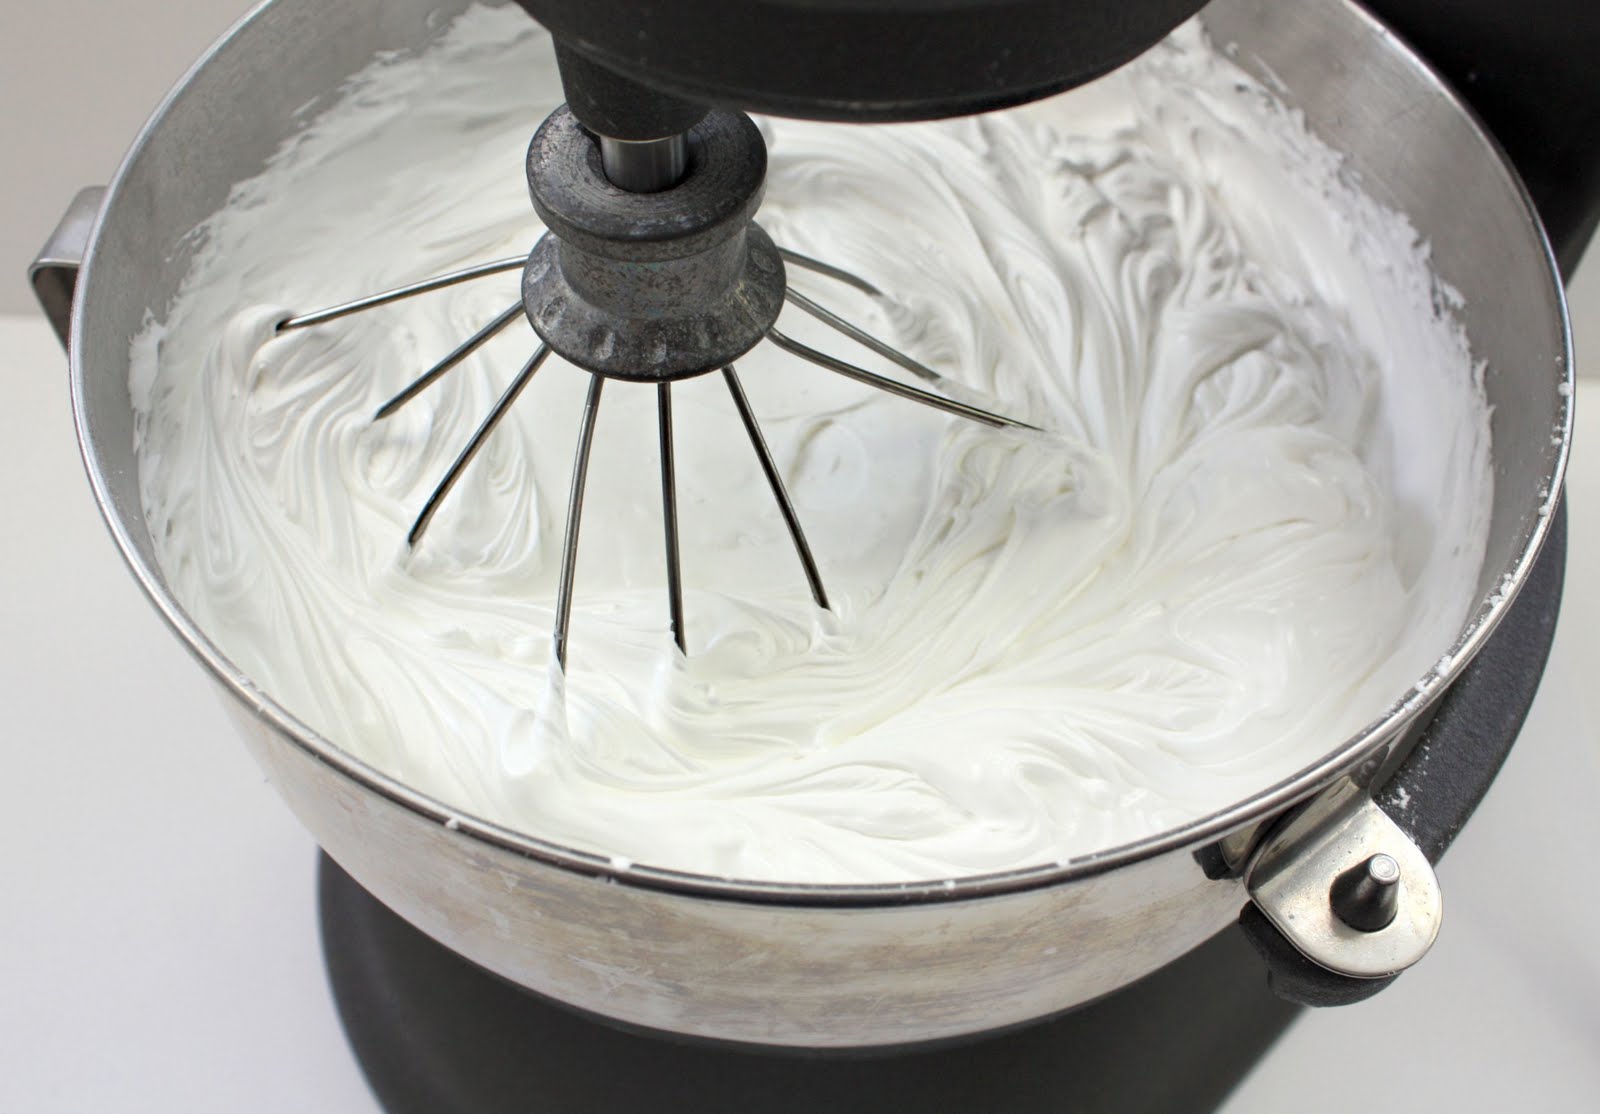
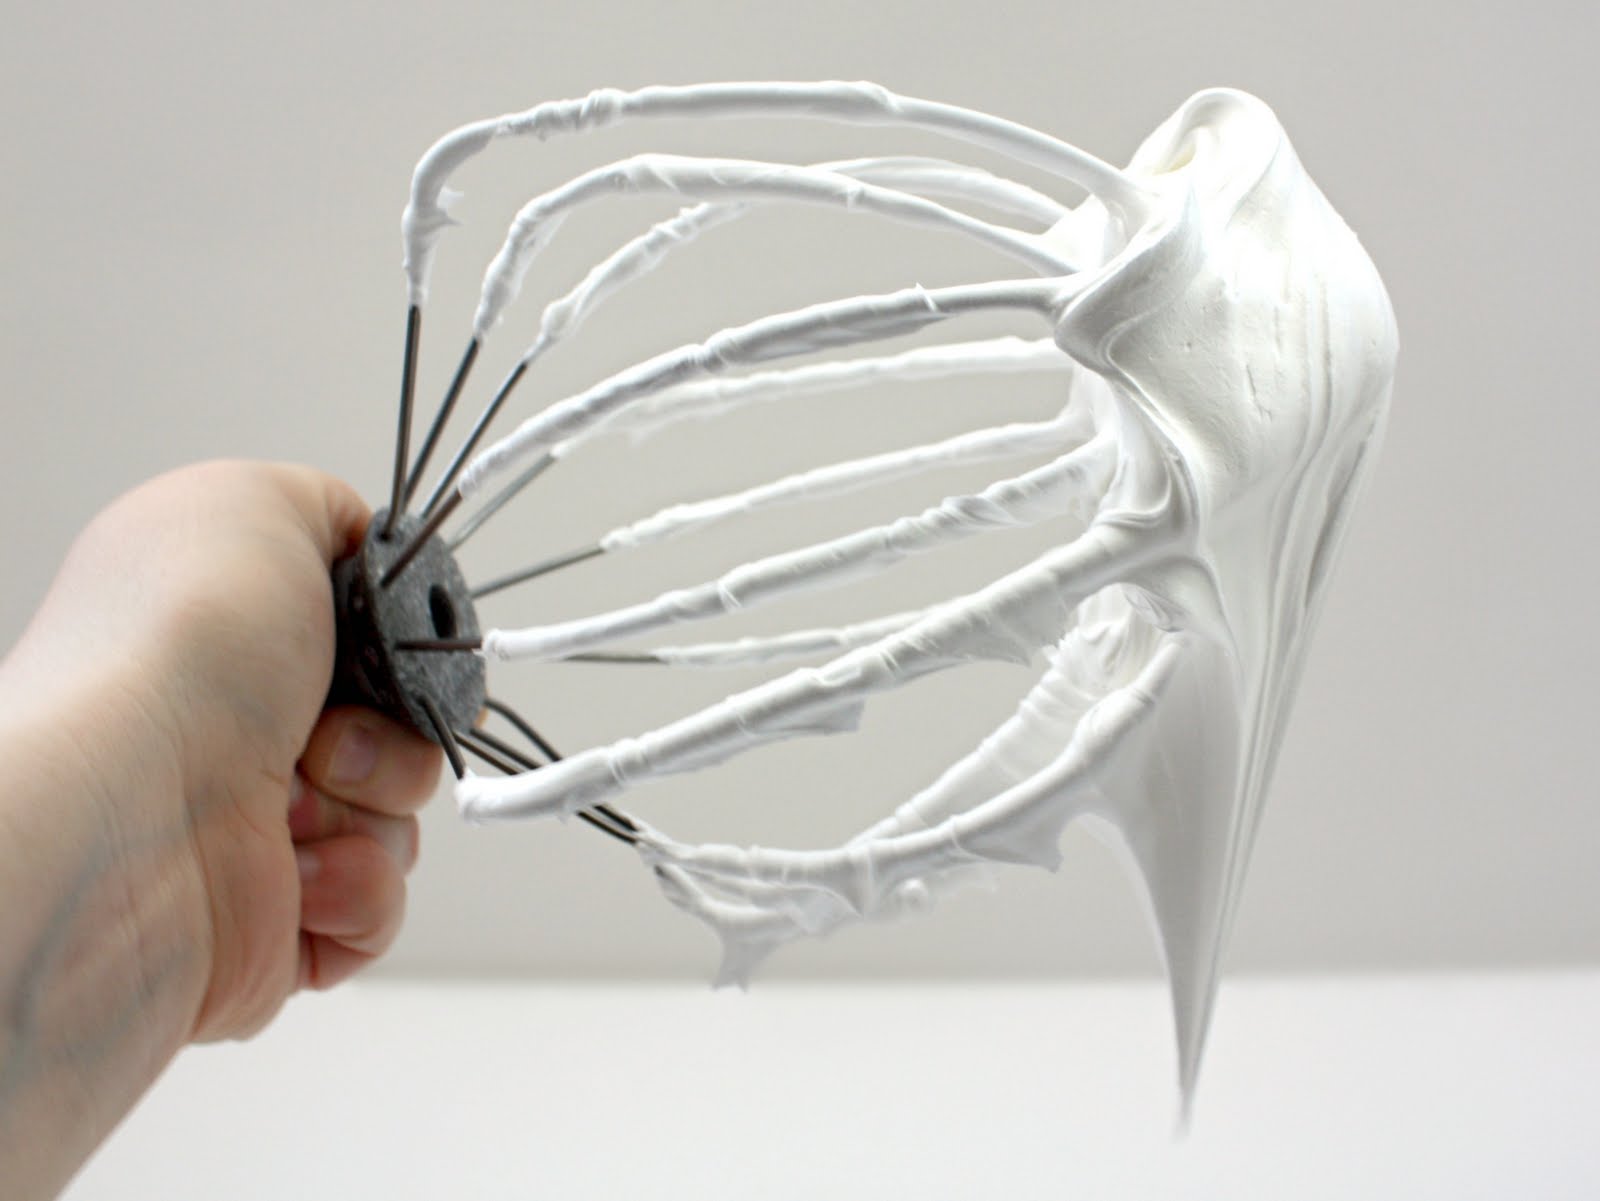
- Continue to mix it at medium-high speed until it is fluffy and stiff peaks form, about 7-10 minutes. Mixing times are approximate, keep your eye it icing and stop mixing as soon as it becomes stiff. Over mixing and oil-containing extracts can keep the icing from setting up, so keep this in mind as you work.
Notes
Royal icing will keep at least a month. I prefer refrigerating it, but it can also be left at room temperature.
Have you ever heard the saying, “All roads lead to Rome”? It basically means that there are many different ways of doing things, but in the end, they all have the same result.
When I first began making cookies, I didn’t really do a lot of research. I’d read a magazine article that said I needed meringue powder, SOOOOO, I headed on out to Wal-mart and bought a can of the Wilton stuff.
The first thing you’ll find when you open it up, folded in a tiny square, are the instructions. That was pretty much my beginning. No Googling or classes, just me reading those little instructions, interpreting in my head what they meant, and taking a leap.
I have gone back and fourth about posting this for a long time, just because I know, if there is any book, or proper way to make royal icing, I’d probably get a big fat “F”, so, as a little disclaimer before I start, PLEASE don’t turn me into the Royal Icing Police if the way I do things strikes you as a little ODD. This method works well for me, so I’m sharing it with you.
When I started, I used with the Wilton recipe. However, as I got better and better at making royal icing, I got to the point that I didn’t measure anymore. At this point, I CAN’T, I just look at it and adjust. To double check “my” recipe, I broke it down .
I pretty much always make a large batch of RI. It almost fills my 5 quart mixer, which is way too much for most people, so I’ll post two versions, a large and a small. If for SOME reason, you hate this recipe, revert back to the Wilton version or another popular favorite, Antonia74’s Royal Icing.
2 lbs {1bag} confectioner’s sugar
1/3 c. plus one tablespoon meringue powder
about 3/4c. water
To begin, I add all of my sugar and meringue powder to the mixer bowl. I am what you would call a non-sifter. In my defense, I ALWAYS sift my flour, but I just don’t waste the time with powdered sugar.

Instead of scraping the sides, ever since I read Gail’s life-altering post on “shpritz bottles” I keep my trusty spray bottle handy. If a little icing happens to stick, I just spritz the sides until it’s incorporated. {As a matter or fact, I now use my bottle for all sorts of little jobs in the kitchen}
At this point, the icing may look too thin, but believe me, it’s not. It should be about the consistency of honey {in a warm room} or shampoo.
A little FYI, a useful piece of info I have learned along the way is this: If for some reason you forget the meringue powder, DO NOT add it into the icing after it has reached this point…if you do, it will be ruined. If you need to add meringue after the fact, dissolve it into as much water as it needs to become liquefied and then add it.
The Christmas before last, exhausted from making tons of cookies, after a few minutes of unsuccessful beating I realized I’d forgotten the meringue. Without a thought, I dumped it right in. The resulting icing was so clumpy, that after a FRUSTRATING hour of unclogging and changing tips, I finally tossed it out and started over.
On the other hand, if I happen to over-thin my initial mixture, adding more powdered sugar to the mix doesn’t seem to effect it at all. Go figure…
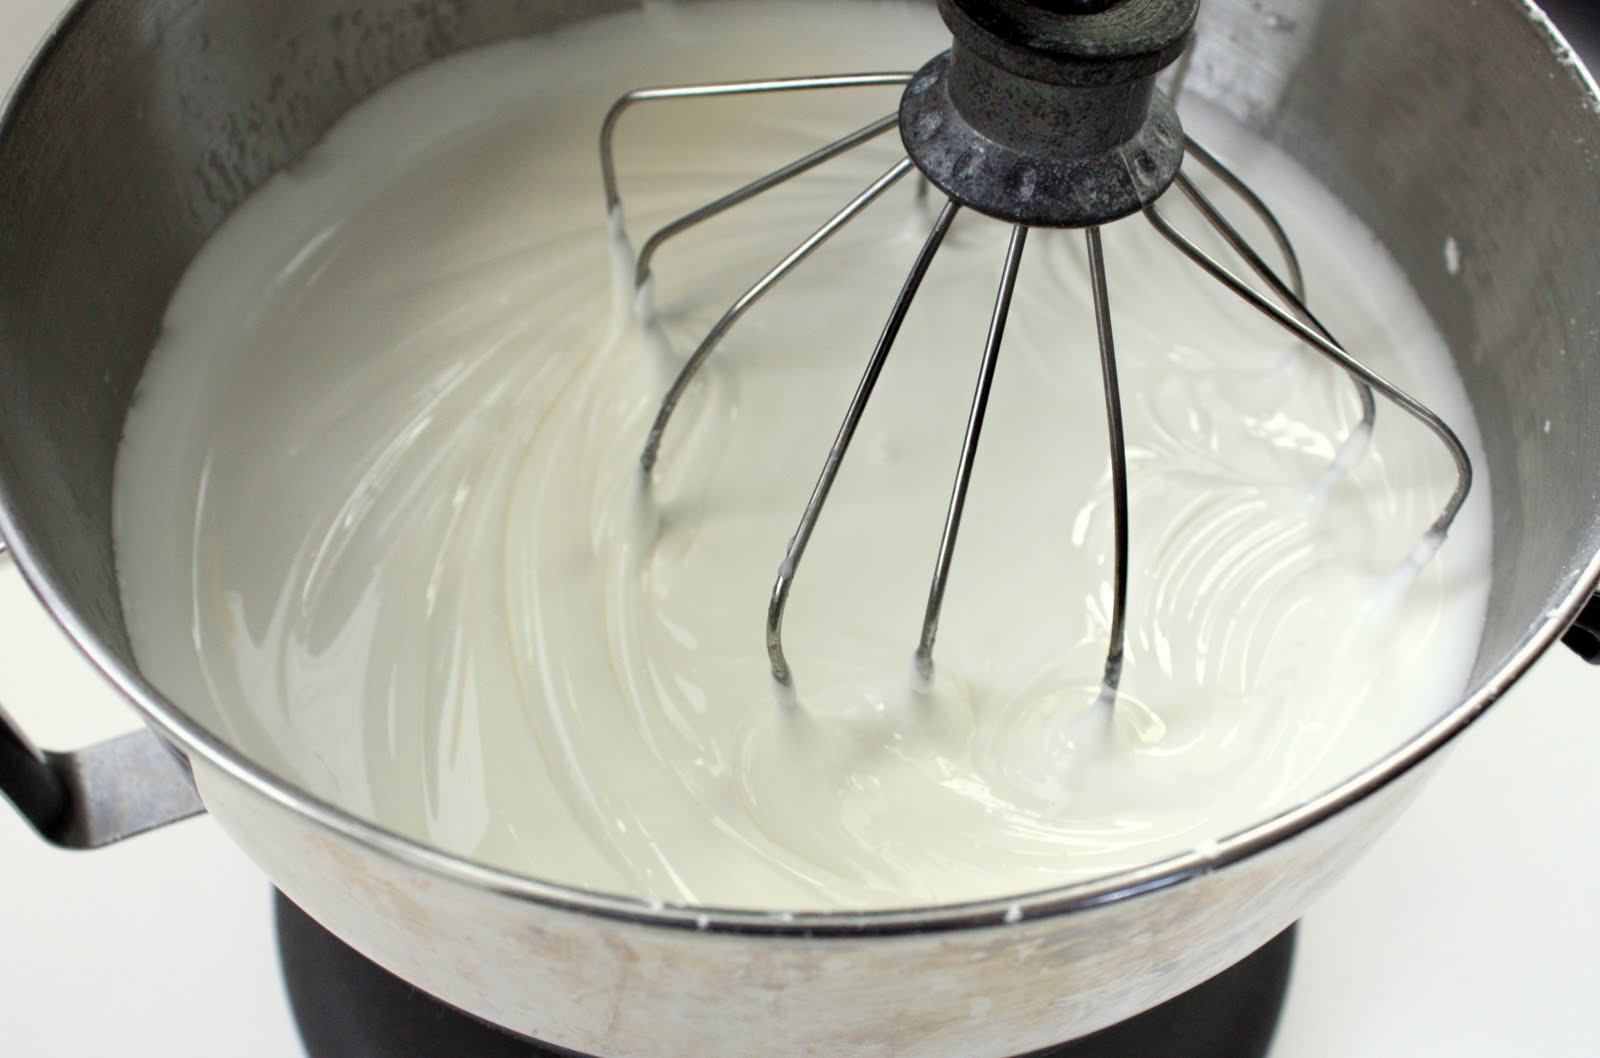
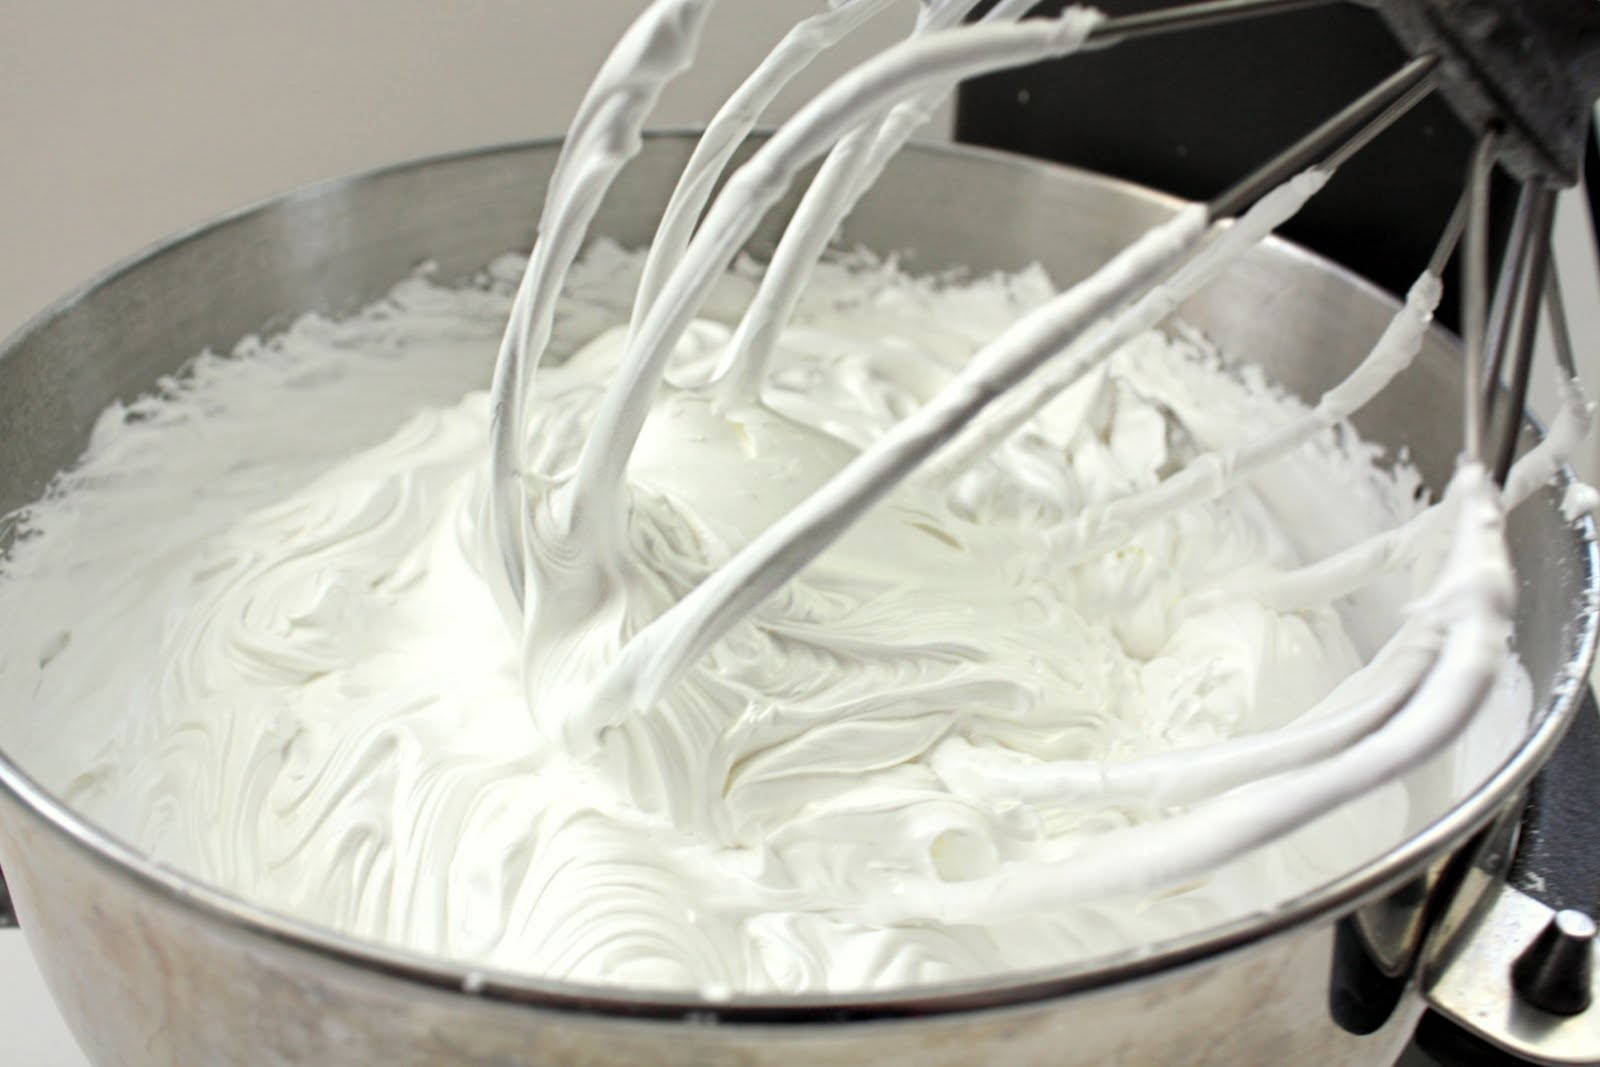
Moving right along…I begin by mixing my icing for 5-6 minutes at medium speed. Then, as it thickens up, {think pudding} I hike it up to high.
I let it go on that way for about 3-4 more minutes until it is stiff and fluffy like meringue. At this point, I can tell by the clanking of my mixer that it’s ready…thank goodness for Kitchen Aid’s wonderful warranty!

-
Royal icing and oil are NOT friends. make sure all of your utensils are oil free, including your bowls. wash them well in hot water, and give them a rub with lemon juice or vinegar before using them.
-
Royal icing keeps for a long time. I have been told by MANY that they leave it covered on the counter for up to a month with no problem. I refrigerate mine, but that’s just me.
-
If you need to refresh it, you can fluff it up again with the mixer, and it will be like new.
-
If I am expecting humidity, I add a little less meringue powder, and a little cream of tartar. I didn’t just make that up. I read somewhere that CofT is a stabilizer and helps when it’s humid. It seems to work, although humidity has not been a concern of mine for almost a year *GRUMBLING*
-
It’s also alright to add a little bit of corn syrup to your icing. Every once in a while I do this if I want it to be a little shinier, but I really can’t tell if it helps or if I just think it does =)
-
I don’t really use Wilton Meringue powder anymore, but if you don’t have access to other brands, it works just fine…


is mccormick vanilla extract oil free?
How much corn syrup is ok to add to the half batch?
I just made this royal icing recipe and I used a little light corn syrup for the first time ever (in my royal icing). I used @ 2 tablespoons. Naturally, the taste of the icing is a bit sweeter. But, the icing is so pretty and shiny. I am anxious to see how it affects drying time. Good luck.
-gina
What can you use instead of merengue powder…. We do not have it here in Zambia??
Egg whites and make Meringue and you won’t need to use the water to make the ri
Thank you so much for the R.I. tutorial. As always, I am amazed by your talent and generosity. One question though …. you mention that R.I. and oil are not friends. The R.I. recipe that I always use actually has meringue powder, a bit of corn syrup and shortening. And I find that it works just fine. In fact, it dries hard, but not rock-hard like the recipe that I used to use. So I am curious about your statement that they don’t mix.
Pingback: Beach Ball Sugar Cookies | This Silly Girl's LifeThis Silly Girl's Life
Hi! Thank you for your recipe and tips! sounds super easy! I have one Question?
If do not have that mixer whisker, Can i use a regular one?
Pingback: Royal Icing- Cookie Decorating Basics - Eat, Think & Be Merry
Okay! You have a ton of different amazing recipes and I am lost on which to follow for what I want to do! I have never made royal icing before that is my disclaimer. I have been asked to make some snowflake sugar cookies for a Frozen themed kids birthday party. I never liked the thought of having raw eggs in frosting esp. for kids. So I like the idea of meringue powder. What recipe do you recommend I follow as a first timer? Additionally I do not have a stand mixer. Only a hand mixer that goes insanely fast. I like the idea of using the bottles with the couplers too. But what do you think about using them for flooding? Probably not on larger cookies? thank you for your help!
In the recipe:
c. Means cup?
after how many hours it hardens; made ??a recipe I found and after 12 hours were soft. why that hapen?
I am not sure about others. But, my sugar cookies with (any) royal icing take between 48-72 hours to “dry” or “set up.” Good luck.
-gina
after how many hours it hardens; made ??a recipe I found and after 12 hours were soft. why that hapen?
Gail’s life-altering post on “shpritz bottles” has been removed and when i tried to search the words “shpritz bottles” on her site I came up empty. Can you help?
Pingback: For Humans Only
Pingback: Pumpkin Pie Sugar Cookies | Femsplain
Hi! I tried making RI for the first time today. I frosted my cookies around 2:00 this afternoon and it is now 8:30. My cookies are still tacky. Should they be tacky, or should the RI dry hard? I would like them to be hard, so what am I doing wrong? Thanks so much for your help and suggestions!
Pingback: Pumpkin Pie Cookies - The YoYo Foodie
Pingback: Olaf Sugar Cookies | Jamie's Recipes
Oh. My. Gosh. We are sisters from another mother. Your recipes are almost identical to mine and yes, confectioner sugar for cookie texture and ALMOND extract for flavor is the only way to go. People love my cookies and just can’t put their finger on why. I just had to post and boy, would I have a great time talking cookie with you!!!! Happy baking always!
Hi SugarBelle. I have to say that my love for sugar cookies hit a whole new level when I seen your amazing creations. I just baked and decorated 10 dozen sugar cookies for an upcoming cookie exchange this weekend. I did a half batch of RI first using wilton meringue powder and it came out just as it should with stiff peaks. I thinned it to the consistencies I needed and all was well. I made a second batch last night using meringue power from the bulk barn. I’m not sure of the brand but it definitely seemed a different consistency from wilton. It was heavier and grainier, almost as if there was sugar in it. This batch never did peak. It made it to an outline consistency but that was it. I followed the recipe exactly. I even tried a third batch and the exact same thing happened. I thought I would ask you for your thoughts. I’m at a loss. My vanilla is kirkland brand without an oil. I noticed you said that you use other brands besides Wilton. Any suggestions would be greatly appreciated.
Hi Melissa. I know this may be a bit late, but I use the Bulk Barn brand too and it does not produce stiff peaks. It stays at outline consistency, but it works very well. I don’t thin it out for outline, just for flooding and it firms out very nicely on the cookie. Hope this helps.
Pingback: Backward Engineering My Sugar Cookies | Musings of a RAD Mom
Thanks for sharing this. I’ve never been able to make royal icing come out the way it should be. I’m going to try again following your steps, though I’ll have to re-read it again since there’s so much to process.
Hi, i visited your site suddenly and i got interested to the nice cookies and your different recipes. i studied various posts you put there and i have decided to start making cookies as you guided. but i have a question. i live in Iran and the meringue powder is so expensive here, is there a way to make meringue powder by ourselves with egg? pls help me. thank you honey.
hey! Just wondering how you store this icing and how long it’s good for?
Can’t wait to try it
Reread the article. It answers both your questuons.
Wondering why nobody answers the questions posted.?
Hi! I made a batch of icing using your recipe the other day and my icing consistency never turned out to be as this as yours. Also, once the cookies (EVENTUALLY) dried the icing was like powder!! Do you have any tips on what to do!
Pingback: Chocolate Cookie Masjid - Modest Munchies
Pingback: LUCKY CHARM LEMON SUGAR COOKIES - Club Narwhal
Do you have a recipe for using egg whites instead of meringue powder? I know that 3/4c meringue powder is 12 egg whites, but with the powder you have to have water to get the right consistency, so would it be just the 12 whites and 4lbs of the sugar? And that is for piping consistency? so do I still gradually add water to make flood consistency?
This has become one of my go-to places for anything sex related. Fantastic blog! Thanks for the great work! I would love your feedback on some of my stuff. pureblissbox.com
Pingback: Toronto cookies | lizzyloveschoco
THANK YOU THANK YOU THANK YOU THANK YOU THANK YOU THANK YOU THANK YOU THANK YOU THANK YOU!!!!!!!!!!!!!!!!!!!!!!!!!!!!!!!!!!!!!!!!!!!!!!!!!!!!!!!!!!!!!!!!!!!!!!!!!!!!!!!!!!!!!!!!!!!!!!!!!!!!!!!!!!!!!
Hi, I was wondering what brand of meringue powder that you use? I used to get Henry & Henry, which i LOVE, but I can no longer find in!
Pingback: Making Softball Themed Sugar Cookies | Rachel's Creative Adventures
I am trying to make and absolutely can’t find any recipe out there close to what I am trying to do; Maple Syrup Royal Icing. I don’t want it to taste like powdered sugar but I want it to have the real maple flavor. Can’t stand fake maple flavor. Is there anyway you can help?
Hi Andie, Just stumbled on this comment when I did a google search for “Maple Syrup Royal Icing” and I was wondering if you ever did come up with anything? I just made some maple syrup, brown sugar cookies and they absolutely need more maple flavor via the icing. My plan is to use egg whites (from the carton), powdered sugar, maple syrup and spritz with h2o as I go I’m just concerned that the icing won’t harden properly and I don’t want to waste a batch of icing (and time) to try to figure it out if you have found a recipe. thanks!
How long does it take to over mix? If I mix even less than the recipe says ( I don’t know exactly how long) it still breaks and crumbles when it’s dry. I searched for posts about this problem and everything says it’s caused by overmixing Is there anything else that can cause this? Or do I just need to keep a close eye on it and stop beating as soon as I hit stiff peaks? What happens if it’s not beaten enough?
Thanks much! Love your site
Pingback: Half a Batch of Royal Icing Recipe | The Bearfoot Baker
Pingback: Mitzy At Home:Lip-shaped sugar cookies - Mitzy At Home
Thanks so much for all your instructions and truths! I’ve just purchased your cookie cutters with the recipie tin and the dough cutters/colors and can’t wait to get started! Your sugar cookie recipie has now become my favorite go to cookie! I’m confused about the oils though since all the almond flavors and most of the vanilla’s too all say “oil” of in the ingredients. Can you recommend what brand you use or a couple of brands that don’t carry oils please? Do you carry or sell any of these oil free flavors online? Thanks so much for your wonderful blogs!
Does this recipe work for piping and flooding? I tried it,
And found that because it was fluffy it wouldn’t flood well and there were “peaks” on my cookies. Any idea how I can avoid this?
Thank you for this recipe . I med the smaller batch. I added almond extrat and vanilla emulsion together. Didn’t have enough almond emulsion at the time. I tasted the water so see the balance of the flavoring, you just have to remember it’s in water. It may taste medium strength but add more. When you don’t its just a very light hint.
I found this recipe is not as sweet as others. My be because of the amount of meringue. But the amount of flavoring is what really does the trick.
Do you adjust the amount of water for the extract you are adding? What size tip can you use this with for decorating sugar cookies?
I just made this and followed to a T and it tasted like straight powdered sugar. Even after adding tons of extracts. This made such a huge batch and it’s such a waste. I’ll go back to my old recipe.
What can you use instead of meringue powdered? Cream of tartar? Processed egg whites? How much of each and recipe please.??????
Love you post … Been roaming around for corn syrup and meringue powder… No.luck… is there any substitute other than Raw eggs… might help .. thanks Gloria .. love from Australia
It change the consistency to a flooding consistency, do you just add more water? If you want to decorate on top of the flooding, once dried, would you go back to the original “dam” consistency?
Hello, whT kind of powder do you use. We are looking to buy a good brand in bulk. Wilton is too small and expensive
Pingback: Honey Orange Mascarpone Sandwich Cookies | Cupcake Project
Pingback: Christmas Bean Cookies with Homemade and Natural Food Dyes - Super Healthy Kids
Pingback: Simple Honey Cookies