Simple Seahorse Cookies
A few months ago a sweet cookie friend emailed me and asked me for a how-to on simple seahorse cookies. It took twice as long as I planned to get it done of course, but finally, here they are. This is for you Susie!
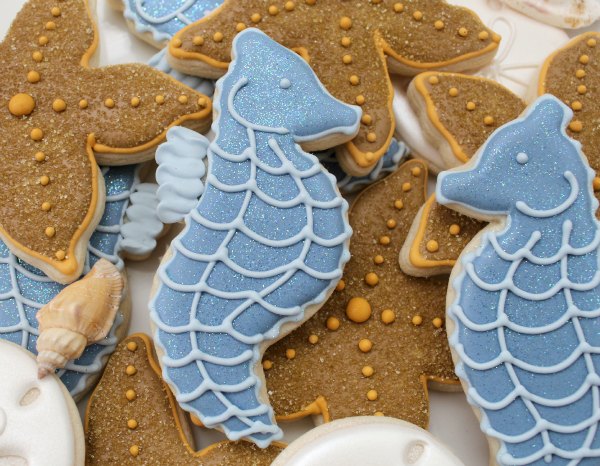 To make these cookies you will need:
- light blue piping icing
- medium blue flood icing {I mixed navy and delphinium blue}
- disco dust {rainbow or baby blue}
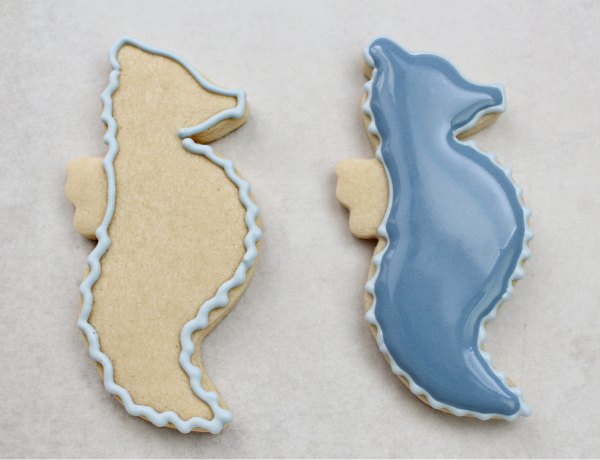
Begin by using a #2 tip to outline the cookie in light blue. For a more realistic look, make a wave pattern as you outline {the same way you probably drew water as a kid}. Once the cookie has been outlined, fill with medium blue icing.
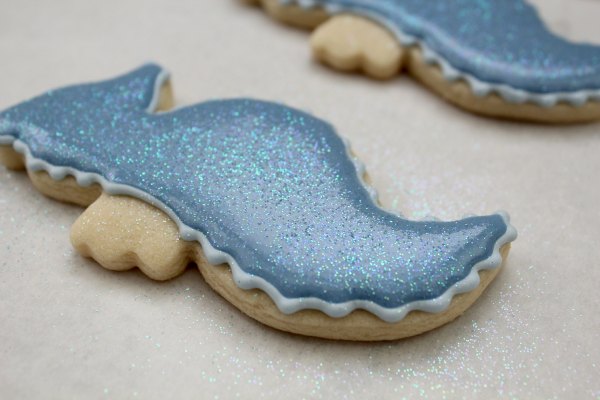
 While the flood icing is wet, sprinkle with disco dust. I used baby blue, but if you aren’t down for investing a ton of money into random shades, go with rainbow. It works for everything. If you’re not digging disco dust at all {food safety issues which we’ll talk more about in the future} skip it altogether.
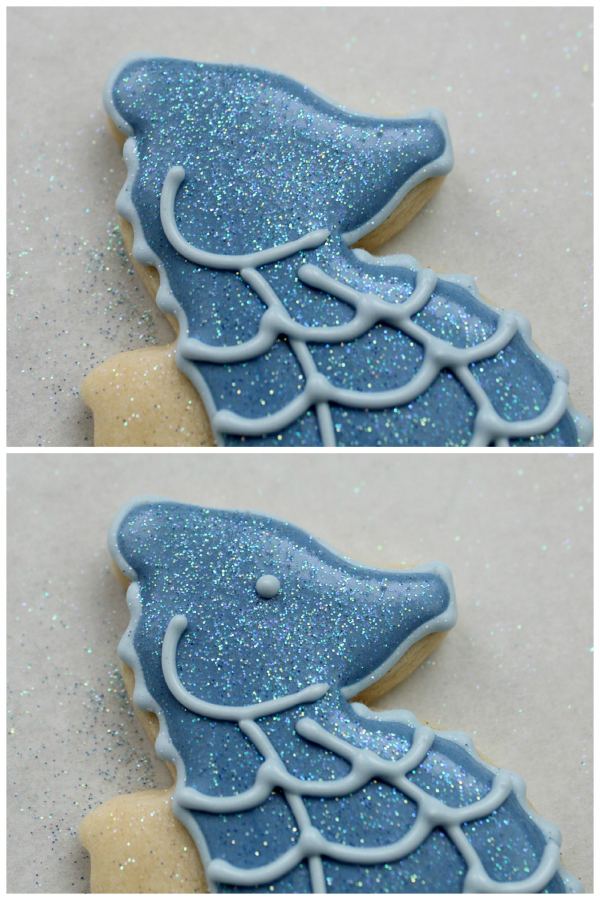
 Let the icing dry for a bit and then pipe on the details with #1.5 tip. This might seem a little scary but if you break it down into sections, it’s pretty easy. Start by making a line down the back of the seahorse, then another toward the front like I did below. Finally, connect the three, once again using a wave pattern and that’s all there is to it.
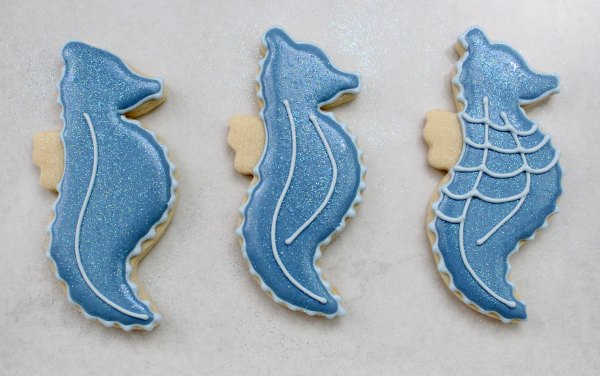 Once the body is piped, give the seahorse a little jawline and eye.
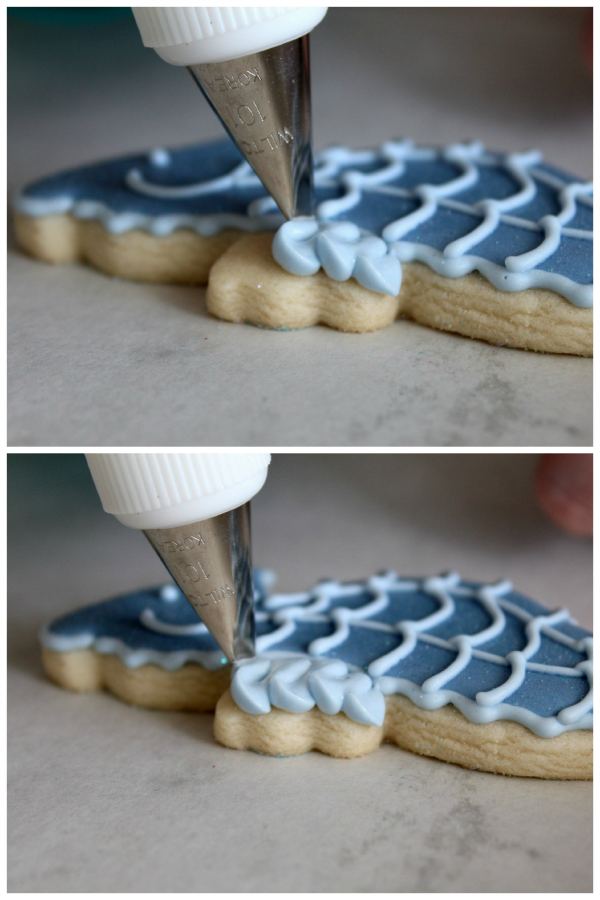
 To finish up, use a 101 ruffle tip to add a sweet little fin. I took a bazillion pictures of this, but in the end I decided you’re better off watching Ali’s ruffle tutorial for help with this step.
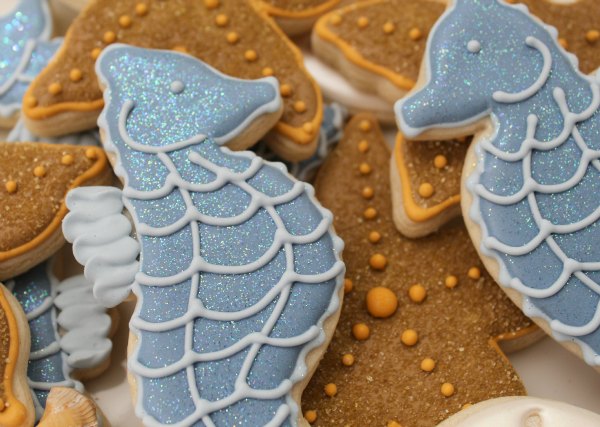
 Let them dry completely and you have a simple, yet elegant seahorse cookie.
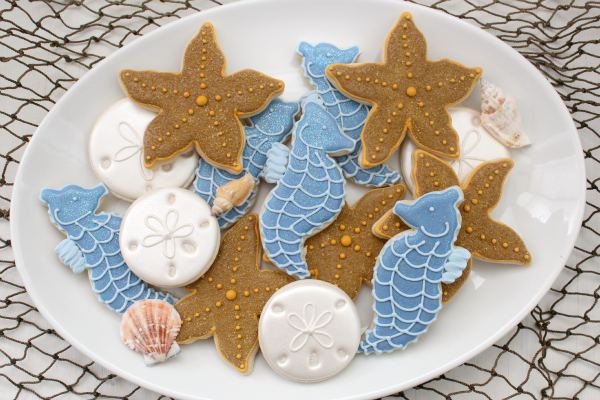
 I mixed mine with a few starfish and sand dollars for visual interest, but these are beautiful on their own.
I hope everyone has had a safe relaxing weekend! See you back here soon!


These are so pretty! Too cute to eat almost 🙂
As always they are beautiful! And you platter arrangement looks nice!
Your work is fantastic!!!!! Congratulations!
Paula
Outstanding! I live on the ocean 6 months out of the year, and these would be perfect!! I’ll have to look for the cutters and give them a try!! Thanks so much! ~karen
So cute!!
Have a nice Sunday
That seahorse cutter is really cute and you decorated it wonderfully. Nice tutorial and that baby blue disco dust is great.
Beautiful! The blue color is so lovely – you have such a wonderful eye for color 🙂
Just gorgeous! The shade of blue is so pretty!
These are beautiful! I really live the sand dollars too! Where did u get the sea horse cutter?
What a gorgeous combination of colors. And that delphinium blue is so pretty…….I think my favorite cookies are the simplest ones.
That disco dust is gorgeous!
These are beautiful. I love the color combination between the seahorses and starfish.
Cute looking cookie.
These are soo pretty and I love the colors and disco dust!!
GORGEOUS!
So pretty! I haven’t used disco dust before….I think it’s time to break it out!!
Love it! You are amazing at breaking things down so we all can make beautiful cookies! You are wonderful and your seahorse, starfish, and sand dollars are beautiful!!
I LOVE your sea horsies! I’m a huge fan of coastal-themed cookies and have done sea horses and star fish…and others. I like yours, especially the way you did the dorsal fin…I have never been happy with mine. Thanks so much for sharing such a pretty batch of cookies!
Your site has helped me learn so much. I am just getting started in cookie decorating and hope to get good at it. I love everything you have done and I am wondering how you did the sand dollars that are with the seahorse? Thanks so much for your updates!
Those are so pretty!
How cute are these? They would be perfect with the sandcastles I want to make someday!
da te imparero’ tantissime cose finalmente ti ho trovata piacere di conosceti sono veronica anche io mamma di tre piccoli antonio di 9 anni e le gemelle maira e noemi di 6 .un bacio ho messo il bottone del tuo blog nel mio per non perderti più
They look really amazing! Thanks for sharing!
The seahorses are so cute…but HOW did you do those amazing seashells?!?!
I don’t think these are simple. I think they are simply stunning. The color is fabulous and they have an elegance about them. Love them!
Perfectly gorgeous just like always!
The wavy outline adds so much to the seahorse and such a pretty blue!
Thank you for this post! It reminded me that I have these cookie cutters (how soon we forget!) and how much I have wanted to do nautical-themed cookies . . . I just need to find the time! I love seahorses and yours are just beautiful!
Tengo una carpeta con el nombre de tu blog donde voy guardando todas tus galletas, me parece un trabajo extraordinario las galletas que decoras. Un besazo.
Wow these are so stunning! Especially with the sand dollar and starfish cookies! awesome job, Callye 🙂
Perfect! Thanks to your advices decorating cookies is easier 😉
Perfect timing – I’m making several dozen cookie pops for an ocean vignette for a Bar Mitzvah this weekend, and the seahorse was the most intimidating. Thanks for the tutorial!
Hi, I just have to say you are amazing. I have been practicing and practicing and i am getting better with your help. I have a very long way to go. I am totally in love with 20 second icing since everything i do is last minute it seems. I have a few questions. It seems theyt take longer to dry because i am using more icing. I am still trying to get the consisting right. Should it take longer is it more icing or do i still need to work on the flow. Oh were did you get the seahorse cutter.
I decorate cakes some times i think cookies are harder. Lynns Custom Cakes on face book.
Thanks Lynn
so fun, I love disco dust!
You never cease to amaze me! I love how your brain works!!! Wonderful combination of new techniques and artful choice of color and subject!
how dreamy and realistic looking!
the scuba diver in me ADORES these. So beautiful!
Oh my, you captured the sea in a cookie. Perfect!
Very pretty cookies, as always! The starfish and sand dollars are beautiful as well.
Oh, I LOVE the Sand Dollars! So classy and simple!
love these! Made me smile!
Thank you so much!! They are beautiful as all of your cookies are! I will send you a picture of mine when I am done! Love the ruffely (sp???) fin! Seahorses are the cutest things ever!!! And did you know that the fathers give birth?? All the more reason to love them!! Thanks again!
Susie
These are so beautiful! And your instructions couldn’t be clearer. Thanks for the wonderful photos, too!
totally adorable! Am sharing on our fb biz page!
I just LOVE the color of these seahorses Callye, STUNNING!
Beeeeeaaaaauuuutiful! Such a gorgeous blue sparkle! The sand dollars and starfish are out of this world too! Amazing texture on the starfish!
I love these! Well, I love all your amazing cookies…but these are really adorable!
Perfect timing!! I just got my seashell cutters in the mail today. I’m decorating cookies for the “Island Paradise” prom this weekend at our alternative community high school! Love the sparkly on the sea horse. I’ll be arranging the cookies in a bed of brown sugar to look like sand.
Oh bummer!!! Why didn’t I think of that. It would have looked great on te platter!
So beautiful Callye!
Thank you =)
These are great Callye! I think they will be on my “to do” list for summer cookies!
I love the pretty glitter, these are so pretty!
Those are just beautiful! I love how you break the steps down to make it look like something I might be able to do, I really appreciate that!
Beautiful cookies. Can you explain how to do the starfish for a new cookie decorator please?
I’ll work on a tutorial here soon =)
Here ya go https://www.sweetsugarbelle.com/blog/2012/06/simple-starfish-cookies/
I love the sparkles! So fun for summer!
Oh, so astonishing! Will you also be sharing how to make your equally stunning starfish and sand dollar? Any tips for where to buy a seahorse cutter? I was expecting an explanation of how to turn a common cutter into a seahorse but that didn’t happen. LOL. Thank you for sharing these beautiful, ocean-inspired cookies. On this rainy, cool day I suddenly feel a longing for summer (and cookies).
Here is a how to for the starfish, sandollar coming very soon https://www.sweetsugarbelle.com/blog/2012/06/simple-starfish-cookies/
your cookies are beautiful!
Hi there, I was wondering what do you use to color your frostings? Please advise…Thank you! 🙂
I use Americolor brand gel coloring =)
Wow! You are so inspiring. I never really had much interest in decorating cookies (I’ve dabbled in cakes and cupcakes) but your photos and explanations are great. I think I might actually be able to do this! Besides, you seem as obsessive about color and detail as I am.
These cookies would have been perfect at my wedding. Maybe I should attempt them for our 10th anniversary in August.
Very pretty seahorses…love that glitter! And I have a thing for sand dollars – very well done!
This shows real expsrtiee. Thanks for the answer.
Always a good job right here. Keep rolling on through.
Glitter makes everything pretty and these cookies are no exception!! so cute Callye!
Pingback: Beach Party Fun! | Diva Entertains Blog
They are so beautiful. It’s crazy how pretty cookies can be.
These are amazing!!! I love the colors, so beautiful!! And the starfish look so real! What did you put on the starfish? Cinnamon and sanding sugar?? I keep staring at the picture, trying to figure it out. lol. I am so amazed and intrigued by these awesome cookies!
Here’s a quick how-to https://www.sweetsugarbelle.com/blog/2012/06/simple-starfish-cookies/
I love the sand dollar cookies! Do you have instructions on how you did those somewhere? My sister is getting married at the beach in october. I’d love to have something like that to do for her!
I’ll post instructions very soon 🙂
OMG!! u make everything look so easy! they are sooooooooooo pretty! i love all ur cookies i am a huge fan!! u are like a cookie goddess!! I am still trying to figure out how to make cookies and the royal icing… well let’s not touch that subject!!! jajaja keep up the beautiful work and can’t wait for more 🙂
Pingback: Simple Starfish Cookies
These are really lovely. Where did you find this sea horse cookie cutter? I’ve seen some others, but not this one, and I REALLY like this one!
Pingback: Simple Sand Dollar Cookies
You are killing me with cute over here! Totally inspired. You ROCK.
Where did you find the awesome seahorse cookie cutters, I am in Jacksonville, FL and there are not very many baking supply stores, except things like AC Moore and Michaels.
Pingback: Crab Cookies
Pingback: Accenting Cookies with an Airbrush
So cute, but rendered INEDIBLE because disco dust is PLASTIC CRAFT GLITTER and not to be used on food. Disco dust is only for decorations that will be removed before eating.
To keep these edible, edible glitter made from gum arabic, sanding sugar, or gelatin should be used.