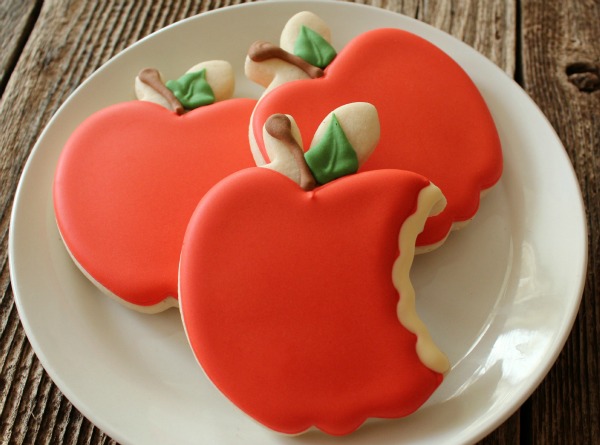
Bitten Apple Cookies
Here’s another throwback to my beginner days. Classic apple cookies gain ten cuteness points when they become bitten apple cookies. I still remember how mindbown I was when it hit me that you could cut a cookie that had already been cut. It’s a simple concept but as a beginner epiphanies like this were a really big deal.
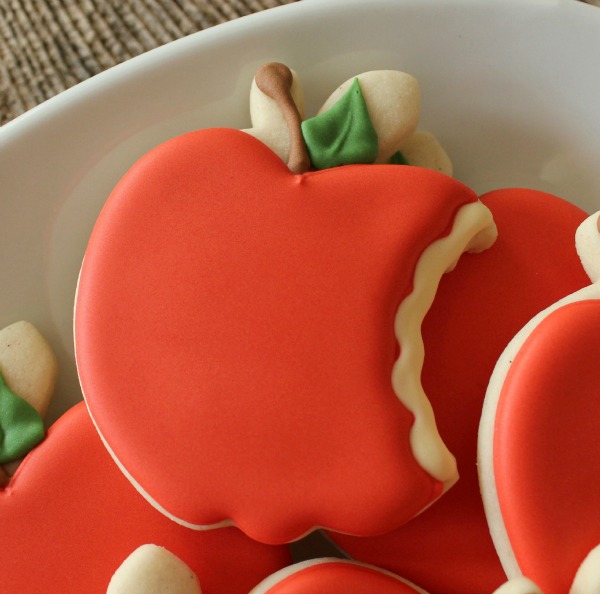 Rather than purchasing a bitten apple cookie cutter use a small scalloped circle to cut an apple cookie and create your own. Go a step further and leave only the core if you like.
 To make these cookies you will need:
- Red piping and flood icing
- Brown piping icing
- Ivory 20-second icing
- Green piping icing
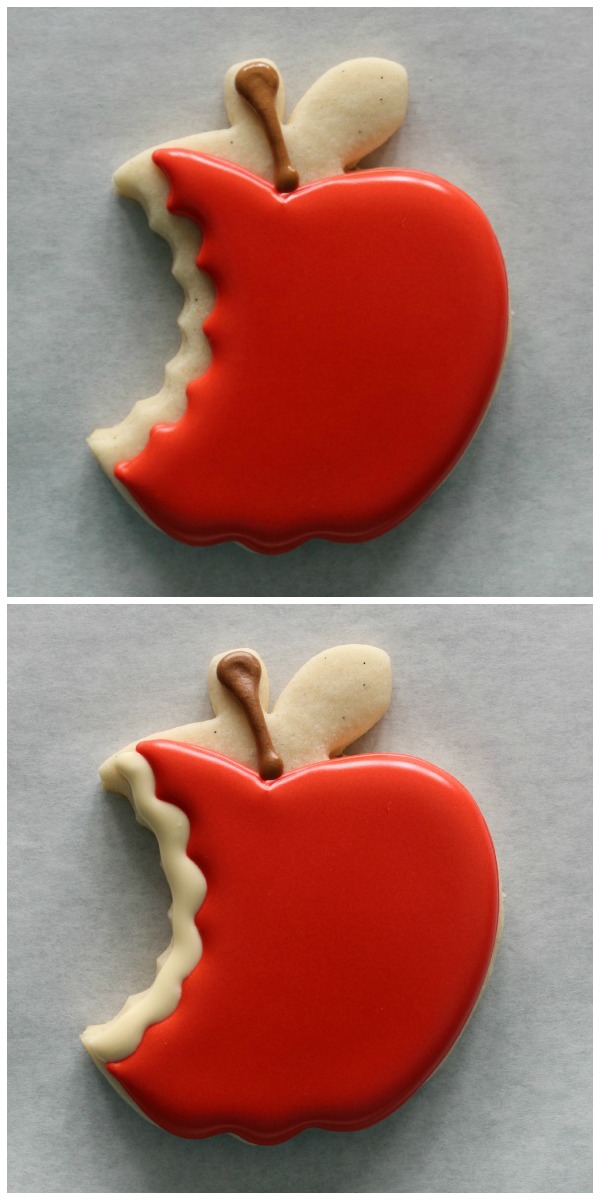
Begin by outlining and flooding the cookie as pictured below. Be sure to leave a small gap {approximately 1/4 inch} beside the bite mark.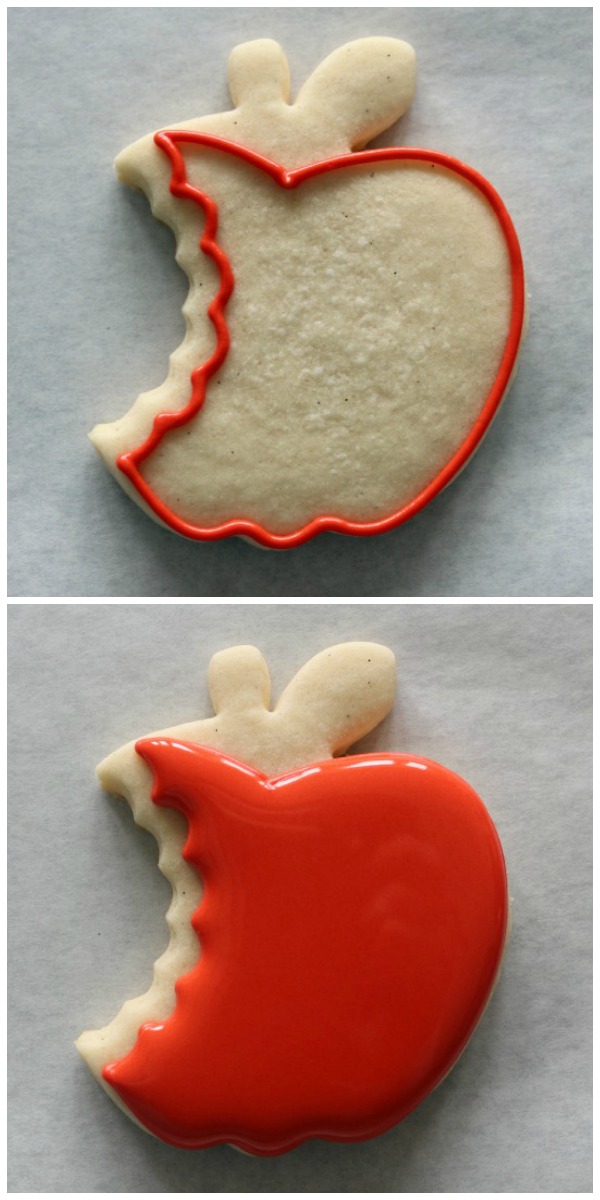 Add a stem using a #3 or #4 tip then use 20-second ivory icing to fill in the small gap along the edge of the bite.
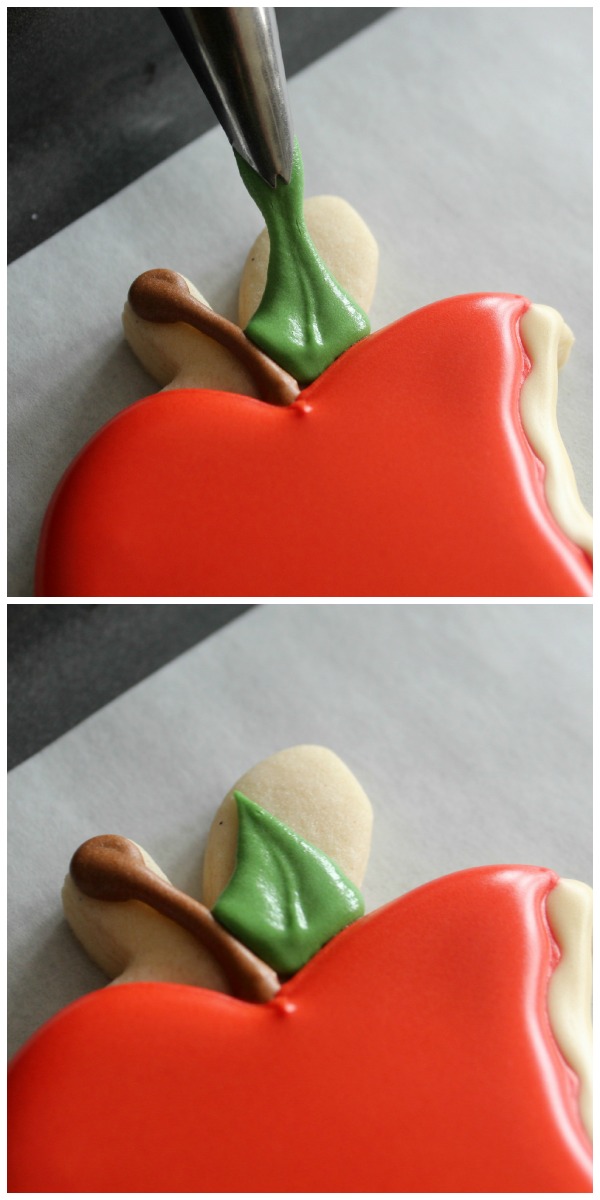
 Finally, use green icing and a #67 tip to create a leaf. Holding the bag at a forty-five degree angle, position the tip between the apple and stem. Apply gentle pressure while slowly pulling the tip away from the starting position. Finally, release pressure and draw to a point. If you aren’t comfortable using a leaf tip, it’s perfectly okay to outline and fill. Do what works best for you.
 Let the cookie dry completely. This can take from a few hours to overnight.
 Bitten apple cookies are perfect for back to school, teacher appreciation and many other themes. For more back to school themed treats check out these links:


