The Easy Way to Use a Kopykake Projector
What do Kopykake projectors and Robert Downey Jr. have in common? Nothing really, except that I kinda love them both.
Over the years I’ve made no secret of my affection for Kopykake projectors. I mean, what’s not to like about a machine that can turn a five hour nightmare into a manageable, two hour job?
It may surprise you to know that my Kopykake and I didn’t start out on the best of terms. When I ordered it, I expected a magic machine. Talk about a disappointing surprise! No one mentioned that it would take time and practice to learn how to effectively utilize it as a cookie decorating tool.
Long story short, I eventually learned to love the beast and we lived happily ever after. Since then, I haven’t given our relationship much thought. Then, a couple of weeks ago I shared template for One-Direction cookies, touching briefly on how to decorate cookies using a Kopykake. I was surprised at how well people liked the idea, so I decided it was worth a little more explanation.
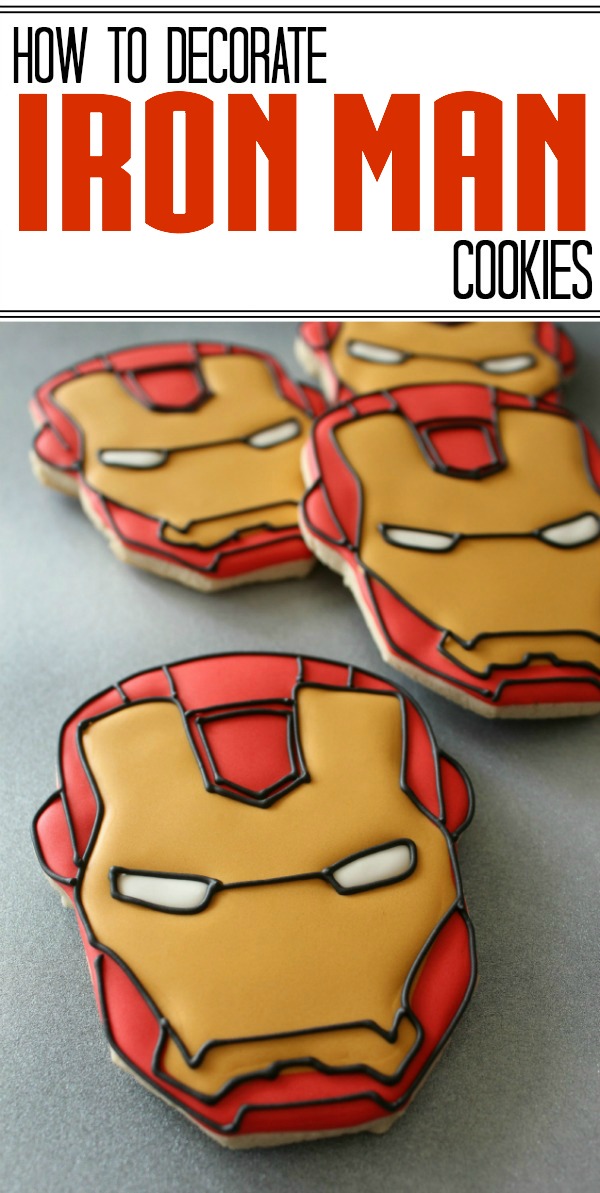
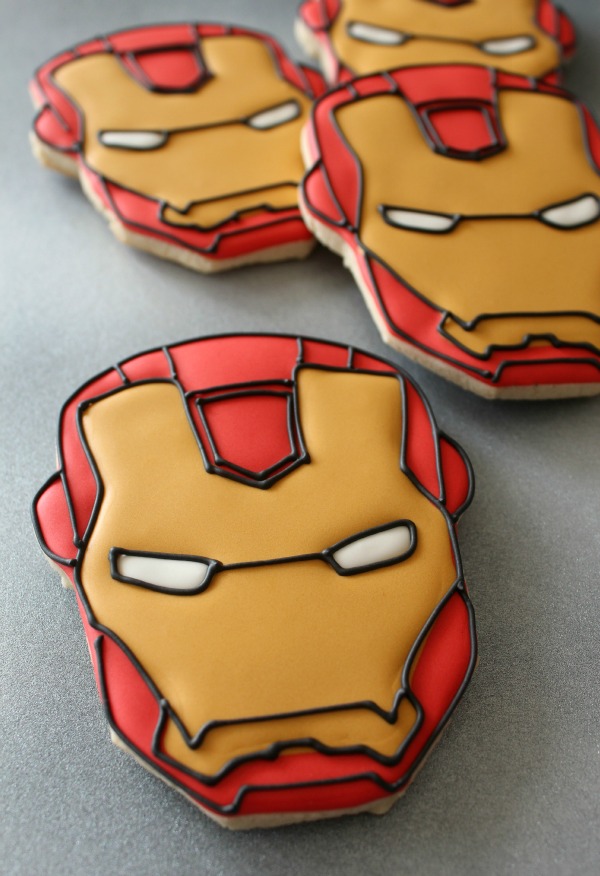
Here is an in-depth look at how I approach cookie designs (like Iron Man) using my Kopykake projector.
 Sometimes, I begin with an existing cutter and with the help of my Kopykake, adapt the design to fit. You can see a great example of that HERE.
In this case, however, I found a pretty straightforward image to use as a template, so I hand-cut the cookies.
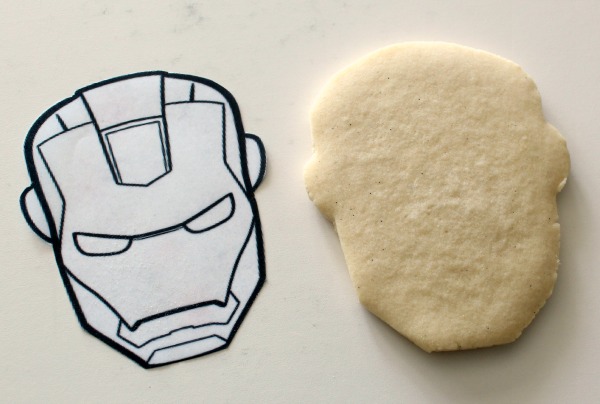 Once the cookies were baked, I placed a copy of the template into the projector and adjusted the lens so that the image was the same size as the cookie.
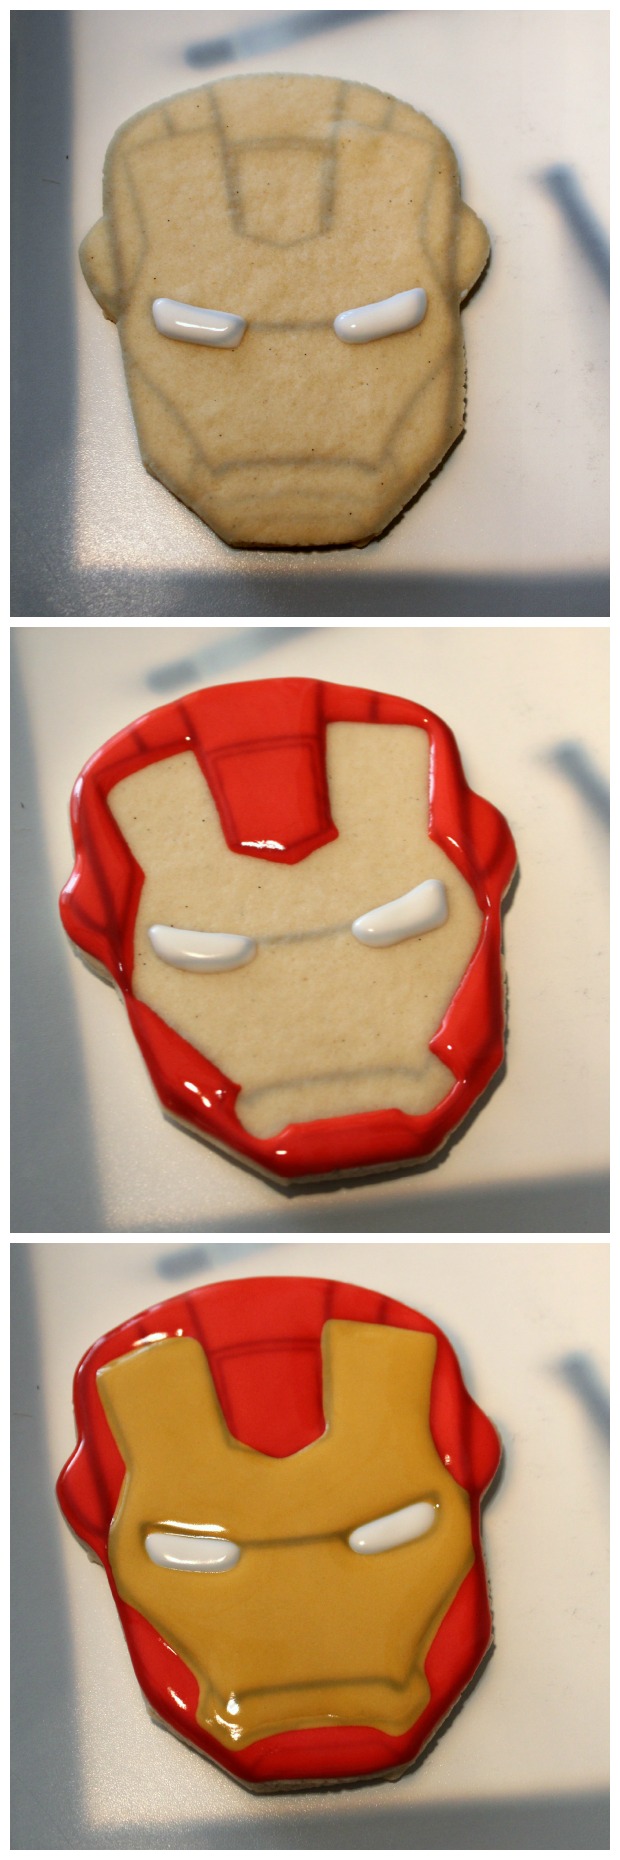
 Many people prefer to pipe the design outline-style onto the cookie before flooding, but I like to add color first.
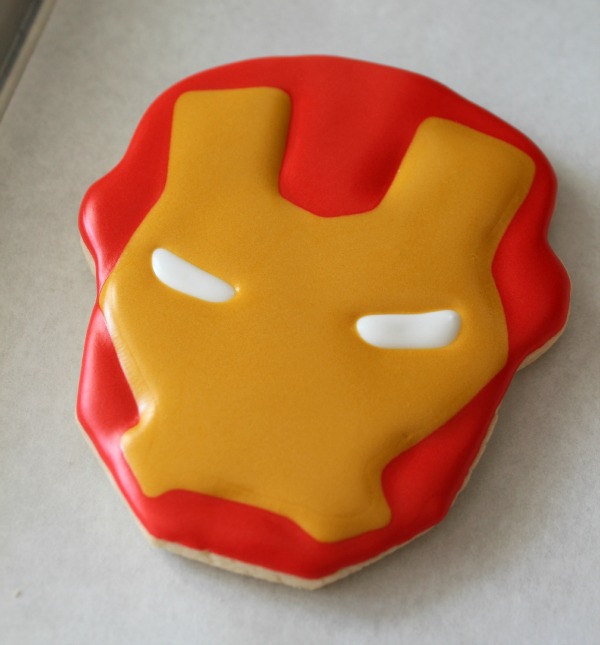
Using 20-second icing, I quickly filled each section to quickly cover the base. Luckily, it wasn’t even necessary to allow drying time in-between steps.
 Just a little tip, from experience, my images are often black and white (to conserve printer ink) so I keep phone nearby to help me keep track of where each color should be.
Just to be safe, I make sure the base is dry before piping the black outline.
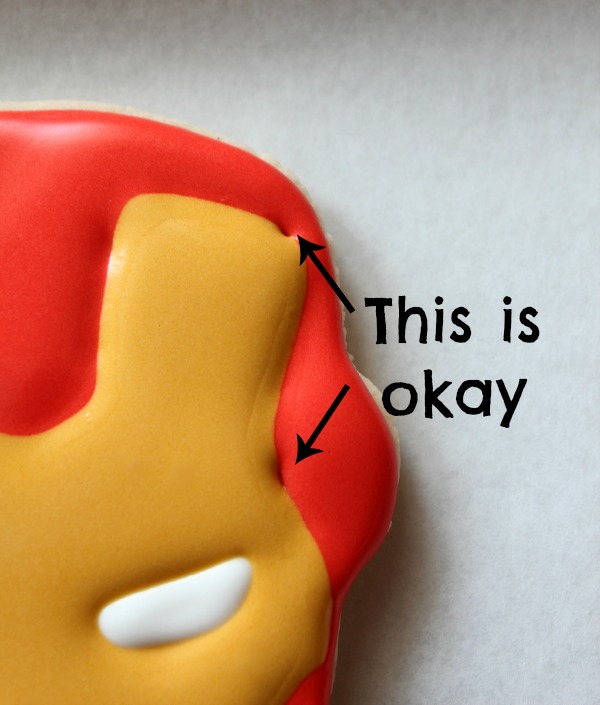
 Also, I don’t worry much about little boo boos like these, since most of them end up covered with piping.
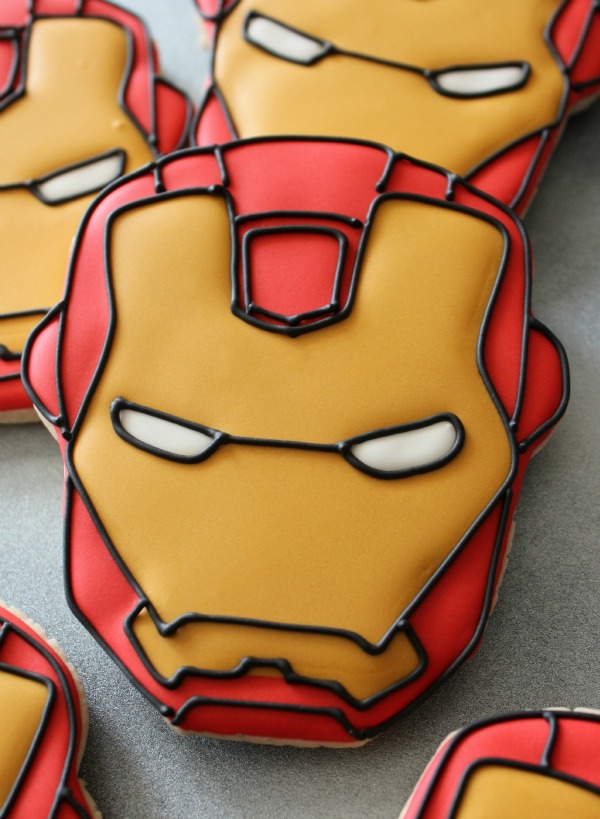
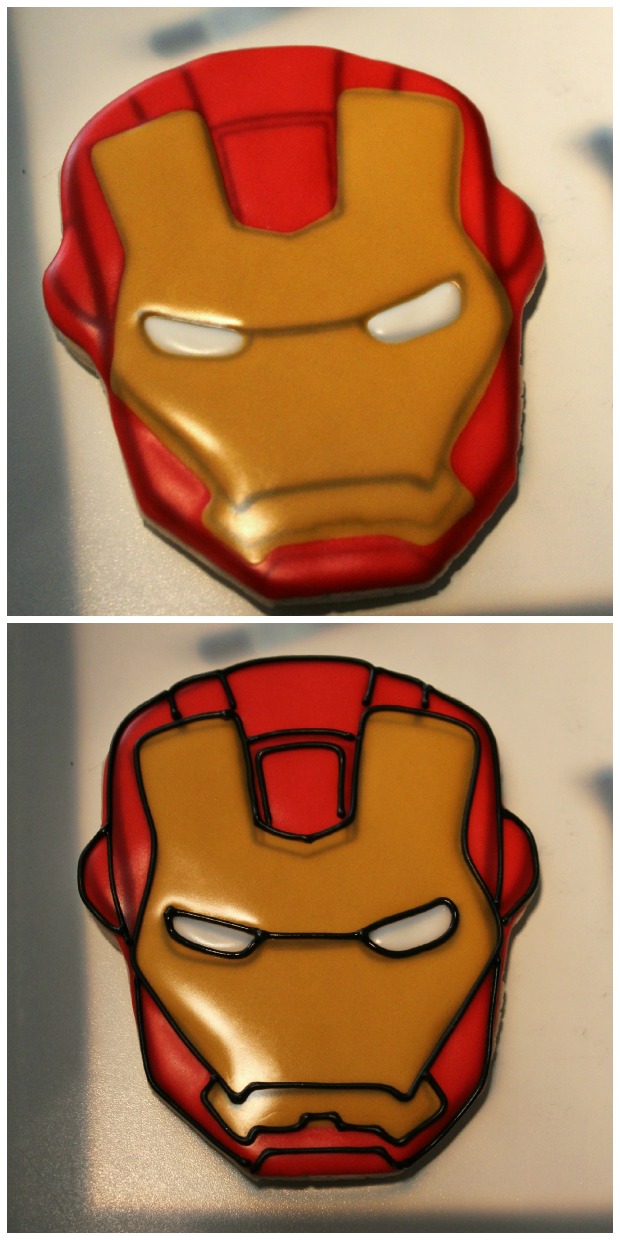
 To finish up, I place the cookie back under the projector and use piping icing and a #1.5 tip to add details.
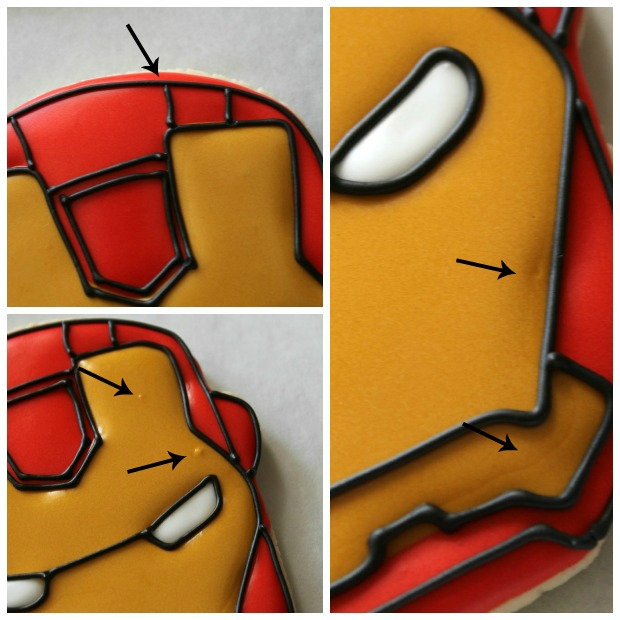
 Remember I mentioned not worrying about perfection? If you look closely, each cookie is a teensie bit different, but I promise that no one will notice. Except you, of course.
 On that note, I thought I would point out a few of my own boo boos to illustrate a point.
It’s in our nature as cookie decorators to be overly critical of our work, but in the grand scheme of things tiny imperfections aren’t really that big of a deal.
 I’ve made cookie after cookie with great results using this method. It cuts down on cratering, mixing time and decorating time, and leaves you with a very sharp, detailed design.
 If you don’t own a cookie projector, do not despair! This method takes a bit longer, but it’s a great way to make uniform cookies without a projector.
Have you ever used your Kopykake in this way? If not, try it sometime and let me know what you think. If you don’t own a Kopykake, GET ONE NOW. Try Jerry’s Artarama for the best deals.
For more helpful Kopykake tips, check out these links:
- How to Decorate Cookies with Paper Templates (great for people who do not own cookie projectors)
- How to use a Kopykake Projector
- Special Fonts for Kopykake Projectors
- Printable Kopykake Templates


