I few weeks ago I made these cookies for Bri and Amy over at Savvy Mom’s Guide. I liked them so much, it inspired me to adapt the design for St. Patrick’s Day.
OKAY, today I’m not feeling very typeative, so lets get this show on the road =)
To make these cookies you will need:
-
3-4 inch round cookie cutter
-
mini flower cutter, mashed into a cloud shape {mine came from Hobby Lobby}
-
mini cauldron cutter {another Hobby Lobby find, but if you don’t have one, a plain circle or Easter egg mini will work}
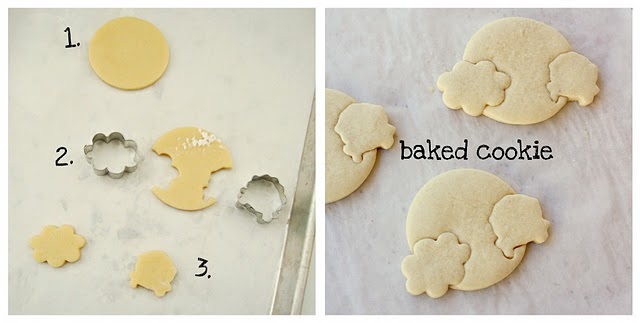
Step 1: Cut out a round cookie
Step 2: Use your mini cutters to cut out a space to insert the cloud and the pot of gold
Step 3: cut out a mini cloud and pot and piece them into the cut circle and bake
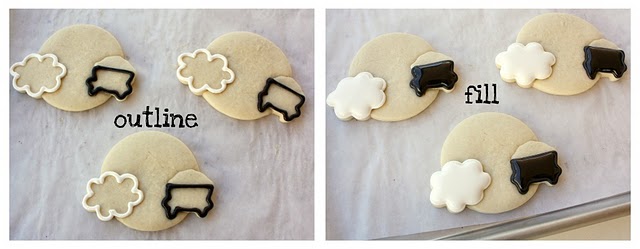
To decorate this cookie, follow the steps below:
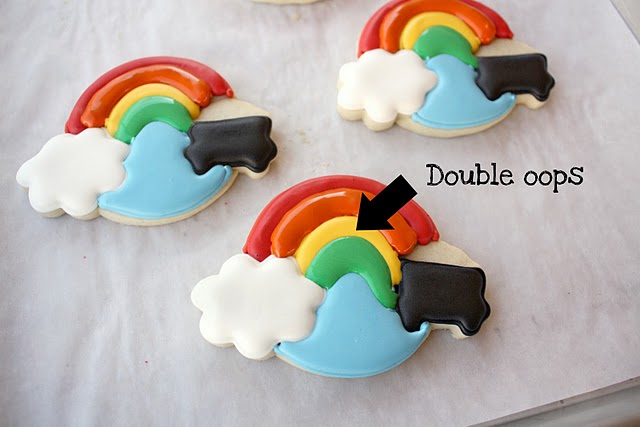
The next step is to set-up your cookie by outlining each section. My sister and brother-in-law showed up right about this time, and I was having so much fun with them, I made a little boo boo that’s actually a cool little lazy girl trick…
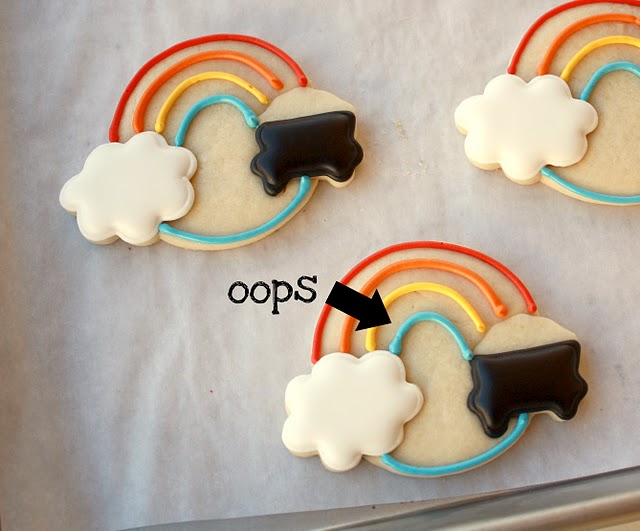
See the arrow? My PLAN was to have four colors in my rainbow, RED, ORANGE, YELLOW, and GREEN. But as I snapped this photo, I realized that I forgot the green. Rather than scrape the cookie and risk damaging the work I’d already done, I left the initial blue line, and added another blue line.
This brings up pretty much my cardinal law of cookies:
Being a good cookier is not about how perfectly you decorate a cookie, its about how well you can fix it when you screw up, and believe me, you WILL screw up!
Moving right along…?
The reason for this is that once I moved on to the next step and flooded the sections, the icing actually covers up the wrong colored line, and meets the previous color.
If that made absolutely no sense, keep reading, a picture is worth a 1000 words.
When it’s time to flood the cookies, you cannot do it all at once. If you do, it will all run together and become a big sloppy mess. You have to fill alternating sections, let them dry, then come back and fill the rest.
I made another boo boo boo when I came back to do step two of the filling that I can’t blame on the in-laws.
See the green flooding? I meant for that to be a clean, precise, full, voluptuous line like the others, but I did a big bad no-no.
The most irritating part is that I know better. When I filled the green section, I used a bottle of icing I had leftover from the day before. It was still cold from the refrigerator, but I could tell immediately, even if it warmed up a little, it was way too thick. SOOOOOO, I took my bottle over to the faucet and added a little water.
Listen to me now…NEVER DO THIS!!! EVER! Take the two seconds it requires to dig through the junk drawer and find the kiddo’s medicine dropper.
Add the water drop by drop and then, using a long wooden handled spoon {or a chopstick if that’s what you find first} mix it in the bottle very very well.
I’ll say it again. VERY VERY well. If you don’t, you’ll have another problem that I will show you one of these days when I do it again {despite knowing better} and save you the frustration =)
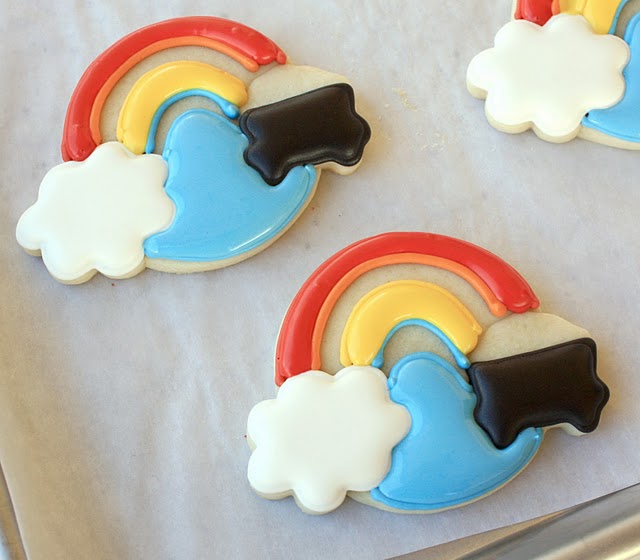
That said, check out the photo below. Since I used the faucet, I added a little too much water to my green icing, and it was only exaggerated as it warmed up. This made it way too thin, and instead of making a nice poofy strip, it ran a little crazy on my cookies.
Most people wouldn’t get too wound up about something like this, but it bugs me to no end…HOWEVER, if you’ll notice, it did cover the blue line oopsie.
Now, you can add the details. The cookie doesn’t have to be completely dry for this, just be careful not to touch it with the tip as you pipe.
I added swirls to the clouds, and outlined the pot.
?
At this point the cookie has to dry, preferably overnight.
The next morning, or at least 6-8 hrs later, it’s time to put the gold in the pot. If only it were this easy in real life…
To do this, use thick-ish gold colored icing and put it on the cookie in a way that makes it look like it’s spilling out of the pot. If it’s a little lumpy, it’s no big deal because the sugar will cover it.
Immediately afterward, pour course gold sanding sugar onto the wet icing.
Leave it this way and let it dry for another few hours.
When the cookie is completely dry, shake off the excess sugar, using a little paint brush if you need to, and you will be left with this, an adorable and unique St. Patrick’s Day cookie!


Pingback: Rainbow Cookies
I love these! And your blog! I’m making a bunch of different goodies for St. Patrick’s day this year and would love to know how you made your gold icing? I wasn’t too keen on painting dried white icing with luster dust…it seemed a little too arduous. Would love your tips on this! Happy baking! 🙂
Pingback: Sugar Cookies… Rain or Shine! | Grin and Bake It!
I am a recent follower of yours and love your blog. I am doing a rainbo party for my daughters 3rd birthday next month and I love your double cloud rainbows at the top of the page. Going to give them a go. Hopefully I can do them justice!